Pos. 112
Seal Driver with set
screws, Pos. 113
Pos. 108
Spring
Pos. 106
Cup for O-ring and
Spring
Pos. 107
O-Ring
Pos. 111
Floating Seal Driver
Pos. 104
Rotating Seal Face
(The tapered face should point
upward through the driver 111
and press against the O-ring
107).
LOWER COMPONENTS OF
SEAL ASSEMBLY
COMPONENTS OF ROTATING SEAL
Reassembly Procedures CR, CRN 32•45•64•90
Back-to-Back Seal (continued)
39
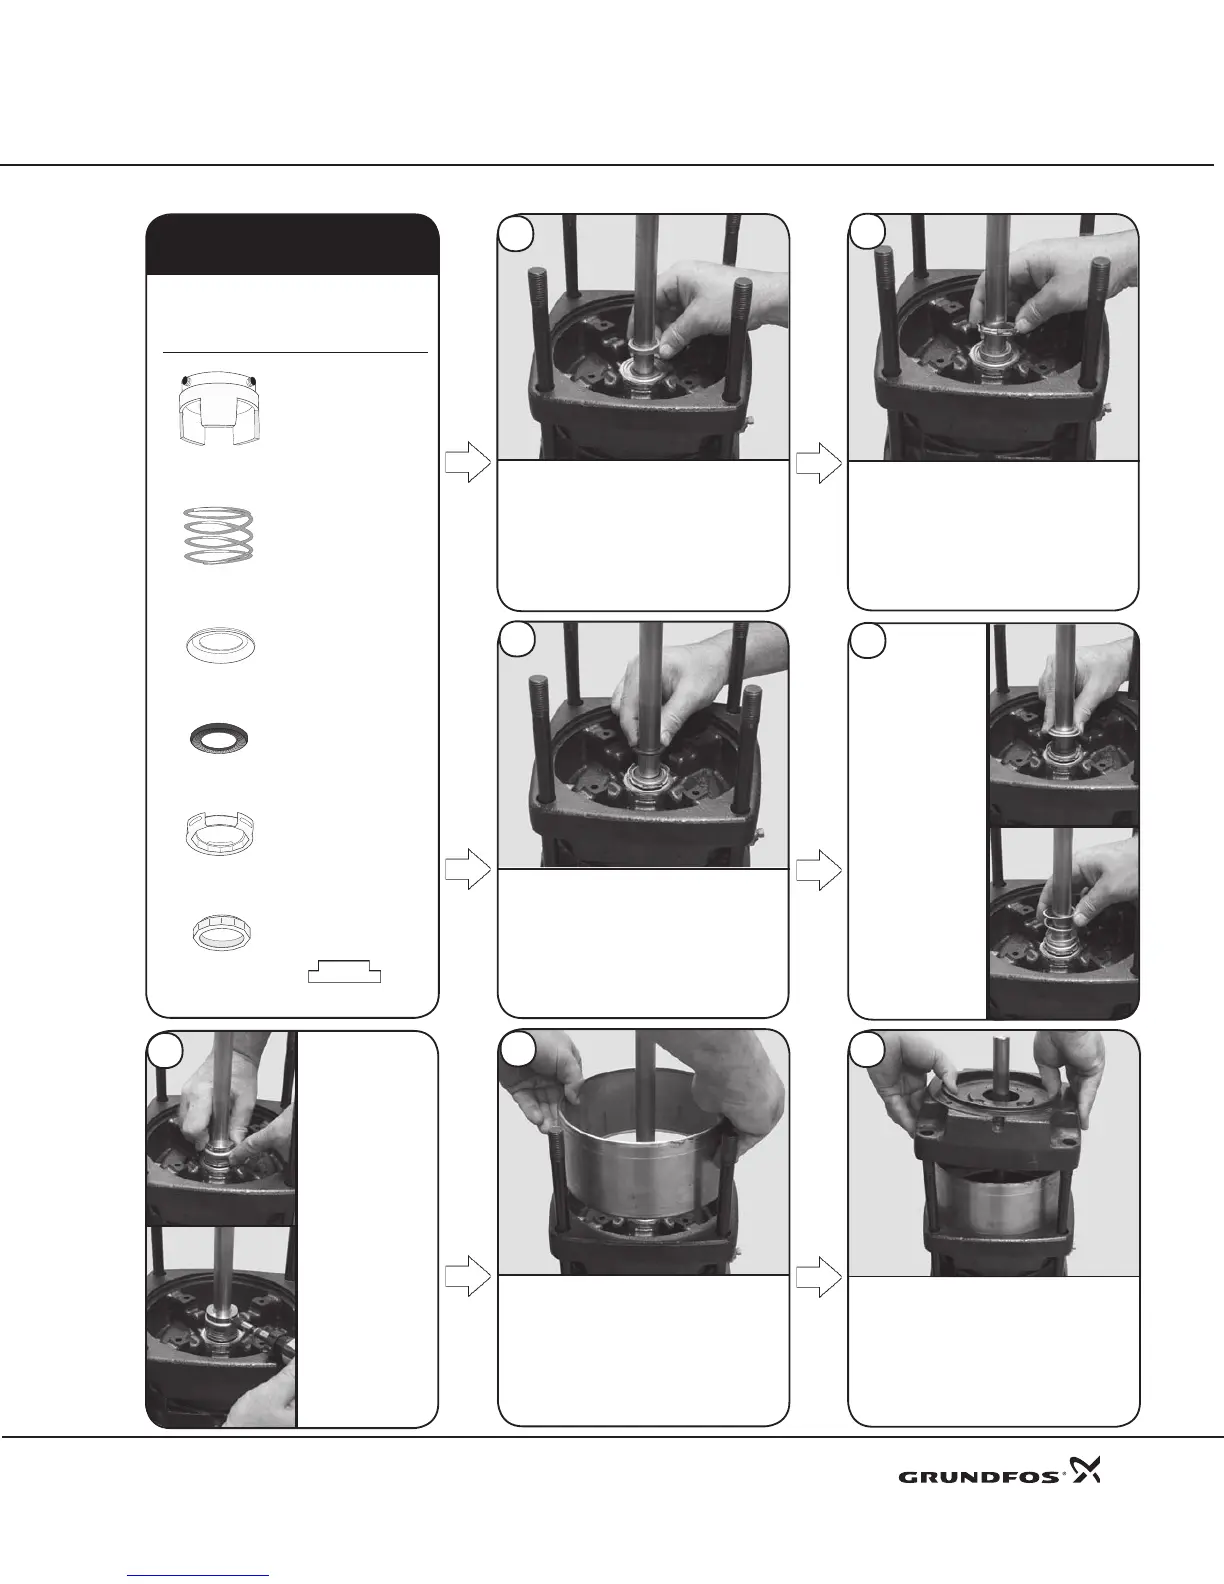
With the tapered edge facing upward,
lower the Rotating Seal Face (Pos. 104)
down onto the stationary seal face.
40
Lower the Floating Seal Driver
(Pos. 111) until it fully engages
the rotating seal face. Ensure
the taper of the rotating seal
p r o t r u d e s t h ro u g h d r i v e r.
Lower and seat the upper Sleeve
(Pos. 55a) into the middle pump head.
44
43
45
Lower and rmly seat the uppermost
Pump Head (Pos. 2b) onto the
upper sleeve. Proceed to step 46.
19
41
Lubricate the inner surface of the
O-ring (Pos. 107) with Rocol, Dow
Corning 111, or soapy water. Slide the
O-ring down the shaft until it contacts
both the driver and the protruding
surface of rotating seal face.
42
Lower the
Cup (Pos. 106)
over the O-ring.
Lower the
Spring
(Pos. 108) until
it ts over the
cup.
Lower the Driver
(Pos. 112) with
set screws
(Pos. 113).
Driving tabs
should pass and
engage each
other. With the
shaft and the
seal drivers
pushed down as
far as possible,
tighten the
3mm Set Screws
(Pos. 113) to
10ft.-lbs./13Nm.
 Loading...


