Dismantling Procedures CR, CRN 32•45•64•90
23
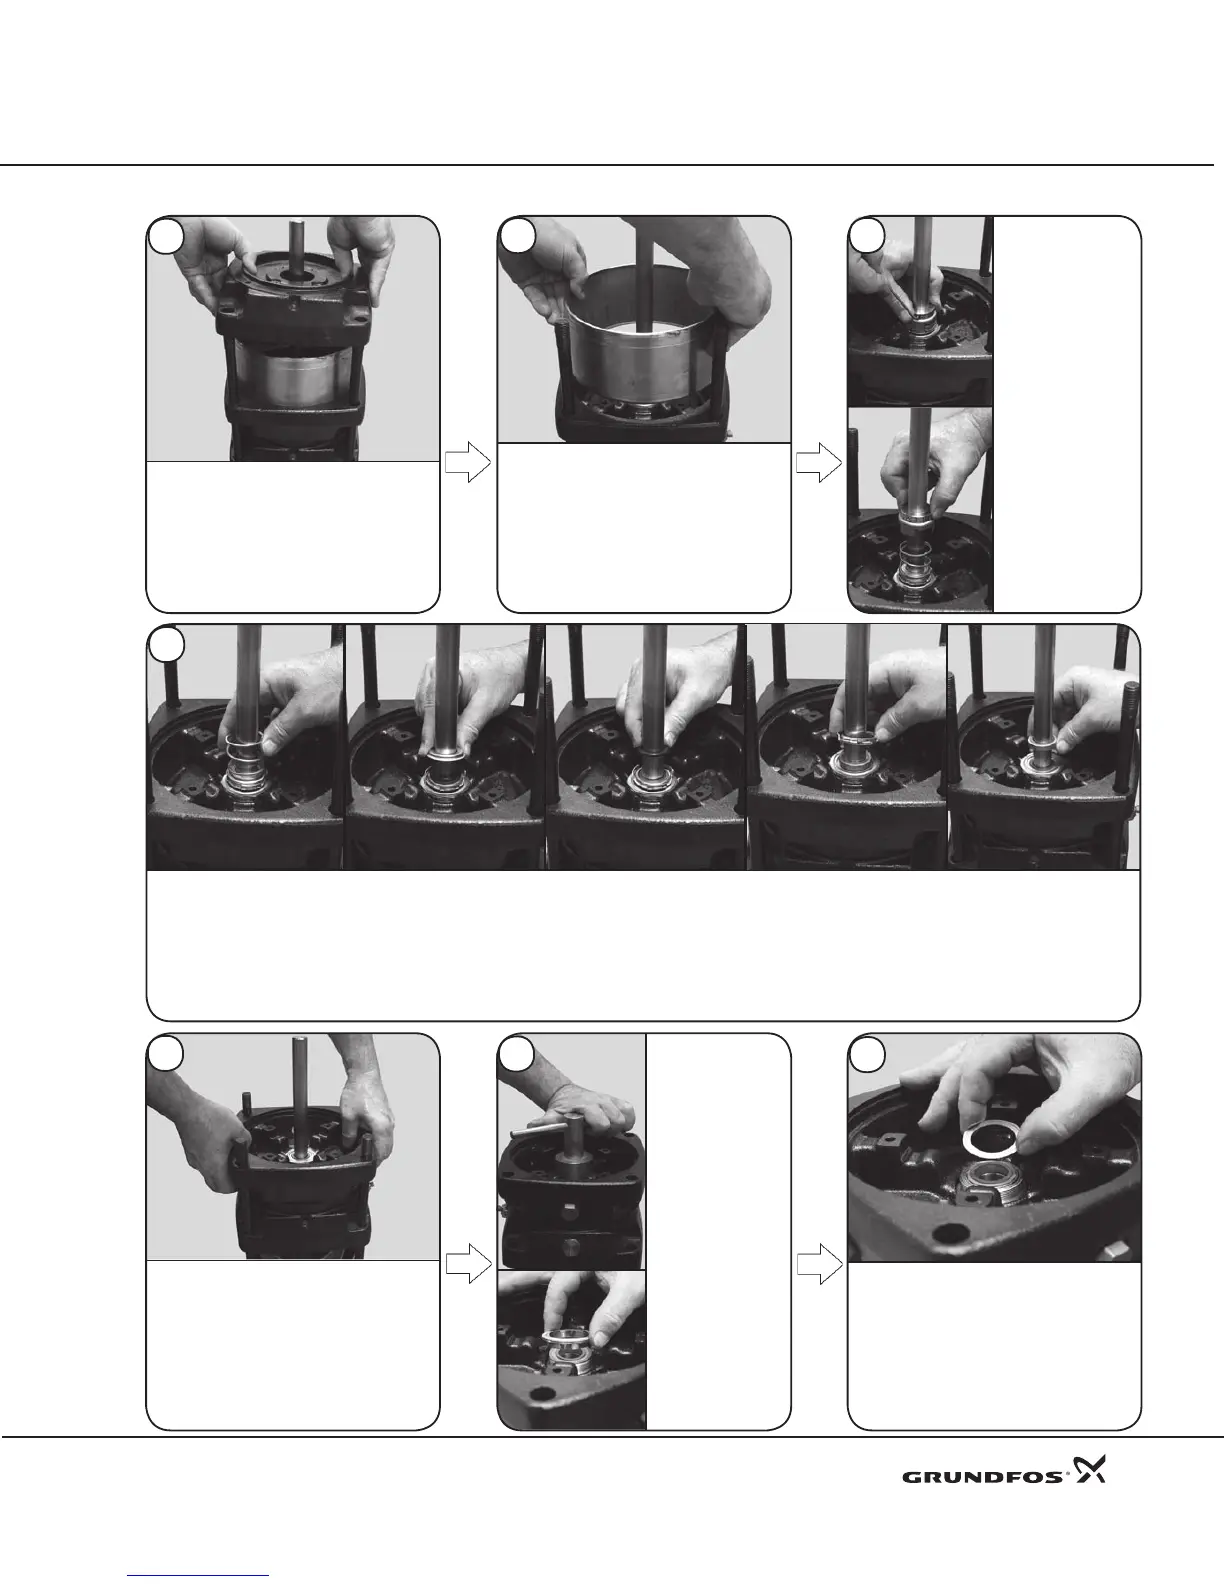
To remove the
Inboard Shaft
Seal (Pos. 105b)
loosen, but do
not remove, the
two 3mm
Set screws
(Pos. 113a) in
the Seal Driver
( Pos. 112). Lift
the seal driver
off of the shaft.
Back-to-Back Seal
Remove the upper most Pump Head
(Pos. 2b). This may require light
upward blows with rubber mallet to
the underside of the pump head.
To remove the Upper Sleeve (Pos.
55a), diagonally grip the Staybolts
(Pos. 26). Use your thumbs to press
against the sleeve to release the sleeve
from the middle pump head. If it does
not move freely, light blows with
a rubber mallet might be required.
Once loose, lift the sleeve off.
22
21
Remove the Spring (Pos. 108b), Spring/O-ring Cup (Pos. 106b), O-ring (Pos. 107b), Seal Driver (Pos. 111b), and Rotating Seal Face (Pos. 104b).
24
Remove the Retaining Washer (Pos.
59a).
Remove the lower most Pump Head
(Pos. 2), Spacing Ring (Pos. 116) and
middle Pump Head (Pos. 2c) with
Connecting Pipe (Pos. 149) as an
assembly. Light upward blows with
rubber mallet to the underside of
the lower most pump head might be
required.
25
26
27
5
Use specialty
tool, 00SV7902,
to loosen and
remove the
threaded Seal
Retainer
(Pos. 148).
 Loading...


