English (GB)
16
6. Renewing shaft-seal wear parts
This section applies only for shaft seals with an inner diameter of
∅28 or ∅36.
Shaft seals with an inner diameter of ∅22 cannot be serviced but
must be replaced instead.
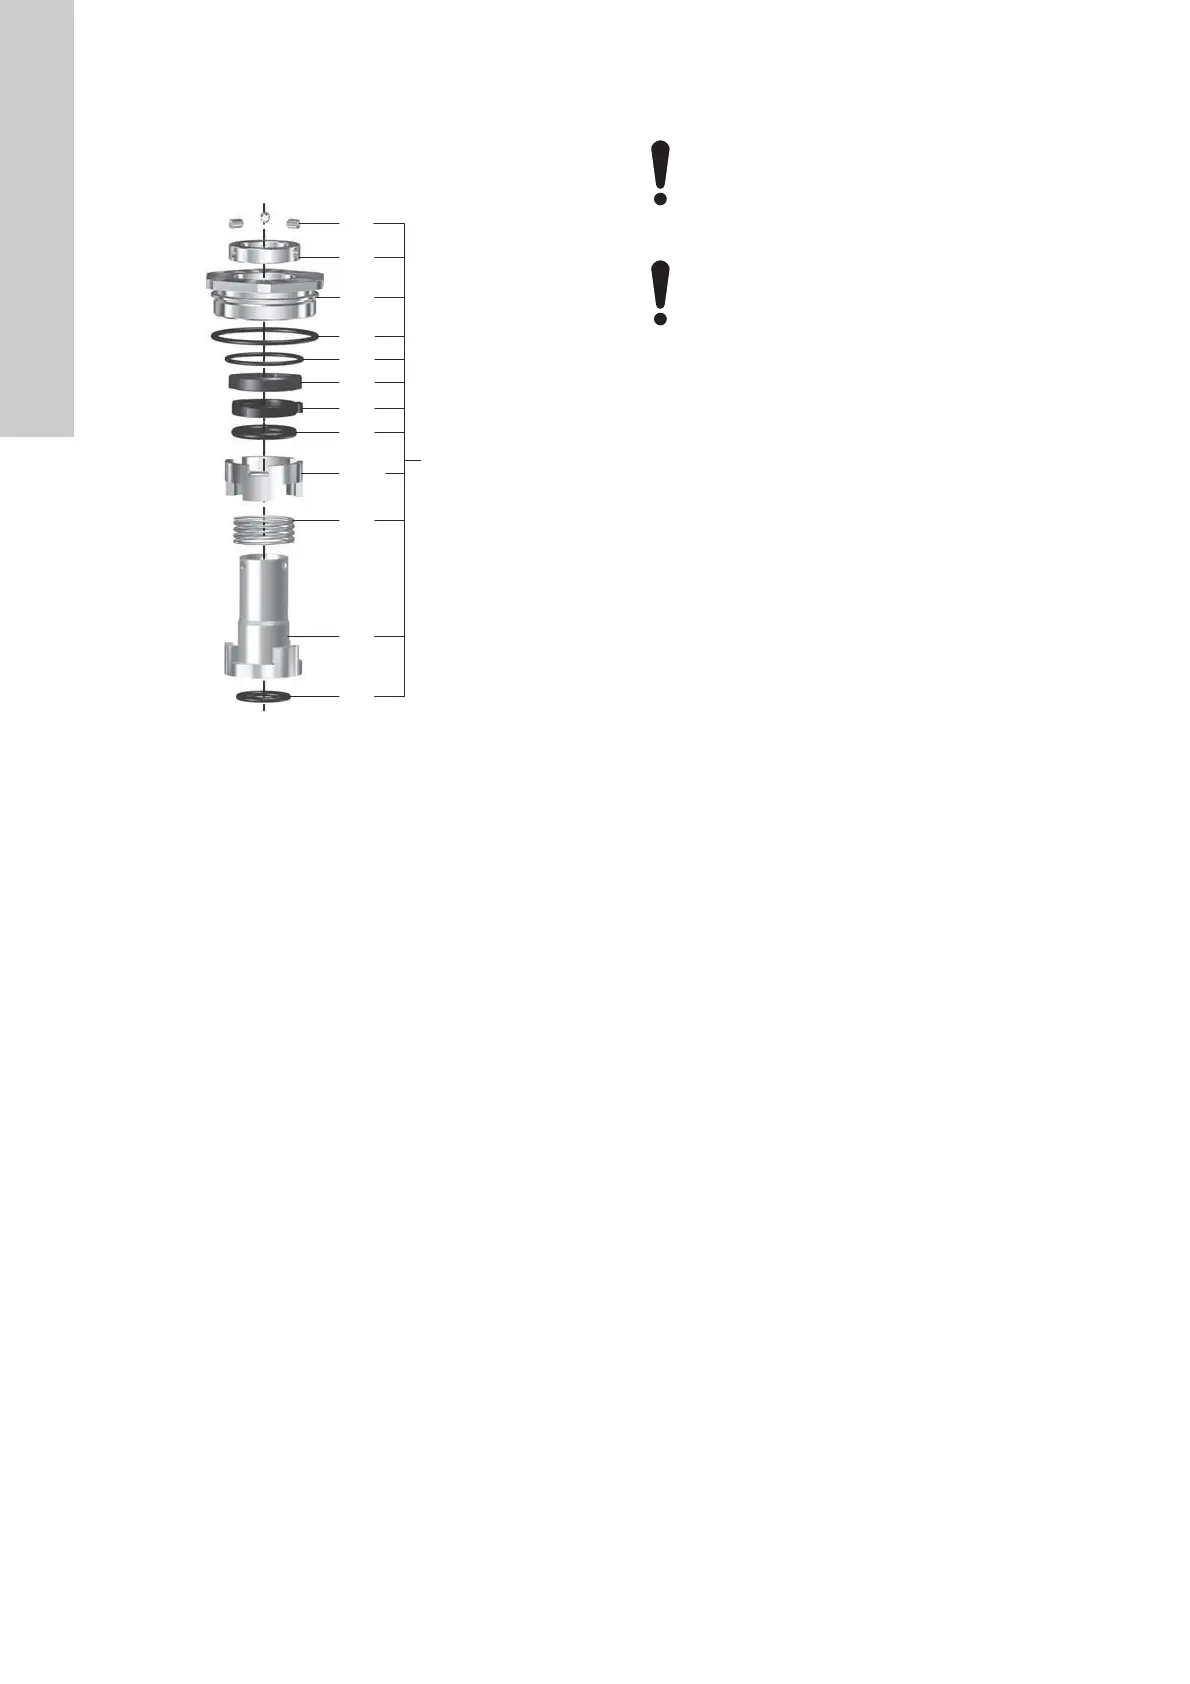
Fig. 37 Shaft-seal parts for ∅28 and ∅36 shaft seals
6.1 Dismantling
1. Place the shaft seal (105) on a work table.
2. Press down the shaft seal and compress the spring (108) with
one hand while removing the three set screws (113).
3. Remove the lock ring (116).
4. Remove the stationary seal-ring retainer (114) together with
the rotating seal ring (104).
5. Remove the o-ring (109) from the stationary seal-ring retainer
(114).
6. Remove the stationary seal ring (103) from the stationary
seal-ring retainer (114) by using a small flat-bladed
screwdriver.
7. Remove the o-ring (102) from the stationary seal-ring retainer
(114).
8. Remove the upper seal driver (112a).
9. Remove the o-ring (107) from the upper seal driver (112a).
10. Remove the spring (108).
11. Remove o-ring (110) from the shaft-seal cartridge (115).
6.2 Assembly
1. Clean and de-grease all parts.
2. Lubricate the new o-ring (110) and install it in the shaft-seal
cartridge (115).
3. Install the spring (108) on the shaft-seal cartridge (115).
4. Install the upper seal driver (112a) on the shaft-seal cartridge
(115).
5. Install a new o-ring (107) on the shaft-seal cartridge (115).
6. Install a new rotating seal ring (104) on the shaft-seal
cartridge (115).
7. Lubricate the new o-ring (109) and install it on the stationary
seal-ring retainer (114).
8. Install a new o-ring (102) in the stationary seal-ring retainer
(114).
9. Install a new stationary seal ring (103) in the stationary
seal-ring retainer (114).
10. Install the stationary seal-ring retainer (114) on the shaft-seal
cartridge (115).
11. Fit the three set screws (113) in the lock ring (116).
12. Install the lock ring (116) on the shaft-seal cartridge (115).
13. Press down on top of the lock ring(116) while aligning the
three set screws (113) with the holes in the shaft-seal
cartridge (115).
14. Screw in the three set screws (113) only so much that they
engage with the holes in the shaft-seal cartridge (115) and
keep the shaft-seal parts together.
Note: The screws (113) must not protrude on the inside of the
shaft-seal cartridge (115) since this will make it difficult to
re-install the shaft seal (105) on the pump shaft (51).
TM07 1904 2318
115
113
108
109
114
102
103
104
107
112a
110
105
116
Do not touch the seal faces of the stationary seal ring
(103) or rotating seal ring (104). Only hold these
parts on their sides.
Do not apply any kind of grease or lubricant on the
stationary seal ring (103) or rotating seal ring (104)
since this can result in malfunction of the shaft seal.
Handle all shaft seal-parts very carefully and avoid
scratching or denting them.

 Loading...


