7
Pumps with ejector valve
The ejector valve is supplied loose with the pump.
Remove the plug (V), see fig. 2, and fit the ejector
valve into the hole. Tighten the valve using fingers
only.
Installation dimensions can be found on page 145.
6. Electrical connection
The electrical connection and protection must be
carried out in accordance with local regulations.
Single-phase motors incorporate a thermal switch
and require no additional motor protection.
Three-phase motors must be connected to an
external mains switch and a motor starter.
Do not start the pump until it has been filled with
water.
Carry out the electrical connection as shown in the
diagram on the inside of the terminal box cover.
6.1 Checking the direction of rotation
(three-phase motors)
Arrows on the motor fan cover indicate the correct
direction of rotation.
If the direction of rotation is wrong, switch off the
power supply, and interchange any two of the
incoming supply wires.
7. Start-up
Do not start the pump until it has been filled with
water.
1. Remove the plug (P). See fig. 2.
2. Fill the pump with water.
3. Refit the plug, and tighten it using fingers only.
The pump can now be started.
Fig. 2 Filling the pump with water
If there is a suction lift, up to 4 minutes may pass
from the moment the pump is started until it delivers
water. This period depends on the length and
diameter of the suction pipe.
If the pump has been used for dirty liquids, it must be
flushed through with clean water immediately after
use.
7.1 Frost protection
Pumps which are not being used during periods of
frost should be drained to avoid damage.
To drain the pump, remove the plug (P) and the plug
or the ejector valve (V). See fig. 3.
Fig. 3 Draining the pump
Refit the plugs, and tighten them using fingers only.
7.2 Ejector valve setting
Pumps with ejector valve
The ejector valve in the plug hole (V) can be turned
to two positions. See fig. 4.
Pos. A:
Turn the valve to the left (out).
Select pos. A when the suction pipe is empty and the
pump is to be primed.
Select also pos. A when a small quantity of water
and a high pressure are required.
Pos. B:
Turn the valve to the right (in).
Select pos. B when the pump has been primed and a
large quantity of water and a low pressure are
required.
Fig. 4 Ejector valve positions
Note
The O-ring must be fitted to the ejector
valve.
Warning
Never make any connections in the
pump terminal box unless the power
supply has been switched off.
Caution
The JP pump is not allowed to run
without delivering water for more than
5 minutes.
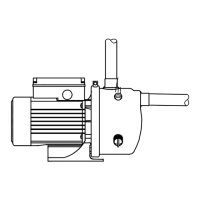
TM00 5495 4995
V
S
P
T
TM00 5497 4995
Pos. Ejector valve Direction
A
Left
(out)
TM04 2299 2308
B
Right
(in)
TM04 2300 2308
°C
-20
-10
0
10
20
V
P

 Loading...