2-4
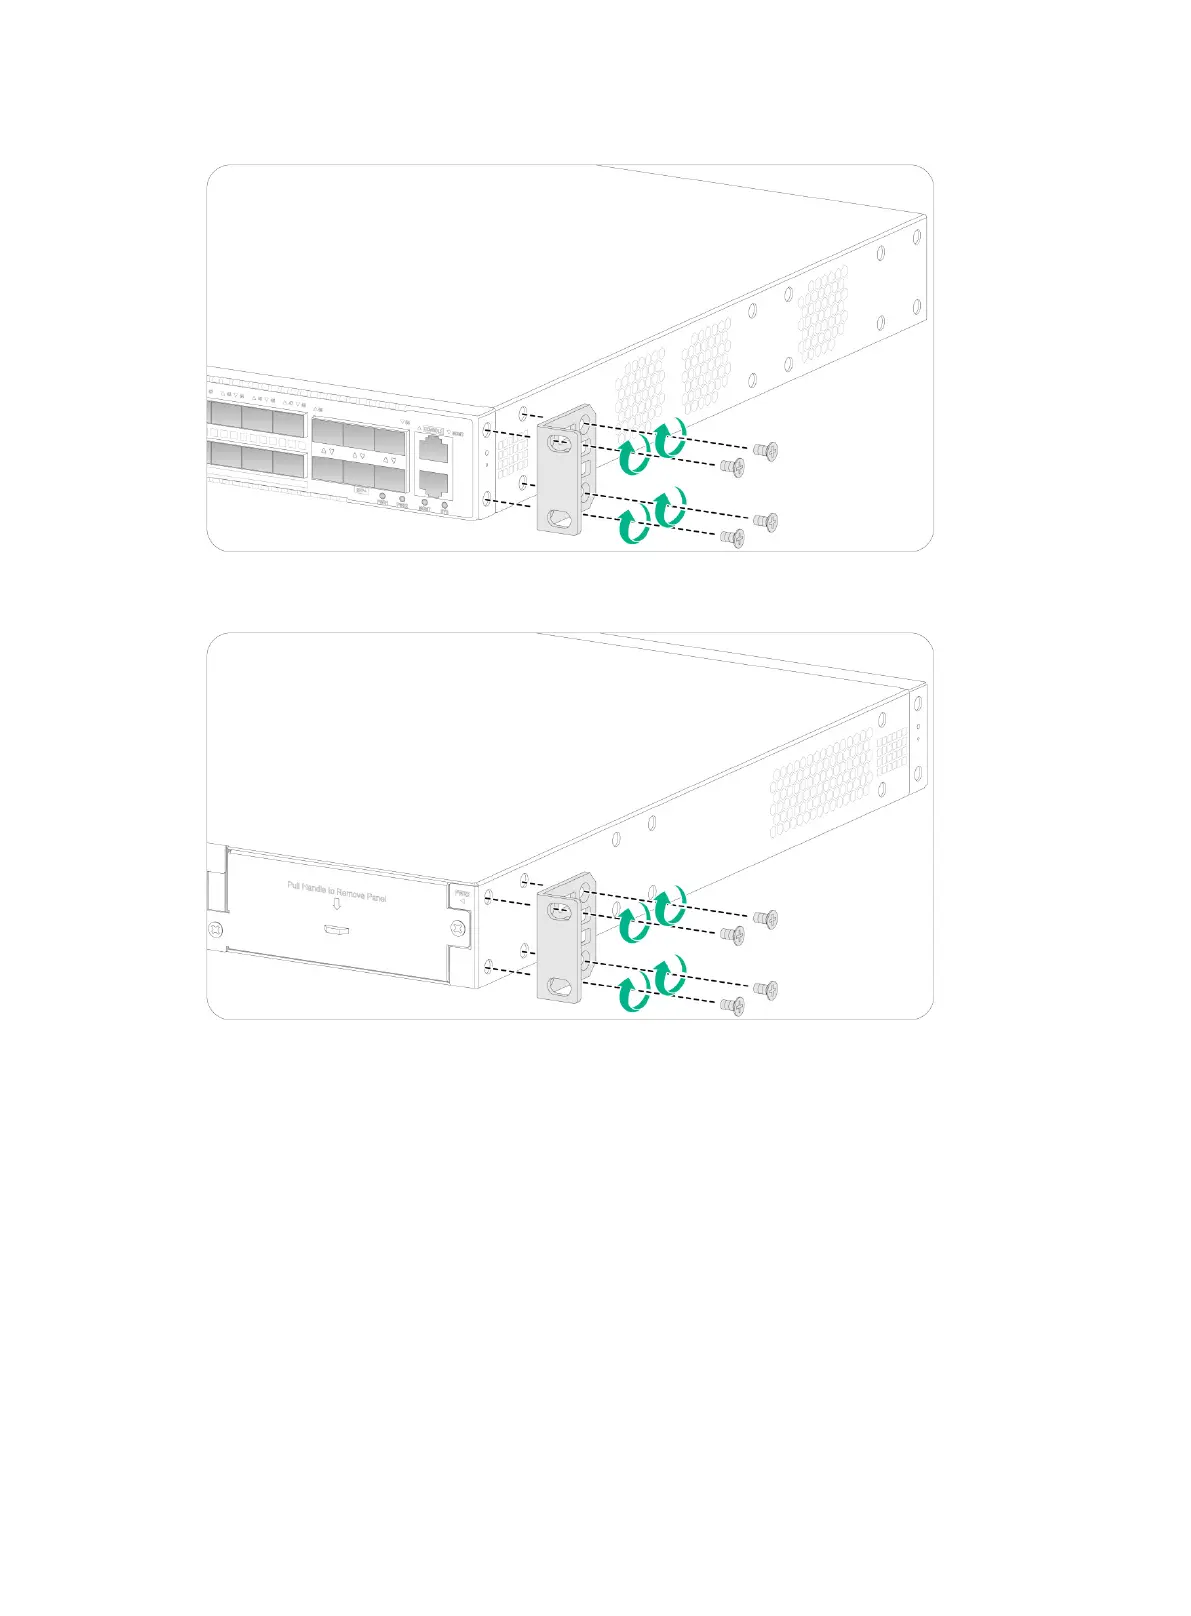
Figure2-4 Attaching the front mounting brackets to the port-side mounting position
Figure2-5 Attaching the front mounting brackets to the power supply-side mounting position
Mounting the switch in the rack
This task requires two people.
To mount the switch in the rack:
1. Wear an ESD wrist strap and make sure it makes good skin contact and is reliably grounded.
2. Verify that the front mounting brackets have been securely attached to the switch chassis. See
"Attaching the front mounting brackets to the switch."
3. Attach cage nuts to the front rack posts.
4. One person supports the bottom of the switch, and moves the switch to an appropriate
position based on the installation positions of the front mounting brackets.
5. Another person uses user supplied M6 screws and cage nuts to attach the mounting brackets
to the rack and verifies that the brackets are level and secure. As a best practice, use a torque
of 30 kgf-cm (2.94 Nm) to fasten the M6 screws.

 Loading...


