14-13
[Sysname-ui-console0] authentication-mode scheme
# Set the baud rate of the console port to 19200 bps.
[Sysname-ui-console0] speed 19200
# Set the maximum number of lines the screen can contain to 30.
[Sysname-ui-console0] screen-length 30
# Set the maximum number of commands the history command buffer can store to 20.
[Sysname-ui-console0] history-command max-size 20
# Set the timeout time of the console user interface to 6 minutes.
[Sysname-ui-console0] idle-timeout 6
z Configure the authentication scheme
Configure the authentication server by referring to related parts in AAA in the Security Configuration
Guide.
To ensure successful login, change the settings of the terminal emulation program running on the PC,
as shown in
Figure 14-4, to make them consistent with those on the AP.
Logging In Through Telnet
You can telnet to a remote AP to manage and maintain the AP. To achieve this, configure both the AP
and the Telnet terminal.
Table 14-5 Telnet login configuration requirements
Item Requirement
Start the Telnet Server (Telnet server is enabled by default).
The IP address of the VLAN interface of the AP is configured and the AP and the Telnet
terminal can reach each other.
AP
The authentication mode and other settings are configured. See
Table 14-6 and Table
14-7.
Telnet is running.
Telnet terminal
The IP address of the management VLAN interface of the AP is available.
Establishing a Telnet Connection
Use a PC as the telnet client to telnet to an AP and configure it.
Step1 Configure the IP address of VLAN-interface 1 through the console port (VLAN 1 is the default VLAN of
the AP).
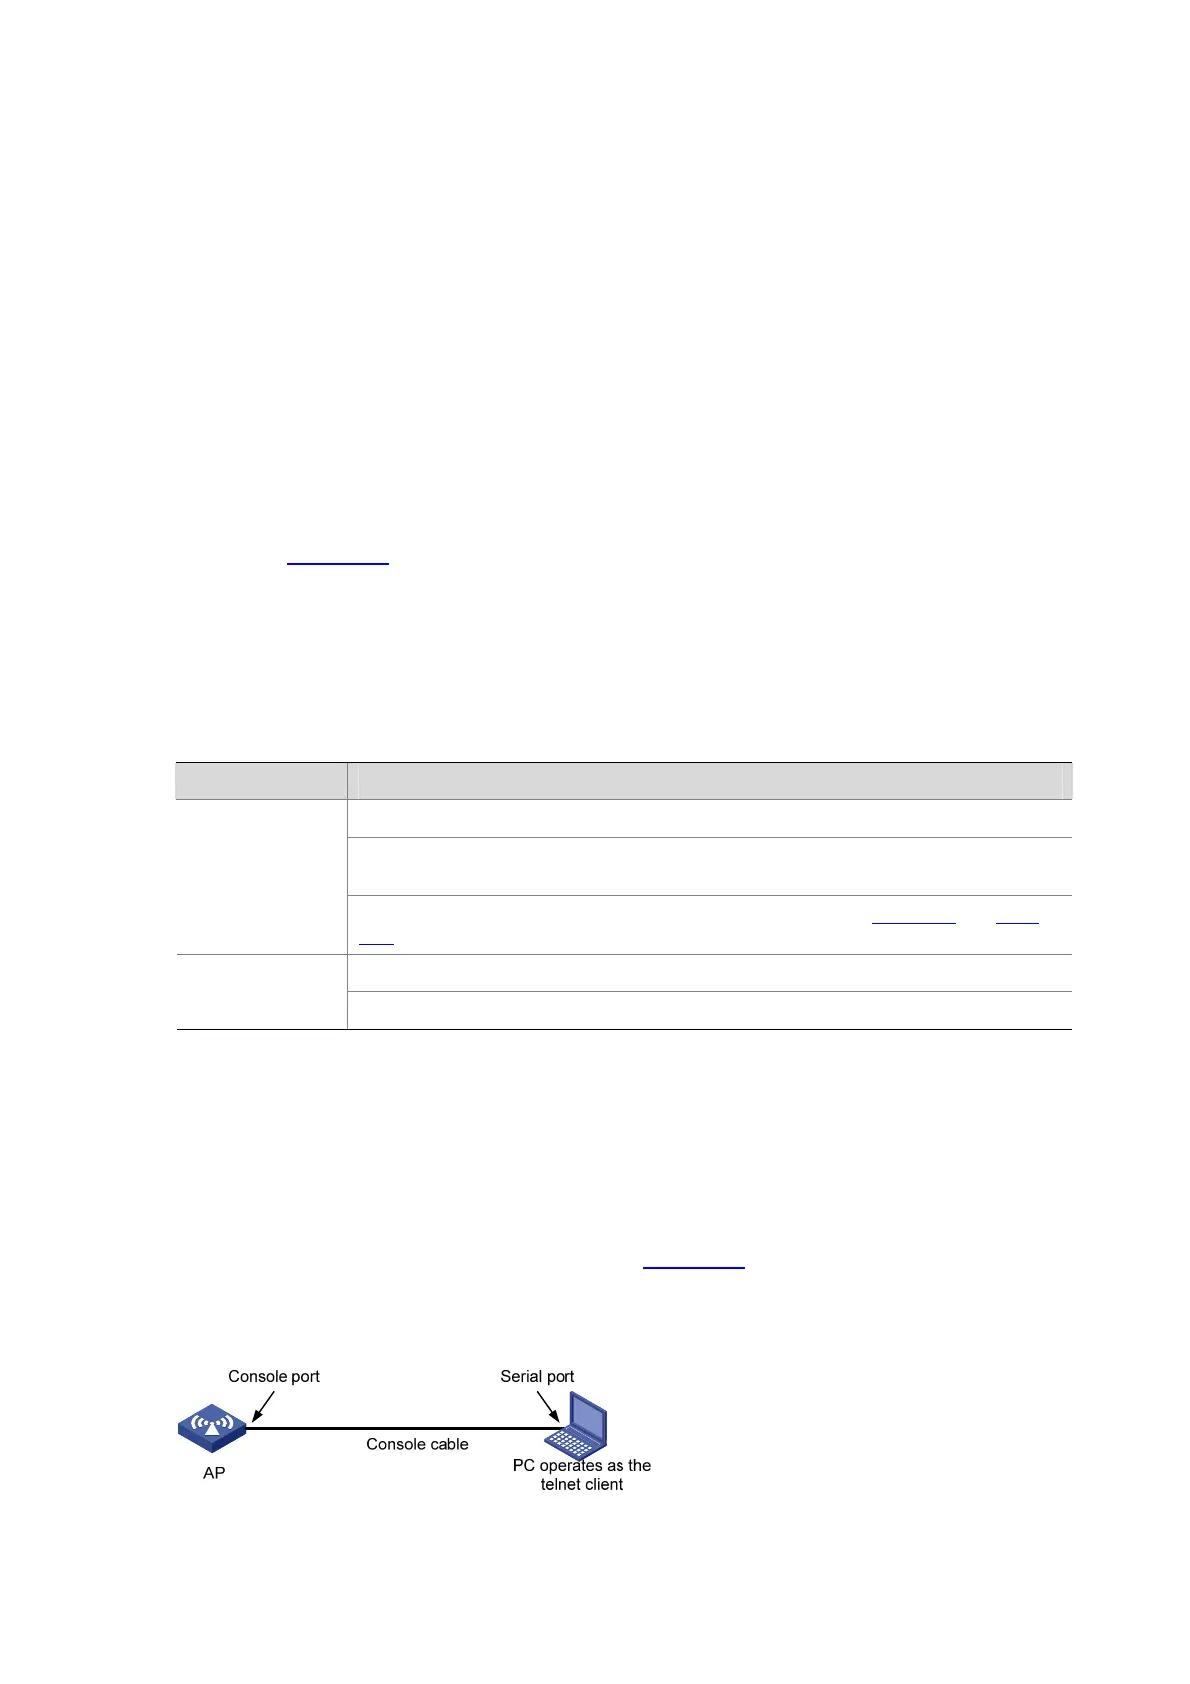
z Set up a configuration environment as shown in Figure 14-9. Connect the serial port of the PC (or
terminal) to the console port of the AP through a console cable.
Figure 14-9 Set up a local configuration environment
 Loading...