7
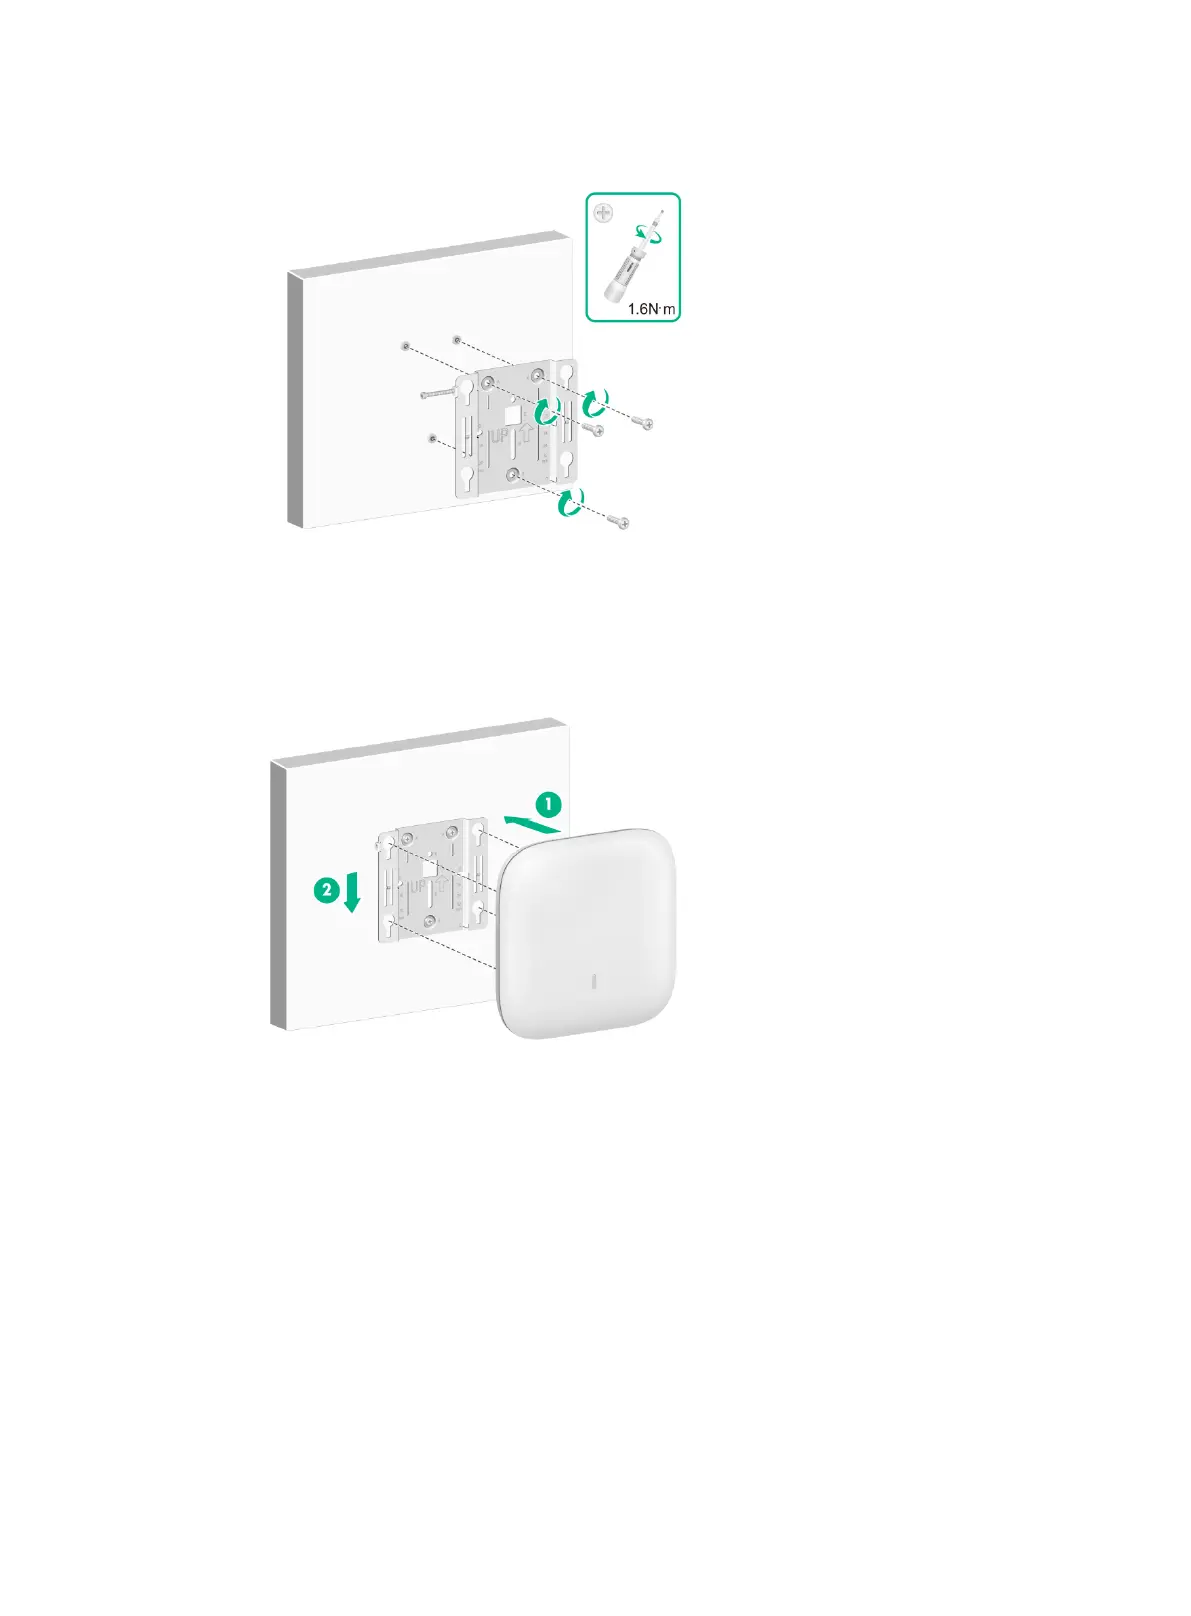
Figure 17 Attaching the mounting bracket to the wall
6. Position the four pegs at the AP rear into the keyhole slots in the mounting bracket and then
slide the AP down until it sits securely in the keyhole slots, as shown in Figure 18.
Figure 18 Attaching the AP to the mounting bracket
7. Use a security Torx screwdriver to fasten the M3 × 23.5 security screw.
 Loading...