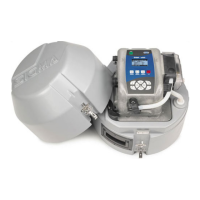
Figure 4 Bottle number 1 installation
1 Bottle number 1 location (compact base) 6 Elastic straps
2 Bottle number 1 location for 24 bottles 7 Standard insulated base for 21 L (5.5 gal) bottle
3 Bottle number 1 location for 8 bottles 8 Standad insulated base
4 Bottle number 1 location for 2 or 4 bottles 9 Compact base
5 Retainer
Install multiple bottles
When multiple bottles are installed, a distributor arm moves the sample tube over each bottle.
Sample collection automatically stops when the specified number of samples have been collected.
1. Clean the sample bottles. Refer to Clean the sample bottles on page 9.
2. Install the first sample bottle (number 1) below the label in the sampler base. Refer to Install the
first bottle for multiple sample collections on page 9.
3. Assemble the sample bottles as shown in Figure 5. For eight or more bottles, make sure that the
first bottle goes next to the bottle one indicator in the clockwise direction.
4. Put the bottle assembly in the sampler. For eight or more bottles, align the wires in the slots in the
bottom tray.
10
English