Each trigger can be defined as a high or low setpoint. Additionally, an optional deadband value can
be set. A deadband prevents the trigger from rapidly changing between active and inactive states
when the measurement value is near the setpoint. Refer to Figure 15.
1. Go to PROGRAM SETUP>MODIFY SELECTED>ADV SAMPLING>SETPT SAMPLE>SETPT
TRIGGER.
2. Select a measurement channel.
Note: A check mark is shown when a channel is enabled as a trigger.
3. Enter a setpoint trigger within the range that is shown.
4. Enter an optional deadband value.
5. Select ENABLE.
6. Select SETPT CONTROL to define how the sample program will operate.
Option Description
START ON SETPT The sampling program operates until the program is complete.
START/STOP The sampling program operates until the trigger is cleared.
7. To use a setpoint delay, enter a delay time in hours and/or minutes. The delay time starts when
the setpoint trigger becomes active. The program starts when the delay time expires.
Note: Setpoint control and delay options are global settings that are applied to all triggers.
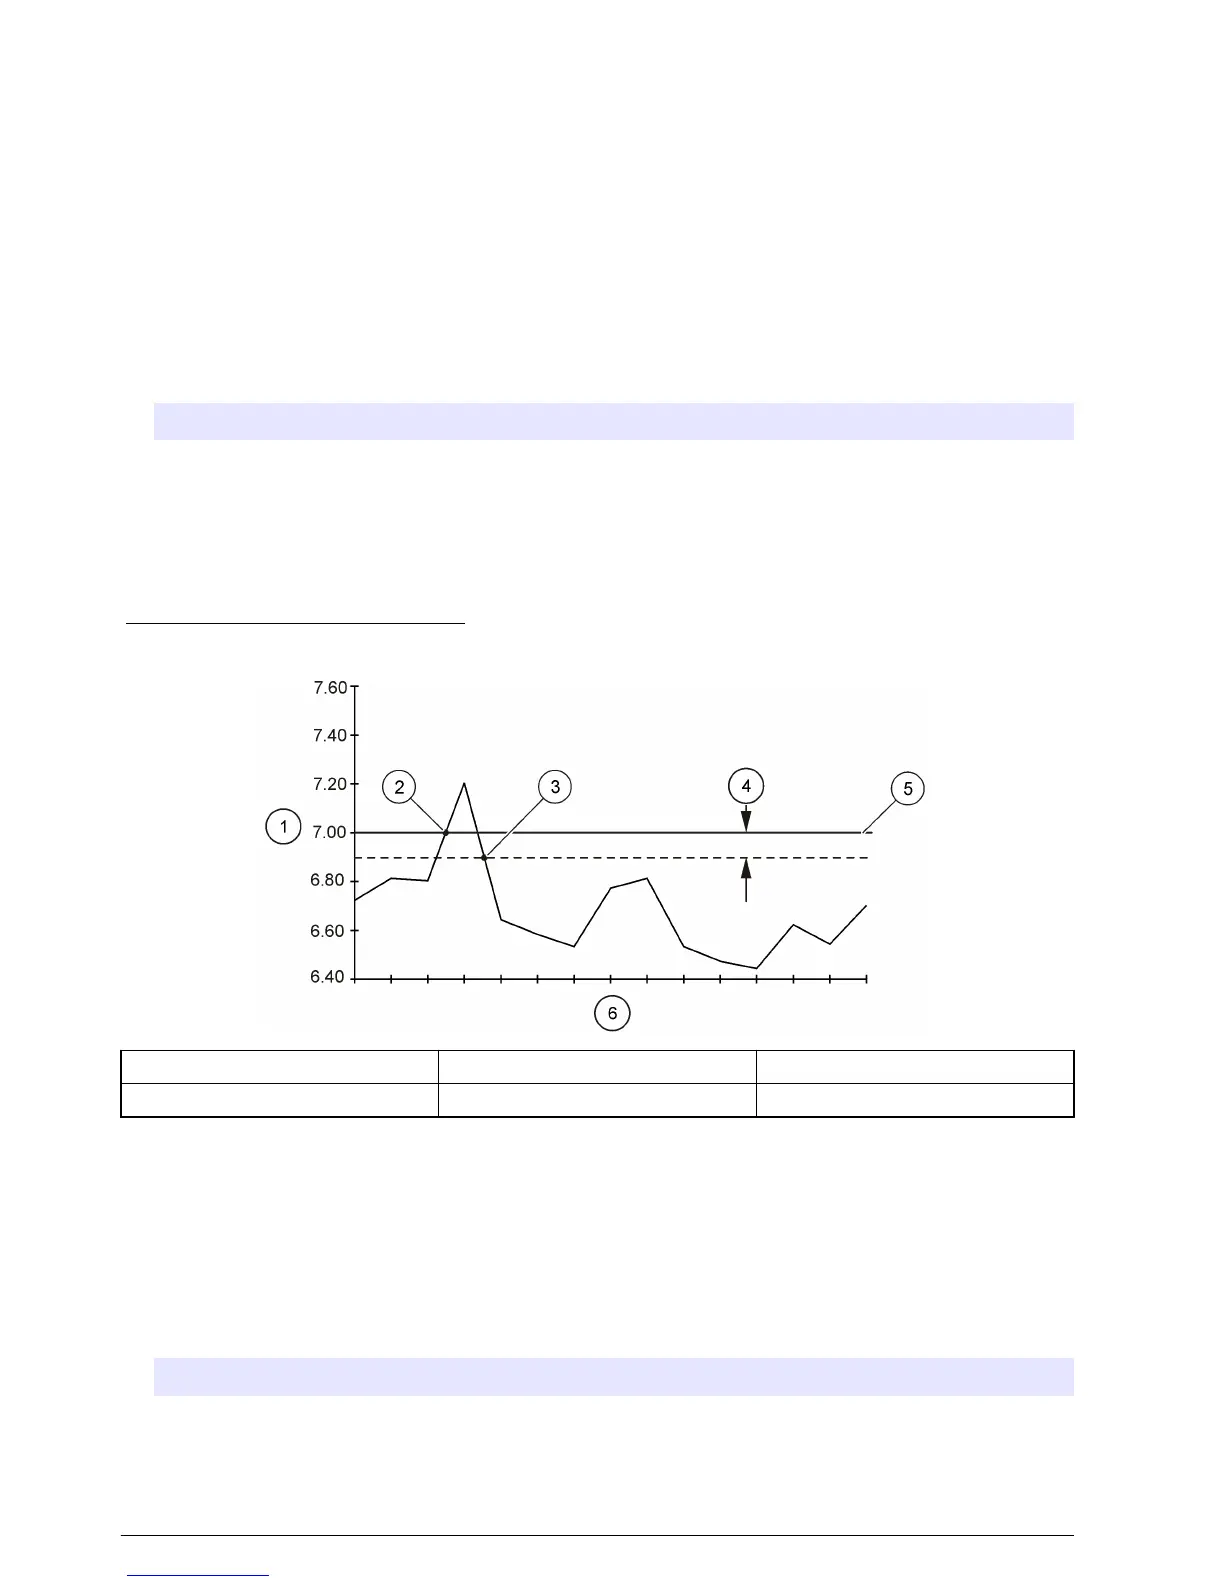
Figure 15 High setpoint example
1 Channel value 3 Setpoint trigger off 5 Setpoint value
2 Setpoint trigger on 4 Deadband 6 Scan intervals
Set multiple start and stop times
A sampling schedule can be set up to start sampling at a specified start time and stop at a specified
stop time. Up to twelve start and stop times can be specified.
1. Select PROGRAM SETUP>MODIFY SELECTED>ADV SAMPLING from the main menu.
2. Select STRT/STOP TIME>ENABLE.
3. If the sample program is configured for multiple bottles, select the distribution option.
Option Description
ENABLE Put the first sample in bottle 1 at each start time.
DISABLE Continue the distribution sequence from the last stop time.
4. Enter the time (24-hour format) and date for the first start time.
32
English