Do you have a question about the Häfele 7100 and is the answer not in the manual?
Connect the power supply and LAN cable to the device and Wi-Fi router for network setup.
Navigate the Hafele Smart Living app to add new devices via the '+' icon or 'Add Devices' option.
Choose 'Gateway' from the 'Hafele Devices' list within the application for pairing.
Confirm the two green lights are on on the device and proceed by pressing 'Next' in the app.
Wait for the application to search for the device and confirm its appearance before proceeding.
Verify the 'Added' status on the display screen, indicating successful device pairing.
Connect the power supply cable to the wireless gateway device to begin setup.
Access the Hafele Smart Living app and select the '+' or 'Add' option to add a new device.
Navigate to 'Hafele Devices' and select 'Wireless Gateway (Zigbee)' for pairing.
Select the 2.4 GHz Wi-Fi network, enter the password, and press 'Next' to connect.
Confirm the indicator light is blinking rapidly and proceed by pressing 'Next'.
Confirm the 'Added' status on the screen, signifying successful pairing of the Zigbee gateway.
Open the battery cover and remove one battery, then connect the Zigbee module and re-insert the battery.
In the Hafele Smart Living app, select '+' and then choose 'Lock (Zigbee)' to start the pairing process.
Choose the appropriate gateway from the list and click 'Confirm' to associate the lock.
Unlock the door and keep it open to facilitate the pairing process with the application.
Enter the lock's settings menu and select the 'Network' option to prepare for app pairing.
On the digital door lock, choose the 'Pairing with APP' option from the network settings.
Confirm the indicator is blinking rapidly and press 'Next' to continue the pairing.
The application will display a success message and allow device name changes upon successful pairing.
View battery status, private mode, door status, and access unlock functions directly from the main interface.
Option to rename the lock for easier identification within the application.
Functionality to remotely open the door using the mobile application.
Generate and manage temporary PIN codes for guest access or specific timeframes.
Navigate to Users, Records, and Settings for managing users, viewing logs, and configuring options.
Open the application and select the desired lock from the list of managed devices.
Touch and long-press the central sign on the lock's interface to begin the remote opening process.
When prompted, click 'Confirm' on the display screen to authorize the remote door opening.
Wait for the display screen to show 'Successful remote opening' to confirm the operation.
Open the application and select the lock management section for PIN code operations.
Touch the sign on the center and slide left to access the dynamic password feature.
The 'Remote dynamic password' screen will display generated temporary PINs.
Touch the screen to generate PINs and wait for the digits to stop, then copy the password.
Select the 'Users' option from the bottom menu in the application.
Select the '+' icon on the right side of the screen to begin adding a new user.
Select the member type (Family or Non-Family) and click 'Immediately add'.
For family members, enter user data like Name, Region, and Account (email) for app access.
Input non-family user details to display their names in the unlock 'Records' log, requiring setup via the lock menu.
Add PIN, fingerprint, or card via lock menu, test access, verify records, and edit user details in the app.
Select the 'Records' option from the bottom menu of the application.
The application displays the usage history, including name, time, and unlock activity.
Select the 'Setting' icon from the right side of the application interface.
Navigate to the 'Dynamic Password Management' section within the settings.
Select 'Available to administrators only' to activate the random coding function for administrators.
Select 'All users are available' to enable the random coding function for all users.
Choose 'Verify door lock administrator password' to require the master PIN before using the coding function.
Select the 'Setting' icon from the right side of the application interface.
Navigate to the 'Remote Door Opening Management' section within the settings.
Select 'Administrator password only' to activate remote door function for administrators.
Select 'No password is required' to activate remote door function for all users.
Select 'Disable remote doors' to deactivate the remote doors function entirely.
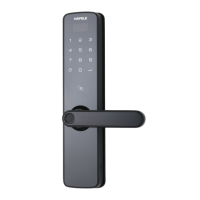
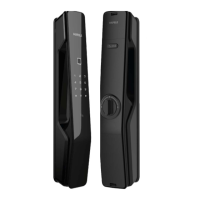
This document outlines the pairing and usage of the Hafele Digital Door Lock 7100 with the Hafele Smart Living Application, providing a comprehensive guide for setup, daily operation, and maintenance. The device is a smart digital door lock designed to integrate with a smart home ecosystem, offering enhanced security and convenience through remote access and management features.
The Hafele Digital Door Lock 7100 is a smart lock that can be controlled and monitored via the Hafele Smart Living Application. Its primary function is to provide secure access to a property, offering various unlock methods including PIN codes, fingerprints, and door cards, in addition to remote unlocking via the mobile application. The lock integrates with a gateway device (both LAN and Zigbee wireless gateways are supported) to connect to the home's Wi-Fi network, enabling remote functionalities.
Key functions include:
While specific technical specifications like battery type, operating temperature, or material are not explicitly detailed in the provided pages, the manual highlights the following:
The Hafele Digital Door Lock 7100 offers several user-friendly features:
The manual implicitly suggests some maintenance aspects:
In summary, the Hafele Digital Door Lock 7100, when integrated with the Hafele Smart Living Application, provides a robust and flexible smart access solution. It emphasizes ease of use through its mobile app, offers multiple secure entry methods, and includes comprehensive management and monitoring features for enhanced home security and convenience.
| Brand | Häfele |
|---|---|
| Model | 7100 |
| Category | Door locks |
| Language | English |