EasyManua.ls Logo

hager EG 270 - User Manual

hager EG 270
2 pages
Print Icon
To Next Page IconTo Next Page
Loading...
res
7
6
on
off
5
4
3
2
1
ON
ON
OFF OFF
enter
A
B
auto
manu
EG 270
Working principle :
The EG 270 is a time switch for the
automatic control of electrical loads.
It is fully programmable with a maximum
of 20 program steps to be divided bet-
ween the two channels. Each program
step can be applied to one or several
days, maximising the use of each memo-
ry location.
The front cover is sealable preventing
unauthorised access after completion of
programming.
Warning : at the beginning of use, please
reset the device in order to clear the
memory before programming.
This is achieved by using a pen to push
the reset button.
Presentation :
Display :
time
circuit status of channel A (ON or OFF)
circuit status of channel B (ON or OFF)
day of the week
(1 = Monday, 2 = Tuesday ....)
Buttons :
Mode selector : to select one of the
following modes :
time setting
A programming channel A
B programming channel B
auto running mode
manu manual override
1” to “7” : selection of the days
on/off” : chooses whether the circuit
is on or off
+” and “-” : changes settings
enter” : to confirm
reset
Time and day setting :
1. Move mode selector to
2. Select with key 1 to 7 , the actual day
(1=Monday, 2 = Tuesday .)
3. Input time with buttons + and -.
Important :
The clock starts when exiting the time setting mode.
Programming channel A :
1. Move mode selector to A.
2. Select with keys 1 to 7 the day(s) assigned
to this program step. An arrow appears
above each day concerned.
3. Input switching time with buttons + and -.
4. Input the type of switching with button on/off
(for the first action ON is automatically proposed).
5. Enter this program step with button enter.
Program additional time settings by repeating
steps 2 to 5.
Important :
To activate the program, move mode selector to
auto.
Programming channel B :
Move mode selector to B.
Same way of programming as channel A.
Important :
To active the program, move mode selector to auto.
Running Auto mode
This mode is the current displaying mode.
It does not allow any modification.
Move mode selector to auto.
Display of the time, the day and the state of the two
channels.
To check your program on channel A
or B :
1. Move mode selector to A or B.
2. Press the enter key repeatedly to display the
different program steps (switching time, days of
the week and state of the channel ON or OFF).
To override the output :
Important : the override must be identical on the
two channels (channels A and B ON”“ON or
channels A and B OFF”“OFF).
Permanent override :
1. Move mode selector to manu.
2. Select the state of the outputs with key on/off.
To switch back to automatic mode, move mode
selector to auto.
1234567
1
2
4
3
5
6
78 9
10
enter
reset
on
off
A
B
auto
manu
ON ON
1234567
enter
reset
on
off
A
B
auto
manu
To modify or delete a program step on
channel A or B :
1. Move mode selector to A or B.
2. Press enter repeatedly and select the program
step to modify or to delete.
3. Modify :
- switching time with keys + or -
- days assigned with keys 1 to 7.
(an arrow flashes above all days assigned,
press once to add a day, press twice to cancel).
- state of the channel with key on/off.
To delete a program step, press keys 1 to 7 in
order to cancel all days assigned.
4. Confirm with the enter key.
2 channels time switch -
weekly cycle
1234567
enter
reset
on
off
A
B
auto
manu
ON ON
1234567
enter
reset
on
off
ON ON
A
B
auto
manu
1234567
enter
reset
on
off
A
B
auto
manu
ON ON
User instruction
GB
Question and Answer IconNeed help?

Do you have a question about the hager EG 270 and is the answer not in the manual?

Summary

EG 270 Time Switch - Operation and Programming

Working Principle

Explains the EG 270's function as a time switch for automatic electrical load control with programmable steps.

Device Presentation

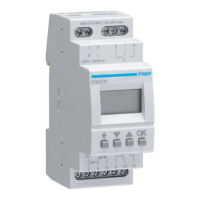
Details the display elements and buttons on the EG 270, aiding user interaction and setup.

Time and Day Setting

Guides users on how to set the current time and day on the EG 270 device.

Programming Channel A

Provides step-by-step instructions for programming switching times and days for channel A.

Programming Channel B

Explains how to program switching times and days for channel B, similar to channel A.

Check Program on Channels

Instructs on how to view programmed switching steps for either channel A or B.

Modify or Delete Program Step

Details the process for editing or removing existing program steps for channels A or B.

Override Output

Explains how to manually override the output state for channels A and B.

Running Auto Mode

Describes the normal operating mode where the programmed schedule is active.

Timed Override and Reset Functions

Timed Override

Details how to set a temporary override duration for the output state.

Cancel Timed Override

Guides users on how to cancel an active timed override and return to automatic mode.

Reset Time Switch

Instructions for resetting the time switch to clear its program.

Technical Specifications

Electrical Connections

Warranty Information

Overview

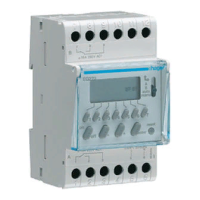
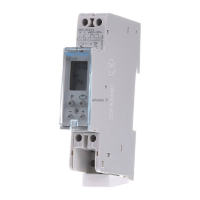
The Hager EG 270 is a 2-channel time switch with a weekly cycle, designed for the automatic control of electrical loads. It offers full programmability with a maximum of 20 program steps, which can be distributed across its two channels. Each program step can be applied to one or several days of the week, optimizing memory usage. The device features a sealable front cover to prevent unauthorized access after programming is complete.

Function Description:

The EG 270 allows users to set specific times for electrical loads to turn ON or OFF. It supports two independent channels (A and B), each with its own programming. The device operates in several modes:

  • Time Setting (L): Used to set the current time and day.
  • Programming Channel A (A): Allows users to define ON/OFF switching times and assign them to specific days for channel A.
  • Programming Channel B (B): Similar to channel A, but for channel B.
  • Running Auto Mode (auto): The default operating mode where the device executes the programmed schedule. It displays the current time, day, and the status of both channels. No modifications can be made in this mode.
  • Manual Override (manu): Provides options for temporary or permanent manual control over the outputs, overriding the programmed schedule.

Important Technical Specifications:

  • Electrical Characteristics:
    • Supply Voltage: 230V +10/-15% 50Hz
    • Outputs: 2 changeover contacts
      • μ 16A - 250V AC1
      • μ 3A - 250V cos φ = 0.6
      • 1000 W incandescent lighting
    • Power Consumption: 1 VA
    • Protection Degree: IP20
    • Insulation Class: II
  • Functional Characteristics:
    • Accuracy: ± 1 sec. / day at 20 °C
    • Operating Reserve: Lithium battery, total of three years.
  • Environment:
    • Operating Temperature: -10 to +50 °C
    • Storage Temperature: -10 to +50 °C
  • Connection Tunnel Terminals:
    • Flexible: 0.5 to 2.5 mm²
    • Rigid: 0.5 to 4 mm²
  • Dimensions: 3 modules (3x17.5mm)

Usage Features:

  • Initial Setup: Before first use, it is recommended to reset the device by pushing the reset button with a pen to clear the memory.
  • Time and Day Setting:
    1. Move the mode selector to "L".
    2. Select the actual day (1=Monday to 7=Sunday) using keys "1" to "7".
    3. Input the time using the "+" and "-" buttons. The clock starts upon exiting this mode.
  • Programming Channels (A or B):
    1. Move the mode selector to "A" or "B".
    2. Select the desired day(s) for the program step using keys "1" to "7". An arrow will appear above each selected day.
    3. Input the switching time using "+" and "-" buttons.
    4. Input the type of switching (ON or OFF) using the "on/off" button (the first action is automatically proposed as ON).
    5. Confirm the program step with the "enter" button.
    6. Repeat steps 2-5 for additional time settings.
    7. To activate the program, move the mode selector to "auto".
  • Checking Programs:
    1. Move the mode selector to "A" or "B".
    2. Press the "enter" key repeatedly to cycle through and display all programmed steps (switching time, days, and ON/OFF state).
  • Modifying or Deleting Programs:
    1. Move the mode selector to "A" or "B".
    2. Press "enter" repeatedly to select the program step to modify or delete.
    3. To Modify:
      • Adjust switching time with "+" or "-".
      • Adjust assigned days with "1" to "7" (an arrow flashes, press once to add, twice to cancel).
      • Adjust channel state with "on/off".
    4. To Delete: Press keys "1" to "7" to cancel all assigned days.
    5. Confirm changes with the "enter" key.
  • Output Override:
    • Permanent Override:
      1. Move the mode selector to "manu".
      2. Select the desired state (ON or OFF) for both outputs using the "on/off" key. Note: Both channels must be set identically (A and B "ON""ON" or A and B "OFF""OFF").
      3. To return to automatic mode, move the mode selector to "auto".
    • Timed Override:
      1. Move the mode selector to "manu".
      2. Select the desired state (ON or OFF) for the outputs using the "on/off" key.
      3. Input the override duration using "+" and "-" buttons: from 1 to 23 hours (in 1-hour steps), then from 1 to 27 days (in 1-day steps).
      4. Move the mode selector to "auto". The state indication will flash, indicating a timed override is active. The device will return to the initial program after the set duration.
      5. To Cancel Timed Override: Move the mode selector to "manu". Press "-" or "+" until "-h" is displayed. Move the mode selector to "auto" to switch back to automatic mode.

Maintenance Features:

  • Resetting the Time Switch: To clear all programmed data and return the device to its initial state, press the "reset" button. This is recommended at the beginning of use.

Warranty:

Hager products come with a 24-month warranty from the date of manufacture, covering material or manufacturing defects. Defective products should be returned via the installer and supplier. The warranty is void if:

  • The device was installed contrary to IEE wiring regulations and accepted industry practice.
  • The proper return procedure was not followed.
  • An explanation of the defect was not included with the returned goods.

hager EG 270 Specifications

General IconGeneral
Brandhager
ModelEG 270
CategoryTimer
LanguageEnglish

Related product manuals