This document is an owner's manual and installation instruction guide for Haier Portable Air Conditioners, models QPFA08 and QPFA10. It provides comprehensive information on the device's function, technical specifications, usage, and maintenance in English, French, and Spanish.
Function Description:
The Haier Portable Air Conditioner is a versatile appliance designed to provide cooling, dehumidification, and air circulation. It offers three primary modes of operation: Cool, Dry, and Fan. The Cool mode is used for active cooling, the Dry mode for dehumidification without cooling, and the Fan mode for air circulation and filtering without temperature modification. The unit is equipped with a compressor for cooling and a fan for air movement. It also features a Power Outage Recovery feature, which automatically restarts the unit with the last used settings after a power interruption.
Important Technical Specifications:
The manual specifies that the unit operates on a 115/120 Volt AC, 60 Hz grounded outlet, protected by a 15-amp time-delay fuse or circuit breaker. It is designed for use with a 3-prong grounding plug to minimize the risk of electrical shock. The remote control uses two "AAA" (1.5 volt) alkaline batteries. The unit's temperature control allows setting the desired temperature between 64°F and 86°F (18°C and 30°C) in 1°F (1°C) increments. The exhaust hose and window kit are essential for operation in Cool and Dry modes, but not required for Fan mode. The window panel can be installed in a window with a minimum opening of 20" (55.88 cm) to a maximum of 46" (121.92 cm). The unit contains a flammable refrigerant, requiring specific safety precautions during installation and maintenance.
Usage Features:
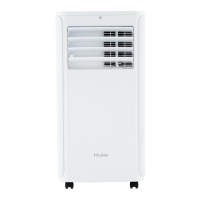
The portable air conditioner can be controlled via a control panel on the unit or a remote control.
- Power Button: Turns the unit ON/OFF.
- Fan Speed Button: Selects fan speed (High/Low on remote, High/Medium/Low on control panel).
- +/- Buttons: Adjust temperature settings (increase/decrease) and set timer duration.
- Mode Button: Selects operating mode (Cool, Fan, Dry).
- Timer Button: Sets the timer for ON or OFF operation.
- Temperature and Timer Display: Shows the set temperature or timer duration.
- Temperature Switch Button (C/F): Switches between Celsius and Fahrenheit temperature display (remote control only).
- Sleep Button: Activates Sleep mode (remote control only).
Operating Modes:
- Cool Mode:
- To activate, press the MODE pad until the COOL indicator light is lit.
- Set fan speed (HIGH, MEDIUM, or LOW) using the FAN pad.
- Adjust temperature between 64°F and 86°F (18°C and 30°C) using the +/- pads.
- The compressor cycles on and off to maintain the set temperature.
- Cooling descriptions include Normal Cooling (middle set temp, HIGH/MEDIUM/LOW fan), Maximum Cooling (lower set temp, HIGH fan), and Quieter & Nighttime Cooling (middle set temp, LOW fan).
- A 3-minute delay occurs before the compressor starts when switching to COOL mode from OFF.
- DRY Mode (Dehumidification):
- To activate, press the MODE pad until the DRY indicator light is lit.
- The fan runs at a fixed speed; fan speed cannot be adjusted in this mode.
- Windows and doors should be closed for optimal dehumidification.
- No set temperature is displayed in DRY mode.
- For extended use as a dehumidifier, connect a 1/2" outer diameter flexible drain hose to the upper drain port for continuous drainage.
- A 3-minute delay is required when switching from DRY to OFF or FAN, or back to DRY.
- FAN Mode:
- To activate, press the FAN pad until the desired indicator light for high, medium, or low fan speed is lit.
- Provides air circulation and filtering without cooling.
- No set temperature is displayed.
- The exhaust hose and window kit are not required for operation in FAN mode.
Power Outage Recovery Feature:
The unit automatically restarts with the last used settings after a power interruption. If the TIMER was set, it needs to be reset.
Installation Instructions:
The manual provides detailed steps for installation:
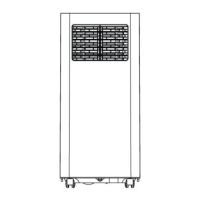
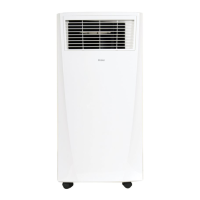
- Unpacking: Remove all packaging materials and dispose of them properly. Handle the air conditioner carefully due to its weight. Ensure the unit is upright and level.
- Exhaust Hose Assembly: Install the exhaust hose assembly by twisting the round adapter counterclockwise into the exhaust port on the back of the air conditioner.
- Window Panel Installation:
- Measure the window opening.
- Insert the middle panel of the Window Kit into the opening for the Exhaust Hose Adapter.
- Insert one side panel to the middle panel, adjusting for openings from 20" to 33" (50.8 cm to 83.8 cm) or 33" to 46" (83.8 cm to 121.92 cm).
- Lock the panels using the Cam locks.
- Apply foam seals to the top, bottom, and ends to ensure a good seal.
- Close the window shut against the Window Kit.
- Connect Exhaust Hose to Window Panel:
- Place the air conditioner 20" (50.8 cm) from the wall and other obstructions.
- Extend the hose so it reaches the Window Kit.
- Insert the Exhaust Hose Adapter into the opening in the Window Kit and slide it into the locking position.
- Ensure the hose runs straight without excessive extension.
- Use a small screw to attach the exhaust hose assembly to the window sealing plate assembly.
- The air conditioner must be vented to the outside. Do not use a longer hose or extend the unit, as this can lead to overheating.
- Complete Installation (Electrical Safety):
- Plug the power cord into a grounded 3-prong outlet.
- Press the Reset button on the plug to ensure the safety plug is providing power.
- Allow 20" (50.8 cm) of clearance around the air conditioner for proper air circulation.
- When removing the Air Conditioner, be sure to remove the Window Kit.
Troubleshooting Tips:
The manual includes a troubleshooting guide with common problems, possible causes, and solutions.
- Unit does not start or operate: Check power supply cord, RESET button, power button, electrical outlet, fuse/circuit breaker, program settings, batteries in remote, and internal water tank level.
- Remote control not working: Check batteries.
- Air conditioner is working but the room is not cooling: Check room temperature, mode setting (Fan or DRY), airflow restrictions, temperature setting, air filters, and exhaust hose/window panel installation.
- Error Codes:
- E1: Abnormal sense of coil pipe sensor.
- E2: Abnormal sense of room temperature sensor.
- E4: Anti-frozen protection.
- FL: Full water (internal water tank is full).
Maintenance Features:
Cleaning:
- General Cleaning: Unplug the unit. Use a soft cloth dampened with water to clean the cabinet. Do not use liquid or spray cleaners, abrasives, ammonia, chlorine bleach, concentrated detergents, solvents, or scouring pads. Dry thoroughly with a soft cloth.
- Air Filters:
- Clean air filters at least every two weeks for optimal performance.
- To remove: Unplug the unit, pull to remove the upper filter panel, and wash or vacuum dust from the air filters.
- If washed, gently shake the filter to remove excess water and trapped particles.
- Reinstall the filters.
- Do not operate the air conditioner without a filter, as dirt and lint will clog it and reduce performance.
Internal Water Tank:
- The "FL" indicator on the control panel illuminates when the internal water tank is full.
- To Empty: Unplug the unit. Place a shallow 1-quart or larger pan below the lower drain on the back. Remove the cap and rubber plug to drain the water. Re-insert the plug and cap. Plug in the unit.
Storage:
- If not used for a long period:
- Unplug the unit.
- Drain the water from the internal water tank.
- Use original packaging to repack the unit to avoid dust/dirt buildup.
- Store in a cool, dry location.
Remote Control Battery Insertion:
- Remove the battery cover by sliding it.
- Insert two "AAA" (1.5 volt) alkaline batteries, ensuring correct polarity (+/-).
- Reattach the cover.
- Notes: Do not use rechargeable batteries. Remove batteries if not used for a long time. Do not mix old and new batteries or different types of batteries.
Limited Warranty:
Haier Appliances offers a limited warranty. For the first 90 days from the date of original purchase, Haier Appliances will replace the unit or provide a refund if there is a defect in material or workmanship. After 90 days and up to one year, Haier Appliances will replace the unit. For US customers, the warranty is extended to the original purchaser and any succeeding owner for products purchased for home use within the USA. The warranty covers product defects and does not cover issues caused by improper installation, misuse, damage, or normal wear and tear. Customers are advised to keep their original sales receipt and make a note of the model and serial number. For warranty service, customers can visit haierappliances.com or call 1-877-337-3639.