EasyManuals Logo

Haiwell PLC User Manual & Application Case

Haiwell PLC
18 pages
To Next Page IconTo Next Page
To Previous Page IconTo Previous Page
Page #8 background imageLoading...
Page #8 background image
www.haiwell.com Haiwell PLC - Analog Module User Manual
8 / 18
11. Mounting and installation
The PLC should be secured to an enclosed cabinet while mounting. For heat dissipation, make sure to provide a minimum
clearance of 50mm between the unit and all sides of the cabinet. (See the figure.)
Rail Mounting: Use standard 35 mm rail.
Screw Mounting: Each MPU or expansion module has two positioning screw holes, the diameter of the hole is 4.5mm. Please
refer to the dimension figure for the location of the positioning holes and their spacing.
To avoid over temperature and for a better heat dissipation, do not mount PLC to a position near to the bottom/top of the cabinet.
Do not mount PLC in vertical direction.
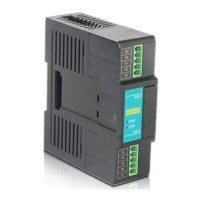
Expansion Module Wiring: Connections between expansion modules and connections between module and MPU are achieved
through bus. One expansion cable will be configured to every expansion module, for the connection between two different
modules.Connection methods: turn the right side of extended interface(the last MPU or expansion module) over, plug the
expansion cable in the extended interface, then press down the cover of the extended interface to reset the interface, the
extended interface at the right side of the module will be reserved for expansion of the next module. Connect all expansion
modules in turn in the same way.

Table of Contents

Other manuals for Haiwell PLC

Questions and Answers:

Question and Answer IconNeed help?

Do you have a question about the Haiwell PLC and is the answer not in the manual?

Haiwell PLC Specifications

General IconGeneral
SeriesHaiwell PLC
Programming LanguageFunction Block Diagram
Communication PortsRS232, RS485, Ethernet
Digital InputsVaries by model (e.g., 8, 16, 32)
Digital OutputsVaries depending on the model (e.g., 8, 16)
Analog InputsVaries by model (e.g., 4, 8)
Analog OutputsVaries by model (e.g., 2, 4)
Power Supply24V DC
Real-Time Clock (RTC)Yes
Expansion ModulesYes, supports various expansion modules for I/O, communication, and special functions
Input Voltage24V DC
Data MemoryVaries depending on the model
Humidity Range5% to 95% (non-condensing)

Related product manuals