UmdenZusammenbaudesGerätesfürSiesoeinfachwiemöglich
zu gestalten, haben wir die wichtigsten Teile bereits vormontiert.
Bevor Sie das Gerät zusammenbauen, sollten Sie bitte diese
AufbauanleitungsorgfältiglesenunddanachSchrittfürSchritt,wie
beschrieben, fortfahren.
Packungsinhalt
EntnehmenSiealleEinzelteileausder
Styroporform und legen Sie diese
nebeneinander auf den Boden.
StellenSiedenHauptrahmenaufeine
bodenschonende Unterlage, da ohne
montierteStandfüßeIhrBodenbeschädigt/
erkratztwerdenkönnte.
Diese Unterlage sollte flach und nicht
zu dick sein, sodass der Rahmen einen
stabilen Stand hat.
AchtenSiedarauf,dassSiewährenddes
Zusammenbaus in jede Richtung hin
genügendBewegungsfreiraum(mind.1,5m)haben.
In order to make assembly of the item as easy as possible for
you, we have preassembled the most important parts. Before you
assemble the equipment, please read these instructions carefully
and then continue step by step as described
Contents of packaging
Unpackallindividualpartsandplacethemalongside
each other on the floor.
Placethemainframeonapadprotectingthefloor,
because without its assembled base feet it can
damage / scratch your floor. The pad should be
flat and not too thick, so that the frame has a
stable stand.
Makecertainthatyouhaveadequateroomfor
movement (at least 1.5 m) on all sides during
assembly.
3. Montage
3. Assembly
04
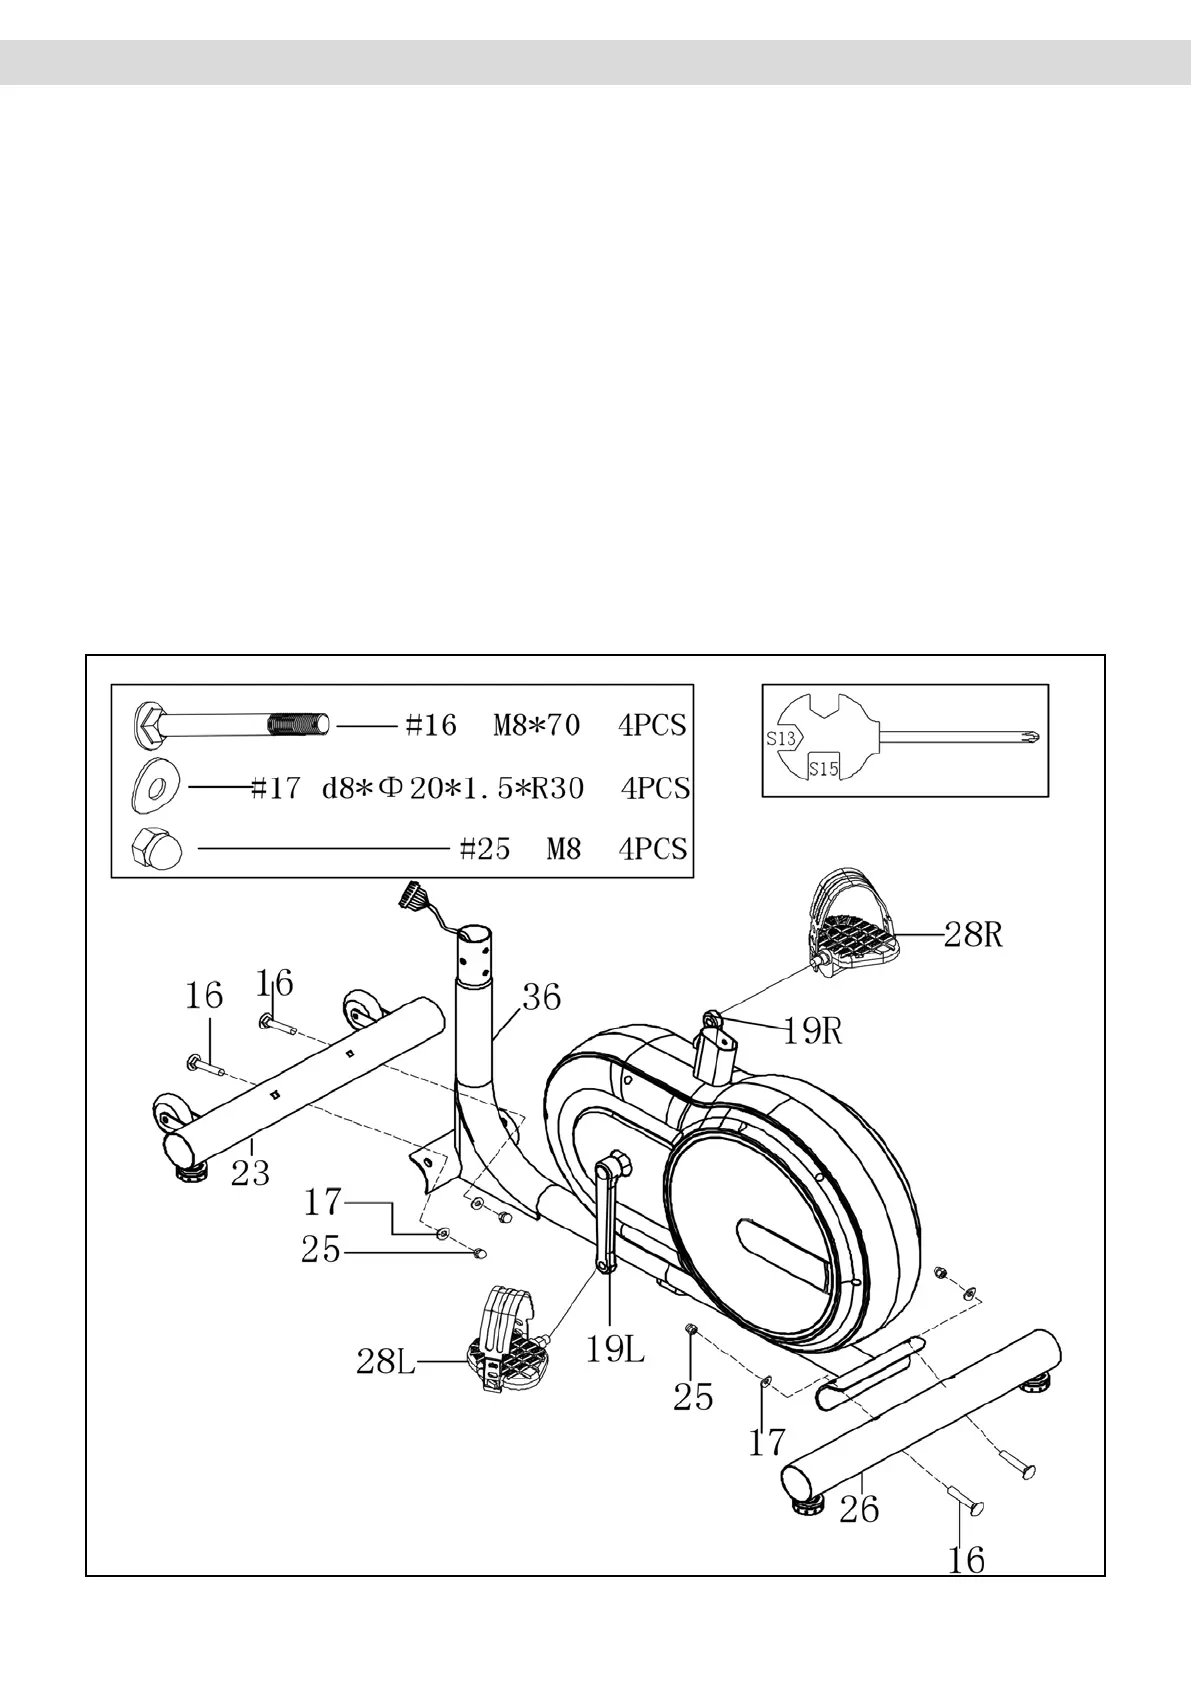
3.1 Montageschritte/Assembly steps
Schritt /Step 1