Do you have a question about the HAMPTON BAY FSC17008 and is the answer not in the manual?
Requires 2-3 people, handle sharp edges, follow basic safety, avoid high winds, keep away from flames, do not climb.
Covers defects in materials and workmanship for 2 years for residential use.
Excludes transportation costs and compensation for assembly/disassembly.
Ensure all parts are present before assembly; contact customer service for missing items.
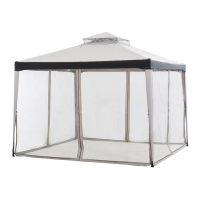
Position wall screens to posts and secure with M6x35 bolts (AA).
Connect lower slide rails to track connectors using M6x15 bolts (BB).
Secure lower slide rail assemblies to bottom corners of screens using M6x30 bolts (DD) and nuts (EE).
Slide support bars onto inner connectors and secure with M6x15 bolts (BB).
Connect support bar assemblies to wall screens using screen connectors (Y) and M6x15 bolts (BB).
Attach corner connectors (S) to top corners using two screws (CC).
Attach track wheels (V) and door bolts (U) to sliding doors (D and E).
Slide upper rail tracks (J, K) onto sliding doors (D, E).
Position sliding doors into bottom track and secure tops with M6x15 bolts (BB).
Connect middle bars (Q) and upper corner bars (O) to center connector (N), then attach lower corner bars (P).
Place large (W) and small (X) canopies over the roof; slide roof finishing bars (R) into corners.
Place top cover assembly onto gazebo and attach using M6x15 bolts (BB).
Secure the large canopy (W) and the gazebo to the ground using M6x15 bolts (BB) and ground stakes (GG).
| Brand | HAMPTON BAY |
|---|---|
| Model | FSC17008 |
| Category | Outdoor Furnishing |
| Language | English |