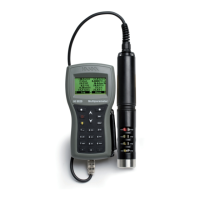
37
• Unscrew the calibration beaker and empty the solution.
• Shake any remaining liquid off the probe and beaker. No droplets should remain on the D.O. sensor
membrane.
Note: Do not attempt to dry wipe the D.O. sensor as damage to the membrane may occur.
• Screw the empty calibration beaker on the probe body. The beaker should not be dry.
• Press <Accept> to close the displayed message.
• When the measurement is stable, “Ready” appears.
Press <Confirm> to store the calibration data and the
“Storing” message will appear.
• Press <OK> to return to “Calibration” menu.
Note: To quit the quick calibration procedure, press ESC at any time.
After every calibration the quick calibration window will show a check mark in the box next to the
calibrated parameter.
To optimize the pH measurement follow the general guidelines mentioned in the Chapter 7 introduction.
From the “Calibration” menu select “Single param. calibration”
and then “pH“ calibration. The display shows two options:
“Calibrate pH” and “Restore factory calib.”.
If a new pH sensor has been installed use “Restore factory
calib.” before performing a user calibration as some warning
messages are based on changes from previous calibrations.
If “Restore Factory Calib” is selected, all user calibration data will be deleted and the default calibration
is restored. A user calibration should follow immediately.
If “Calibrate pH” is selected, the user can perform a new calibration using up to 3 buffers (pH 4.01,
6.86, 7.01, 9.18, 10.01 or one custom buffer).
When a 3‑point calibration is performed, all old data are overwritten, while with a single or 2‑point
calibration the meter will also use information from the previous calibration.
Preparation
Pour small quantities of the selected buffer solutions into clean beakers. To minimize cross contami‑
nation, use two beakers for each buffer solution: the first one for rinsing the sensor and the second
one for calibration.
QUCIK CALIBRATION pH CALIBRATION
 Loading...