using controller mode
30_ using controller mode
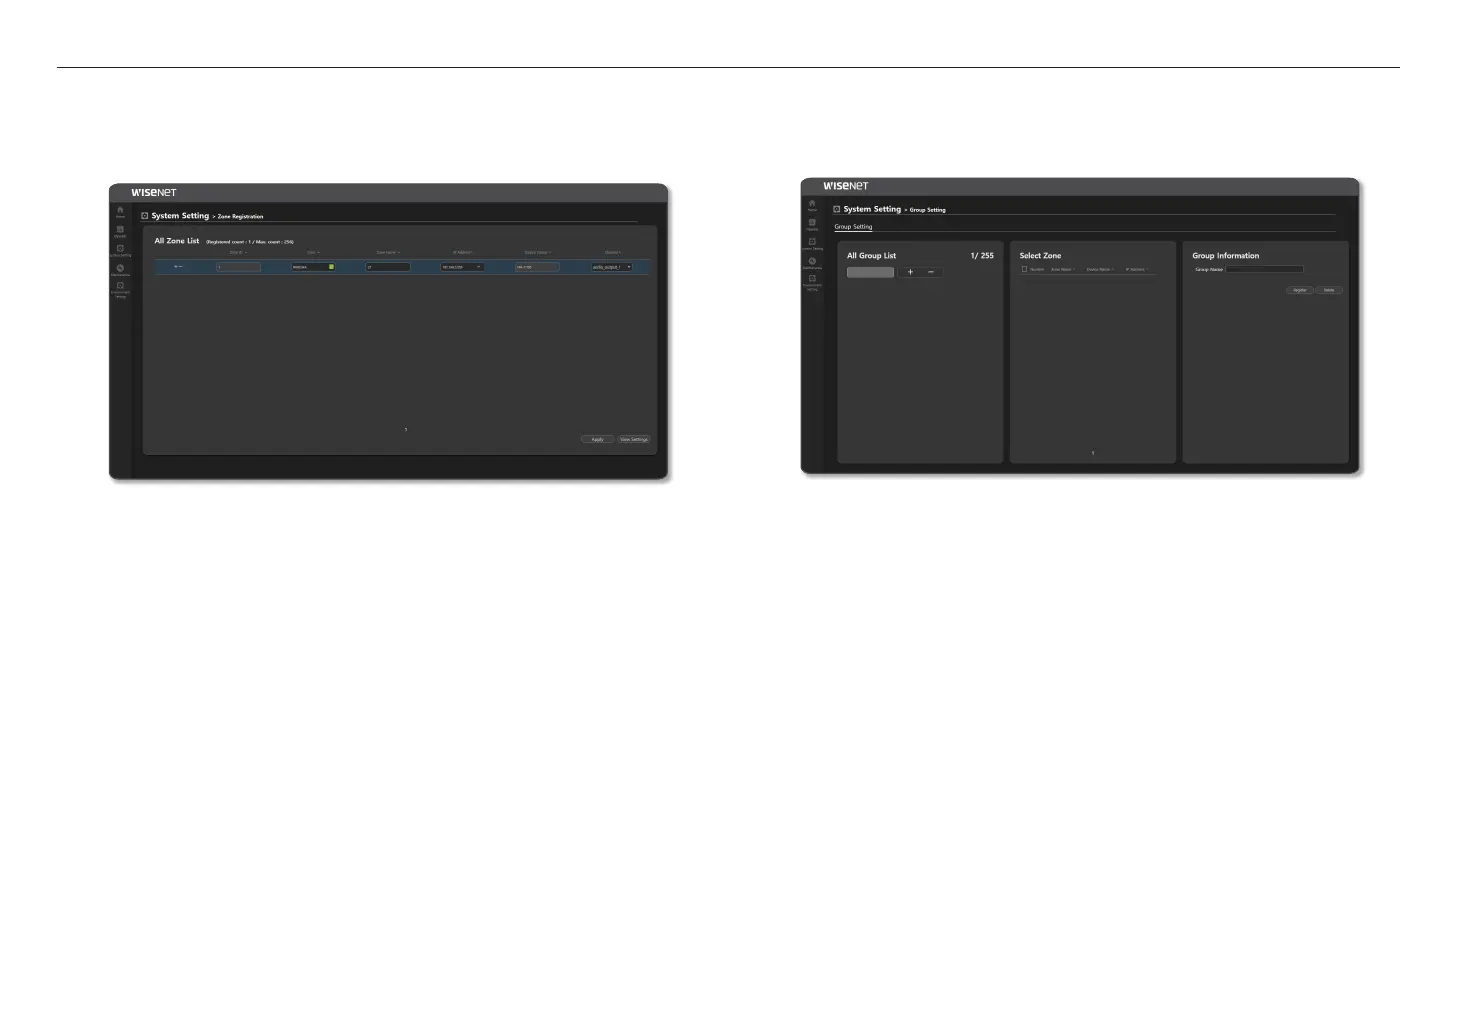
Register Zone
You can register the speaker to the <Zone> of the region for broadcasting. <Zone> refers to one speaker set
as an output device.
1. On the Home screen, click <System Setting>
;
<Zone Registration>.
~
Zone ID: Up to 256 zones can be registered, and the registered count is displayed.
Click the [+] icon to create a list, and click the [ - ] icon to remove the list.
Names such as z1, z2, and z3 are displayed on the website menu.
M
`
If you click the [Sort] button in the <Select Zone> menu of the <Operate>
;
<Button Mode>, they will be sorted in
the order of z1, z2, z3.
~
Color: You can select the color of the zone from the color chapter or create colors you want.
~
Zone Name: You can enter the zone name or change it. It is displayed on the <Operate>
;
<Button
Mode> screen of the device.
~
IP Address: If you select the Speaker IP address, the <Device Name> is displayed.
~
Channel: Displayed as audio_output_1.
2. Once set, click the [Apply] button.
3. If you click the [View Settings] button, the set value can be saved as a CSV file.
M
`
As the same speakers can be registered more than once as <Zone>, click <IP address> to sort them in order.
Group Setting
You can set the <Zone> to be broadcast by grouping it.
1. On the Home screen, click <System Setting>
;
<Group Setting>.
~
Group Setting: Up to 255 groups can be set.
Click the [+] icon to create a group, and click the [ - ] icon to remove the group.
M
`
The set group number is used as the <Group> button in the <Operate>
;
<Button Mode>.
`
For the set group number, after selecting the [Menu] button and switching <Talk Type>
;
<Talk Protocol> in <IsIs
Group>, if you input numbers with the ten key button in the middle of the microphone device, it will be broadcasted with
the same group number.
~
Zone Select: You can select registered zones (speakers) and set them to the same broadcast group.
~
Group Name: You can enter the group name and change it.
2. Once set, click the [Register] button.
~
Click the [Delete] button to delete the registered group.
 Loading...