INITIAL INSTALLATION
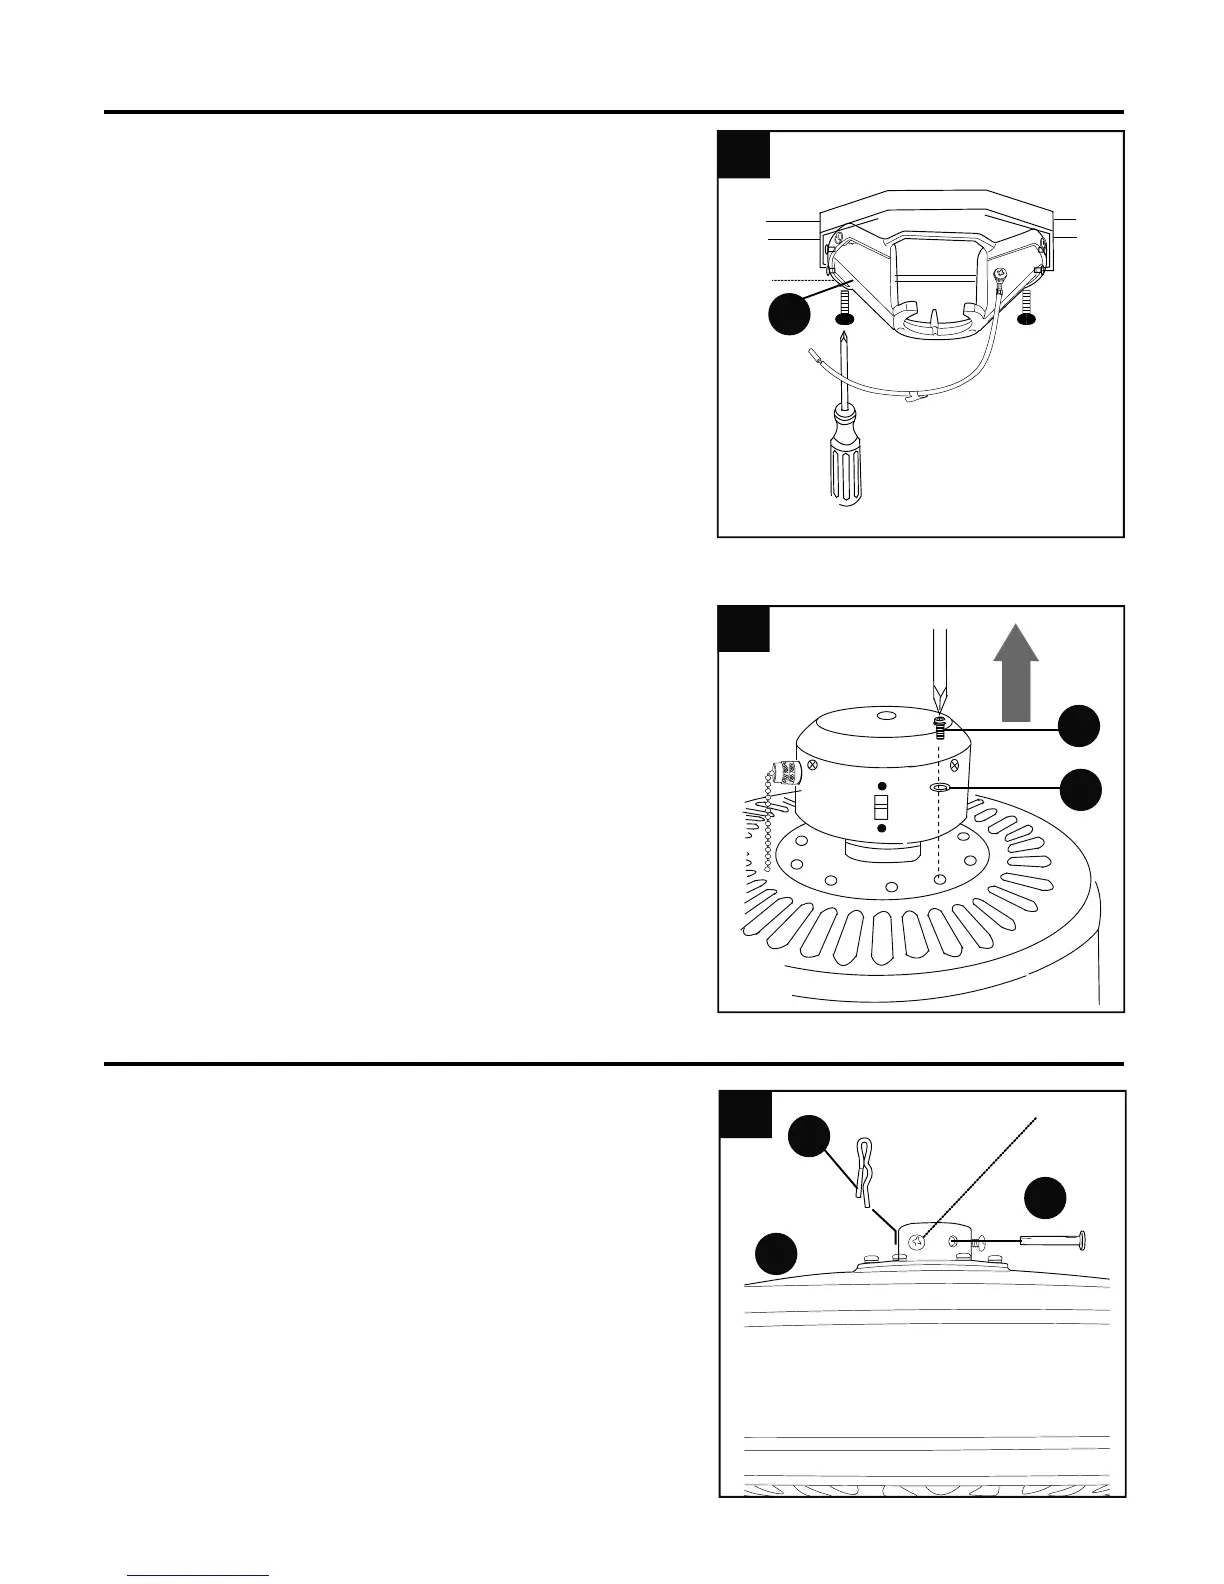
5.
Remove motor screws (M) and lock washers (O)
from underside of motor. [If there are plastic
motor blocks installed with the motor screws (M)
and lock washers (O), discard the plastic motor
blocks.] (Fig. 5)
Follow mounting instructions on pages 8 - 10 for
“Downrod Style Fan Mounting” or proceed to
pages 10 and 11 for “Closemount Style Fan
Mounting”, depending on mounting method (A or
B) chosen in Step 2 on previous page.
DOWNROD STYLE FAN MOUNTING
1.
R
Q
Secure mounting bracket (C) to outlet box using
screws, spring washers, and flat washers
provided with the outlet box. (Fig. 4)
*NOTE: It is very important that you use the
proper hardware when installing the mounting
bracket (C) as this will support the fan.
IMPORTANT: If using the angle mount, make
sure open end of mounting bracket (C) is installed
facing the higher point of the ceiling.
4.
4
C
Remove pin (Q) and clip (R) from motor housing
yoke at top of motor housing (D) and partially loosen
set screws. (Fig. 1)
*Helpful Hint: Downrod style mounting is best
suited for ceilings 8 ft. (2.44 m) high or higher. For
taller ceilings you may want to use a longer downrod
(not included) than the one provided. Angle style
mounting is best suited for angled or vaulted
ceilings. A longer downrod is sometimes necessary
to ensure proper blade clearance.
Set
Screw
1
D
8
5
O
M
 Loading...