
T
Tracey WestAug 2, 2025
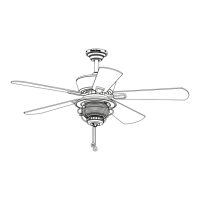
What to do if my Harbor Breeze JP18EB3 does not move?
- Jjessica90Aug 2, 2025
If your Harbor Breeze Fan does not move, the power may be off or a fuse may be blown. Turn the power on or check the fuse.
What to do if my Harbor Breeze JP18EB3 does not move?
If your Harbor Breeze Fan does not move, the power may be off or a fuse may be blown. Turn the power on or check the fuse.
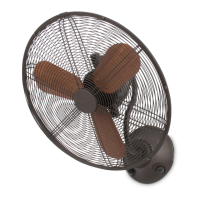
What to do if my Harbor Breeze Fan is wobbling?
If your Harbor Breeze Fan is wobbling excessively: 1. Turn the power off. Carefully loosen the hanging bracket set screw and verify the wall mounting bracket is secure. 2. Remove the front cage screws and tighten the blade assembly set screw securely.
GFCI protection required for damp locations to prevent electrical hazards.
Use provided bracket, secure to structural support like studs, not drywall.
Wear gloves when handling fan parts with sharp edges to prevent injury.
Avoid solid-state speed controls or dimmers; use the fan's own controls.
Install out of reach of children; the fan is not a toy.
Do not use the fan if the power cord or plug is damaged.
Avoid extension cords; if used, must be listed and only one.
Use only provided parts; non-provided parts void warranty.
Shut off power at the main switch or breaker before proceeding.
Seek assistance for safe and efficient installation due to fan bulkiness.
Check all parts against lists before assembly; do not assemble if parts are missing/damaged.
Estimated time for assembly is 90 minutes.
Lists required tools not included with the fan.
Lists helpful tools not included with the fan.
Ensure wall mounting bracket is securely attached to support fan weight to prevent injury/death.
Check all screws, bolts, and nuts on the fan assembly are secured.
Turn off power at circuit breakers and wall switch before starting assembly.
Mount on indoor/enclosed walls with 7 ft. floor clearance to prevent blade contact.
Ensure wood studs/posts are thick/wide enough to support bracket and fan weight.
Determine fan position, locate stud, mark bracket holes on wood support.
Use all four mounting holes on the bracket for installation to prevent hazards.
Drill pilot holes with 3/32-in. bit and attach bracket with wood screws.
Use correct hardware for bracket installation as it supports the fan assembly.
Hang fan assembly by aligning slots with bracket hooks and pulling down.
Ensure all four hooks/slots engage securely for stability to prevent injury/death.
Replace and securely tighten the set screw (G) at the bottom of the fan assembly.
Align front motor holes with back cage center holes for attachment.
Secure the back cage using four back cage screws (CC) into the motor assembly.
Remove the blade assembly nut (F) from the fan motor shaft by turning clockwise.
Place blade assembly onto shaft, align gap with pin, tighten set screw with Allen wrench.
Re-attach blade assembly nut (F) and turn counterclockwise to secure the blade assembly.
Attach front cage to back cage using screws, ensuring hooks and holes align.
Plug the fan's power cord into a suitable wall outlet.
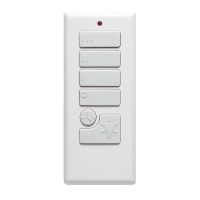
Test fan speeds using the wall control: Off, High (H), Medium (M), Low (L).
Test oscillation by turning the wall control from Off to On.
Tighten screws twice yearly; clean with soft brush/cloth to avoid scratches.
Unplug fan, open fuse cover, remove fuse with pliers, replace if blown.
Use replacement fuse rated 5 amps, 125 volts.
Check power is on or fuse is blown.
Allow break-in period, especially at higher speeds.
Ensure secure mounting and tighten blade assembly set screw.
Covers defects in workmanship/materials from shipment date.
Present sales receipt; removal/reinstallation costs are purchaser's responsibility.
Excludes damage from accident, misuse, improper installation, or non-manufacturer parts.
Disclaims implied warranties; limits liability for incidental/consequential damages.
Call customer service for replacement parts. Contact details provided.
| Brand | Harbor Breeze |
|---|---|
| Model | JP18EB3 |
| Category | Fan |
| Language | English |