INITIAL INSTALLATION
7
Lowes.com/harborbreeze
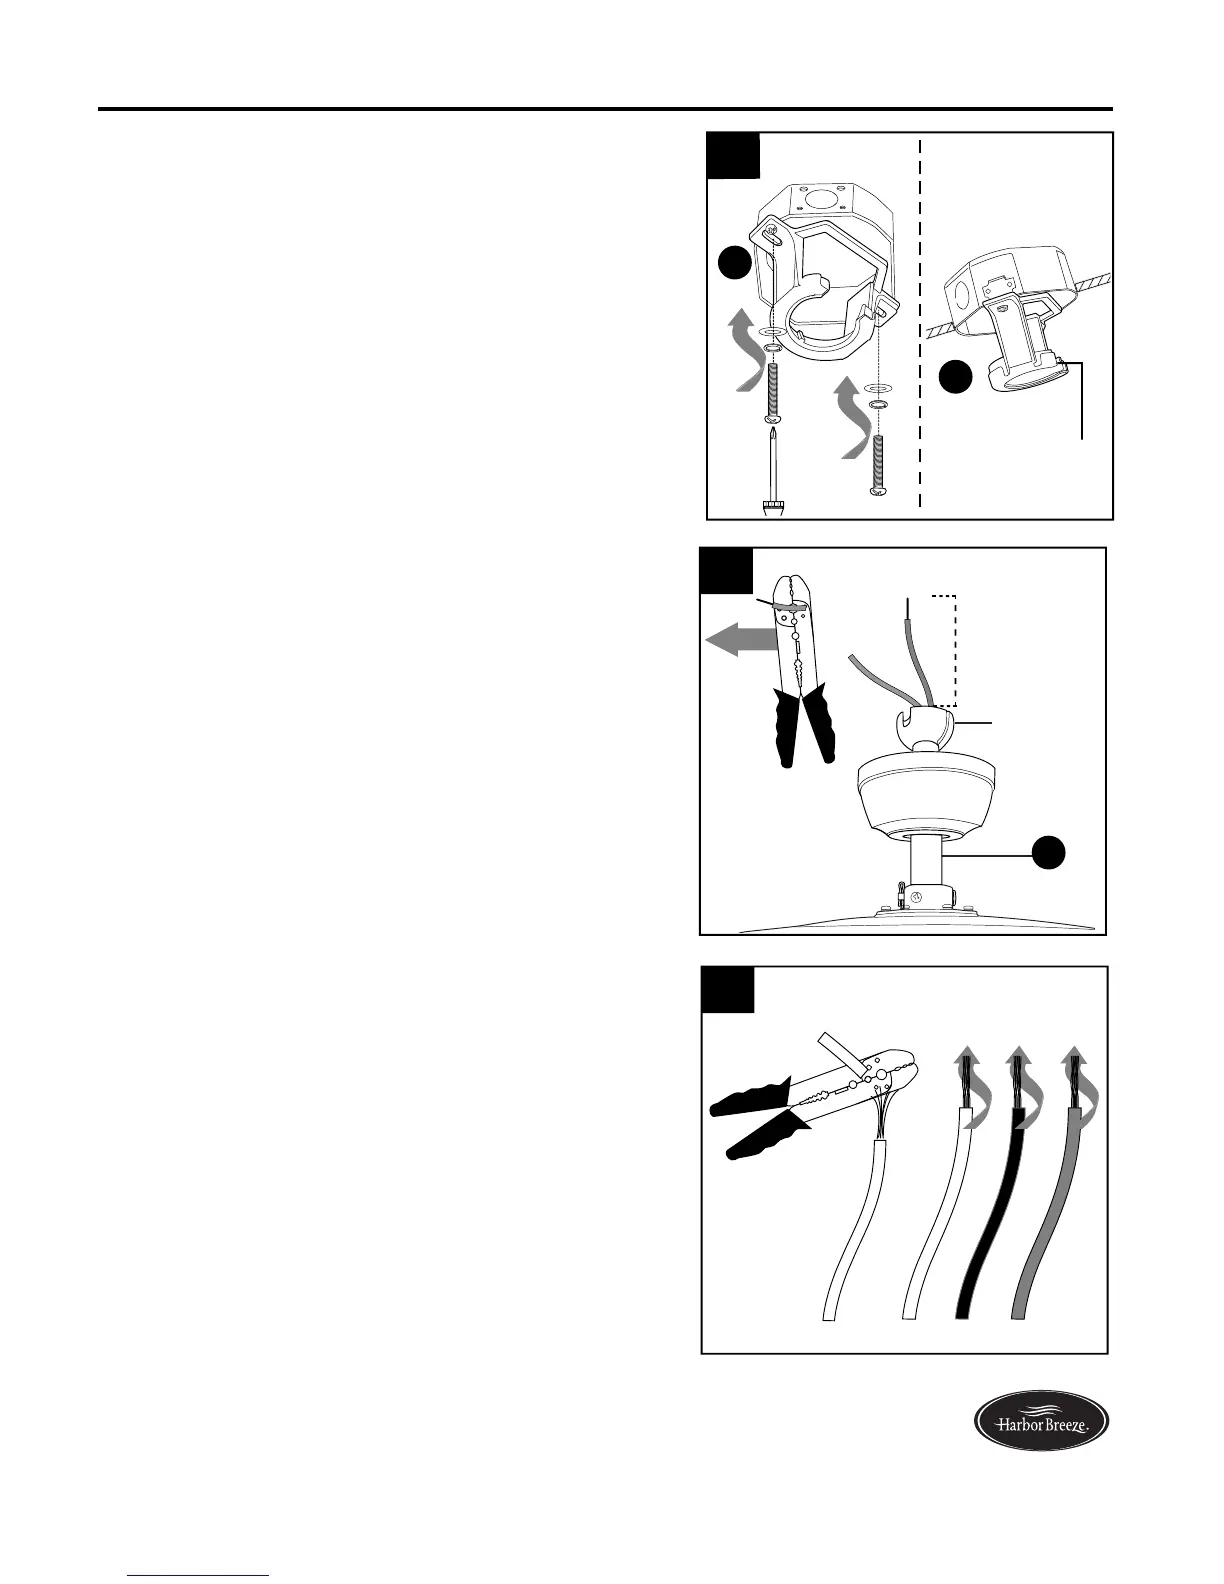
You may need to cut the lead wires back to simplify
the wiring. If you decide to cut back the lead wires, it
is suggested you do so in the following manner:
Take the lead wires and make sure you have pulled
them all the way through the top of the downrod.
Start at the TOP of the hanging ball on the downrod
and measure 8 in. of lead wire, and then cut the
excess wire off with wire cutters (not included).
NOTE: If you do not cut back the lead wires, Steps
5 and 6 are not necessary and you may proceed
to Step 7 instead.
5.
4.
If you cut back the lead wires in Step 5, strip 1/2 in.
of insulation from end of white wire. Twist stripped
ends of each strand of wire within the insulation
with pliers. Repeat Step 6 for black, blue (if
applicable) and green wires.
6.
5
6
Hanging
Ball
A
8 in.
Secure mounting bracket (C) to outlet box (not
included) using screws, spring washers and flat
washers provided with the outlet box.
*NOTE: It is very important you use the proper
hardware when installing the mounting bracket
(C) as this will support the fan.
IMPORTANT: If using the angle mount, make
sure open end of mounting bracket (C) is installed
facing the higher point of the ceiling.
Open End
4
C
C
ANGLE MOUNTSTANDARD MOUNT
 Loading...