6 - Maintenance
84
• Max. drum diameter: 302 mm (Small drums)
• Max. drum diameter: 402 mm (Large drums)
• Min. lining thickness: 2.0 mm
±
WARNING! The specified minimum thickness is the absolute minimum, which must never be exceeded. Replace the
parts, if they would reach the above dimensions before the next service inspection.
±
WARNING! Renewal of brake linings or brake drums must be done for both sides at the same time.
μ
ATTENTION! If the brake drum must be removed from the wheel hub, a hydraulic press is required to press the wheel
studs out.
10. Remove the clevis pin between the air diaphragm cylinder and the
brake cam lever.
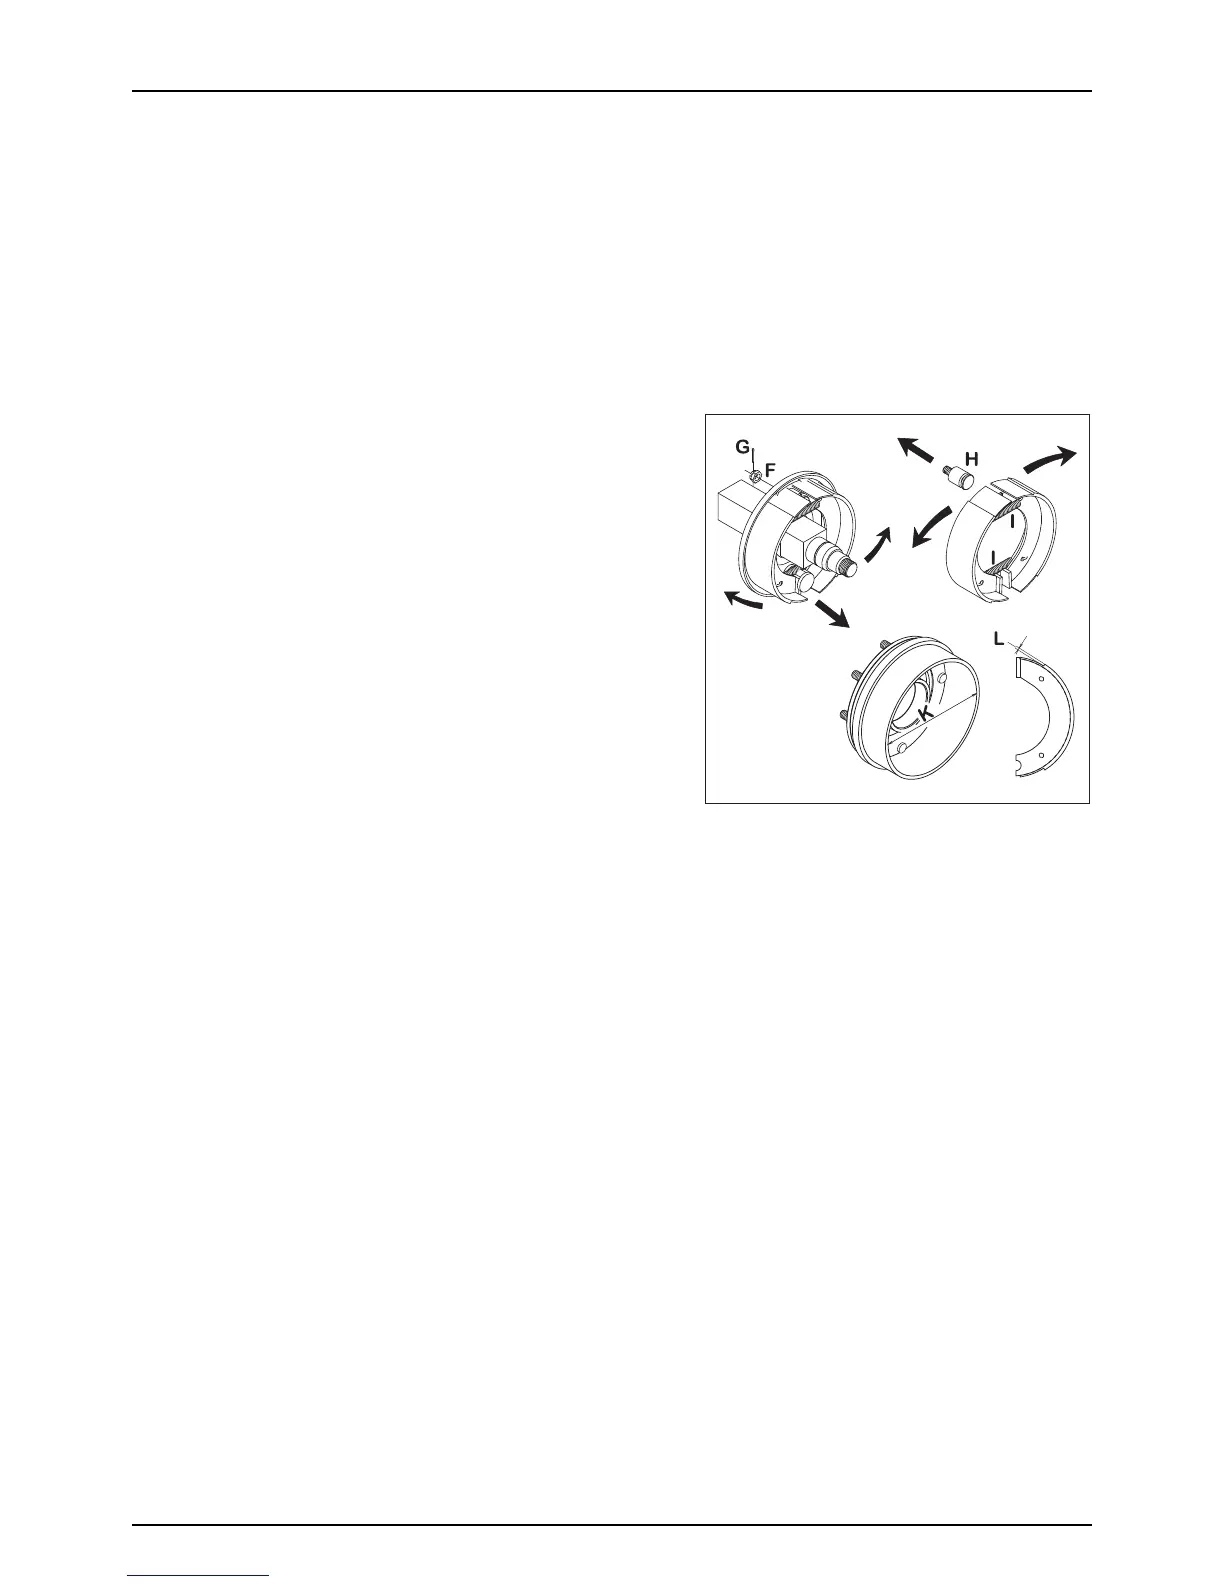
11. Remove the cotter pin (G), castle nut (F) and the brake shoe anchor
bolt (H), and slide the brake shoes over the cam. Twist the pair of
brake shoes to remove the shoe return springs (I). Replace the
brake shoes, if the linings are worn.
12. Apply a small amount of copper paste on moving parts and
reassemble the brake shoes and shoe return springs (I).
±
WARNING! Do not get copper paste in contact with the brake
linings and drums.
13. Fit the shoe assembly with the anchor bolt (H) first. Then pull the
shoes away from each other and slide them over the cam
afterwards. Tighten the anchor bolt castle nut (F) again, and fit a
new cotter pin (G).
14. Check roller bearings for discolouration and wear. Replace if worn
or damaged.
15. Assemble drum (D) and bearings (E) using a new sealing ring (J).
16. Fill the hub and bearings with new grease, before fitting them to the wheel axle.
±
WARNING! Do not get oil or grease in contact with the brake linings and drums.
17. Fit the castle nut (C). Rotate the brake drum (D) and tighten the castle nut (C), until a slight rotation resistance is felt.
18. Loosen the castle nut (C) again, until the first notch is aligned with the cotter pin hole in the axle.
μ
ATTENTION! The shaft has a vertical and an horizontal cotter pin hole. Use the one first aligned with the notch when
loosening the castle nut.
19. Fit a new cotter pin (B) and bend it to keep it in place.
20. Fit the hub cap (A) to the hub. Slightly tighten the 6 bolts.
21. Fit the wheel again and tighten the wheel nuts. See “50 Hours Service - Wheel Nuts” on page 81 regarding torque
wrench setting. Tighten all bolts to half the specified torque at first, then tighten to the full specified torque.
22. Tighten again after 10 hours of work. Check the torque every day, until it is stabilised.
±
If you do not feel totally confident changing wheel bearings or brakes, then contact your HARDI dealers workshop.
 Loading...