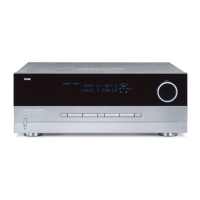
Basic Operation
NOTE: Once a program has been encoded
with surround information, it retains the
surround matrix as long as the program
is broadcast in stereo. Thus, movies with
surround sound will carry surround
information when they are broadcast via
conventional TV stations, cable, pay TV
and satellite transmission. In addition, a
growing number of made-for-television
programs, sports broadcasts, radio dramas
and music CDs are also recorded in
surround sound. You may obtain a list of
these programs and discs from the Dolby
Laboratories web site at www.dolby.com
Surround modes may be selected in one
of three ways.
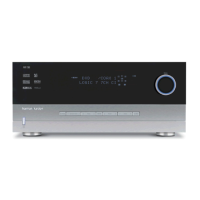
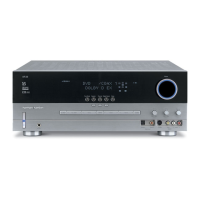
From the front panel, use the Mode
⁄
or Mode ¤ buttons @ to scroll
through the list of modes. The selected
mode will appear in large letters in the
front panel display, and in a two-line
reminder on the video screen. Once the
selection is made, the mode will continue
to appear in a smaller indicator B at
the bottom of the front panel display
(see figure 9).
From the remote, modes may be selected
by simply pressing the button y that
corresponds to the desired mode.
Modes may also be selected using the
on-screen display. Press Select j on
the remote to display the MAIN MENU.
Then press ¤ i so that the on-screen
cursor is next to SURROUND MODE.
Press Select j again to move to the
next menu.
At the Surround Mode Menu, press the
‹ or › buttons i until the desired
mode name appears on the screen. Press
¤ until the on-screen cursor > is next
to RETURN TO MAIN MENU and
press Select j. At the main menu
select MENU OFF and press Select j
to exit the menus.
A different mode may be selected for
audio and video sources. Once a mode
has been selected, it will be attached to
those sources in memory. Thus, you
may select PRO LOGIC as the mode for
one video source and HALL for another.
After the initial selections are made, the
unit will automatically return to your
preferred mode for each type of input
whenever it is chosen.
Digital Audio Sources
When the source is connected to the
AVR75 and playing digital audio infor-
mation, first select it using the front
panel or remote input selectors, and then
press the appropriate digital input using
the Digital Input Selectors g9on
the remote or front panel. Depending on
the type of digital source in use, the
AC-3 indicator A will light when a
Dolby Digital signal is present, or the
PCM indicator Q will light when a
standard two-channel S/P-DIF-type
digital signal is present.
Once a Dolby Digital signal is detected
the unit will automatically switch to the
Dolby Digital mode. When a PCM digital
source is detected you may select any of
the surround modes except Dolby Digital.
NOTE: The Dolby Digital mode should
not be selected when PCM digital or
analog signals are present. If the Dolby
Digital mode is selected when an AC-3
signal is not detected, the AVR75 will
default to the STEREO mode.
For information on using Digital Audio
Sources, see the Advanced Features
section of this manual.
IMPORTANT NOTE: Many people
incorrectly presume that sound should
always be heard from the surround
channels. In reality, it is normal for
the surround channels to operate occa-
sionally, and often to be silent. Movie
directors and sound mixers typically
use these channels only when needed to
create an effect or establish ambience.
Artificially increasing the volume level
to the surround channels may destroy
the illusion of surround audio and add
unwanted noise to your system.
Tuner Operation
The AM/FM tuner is extremely flexible,
and offers a number of options. The
following instructions will enable you
to take advantage of the tuner’s many
features.
To select tuner operation, press the
AM/FM button 2 on the front panel,
or the remote h. Press the button again
to select the desired frequency band if
required.
Up/down tuning is accessible by pressing
the Tune button Ò on the front panel
either up ⁄ or down ¤ or the
‚ TUNE/SEARCH —
buttons s on the remote. Pressing
these buttons once increases or decreases
the station frequency by one step.
Holding the buttons down quickly scans
for the next station. Holding the tune
buttons for a few seconds and then re-
leasing them will change the tuner to the
next station with an acceptable signal.
22
AVR75 120 rev (c) 8/27/97
AVR75 om (c) 9/16/98 11:33 AM Page 22
 Loading...