AVR75 120 rev (c) 8/27/97
On-Screen Display
AUDIO or VIDEO. When either input
type is highlighted in reverse video use
the ‹ or › buttons i to select the
source you wish to listen to or view.
Remember that the video source should
be selected first when you wish to watch
one source and listen to another.
To select a digital audio input use the
⁄ or ¤ buttons i to position the on-
screen cursor >next to DIGITAL. Press
Select j and note that the word
DIGITAL will be highlighted in reverse
video. Then use the ‹ or › buttons i
to select the desired digital source. Note
that when any digital source is selected,
the audio source will indicate
**
.
You may also use this menu to turn the
attenuation, or ATT, function on or off
for a source by moving the cursor to the
ATT line and using the ‹ or › buttons
i to select ON or OFF. When the ATT
function is enabled the input level is
reduced to prevent overloading the input
circuits.
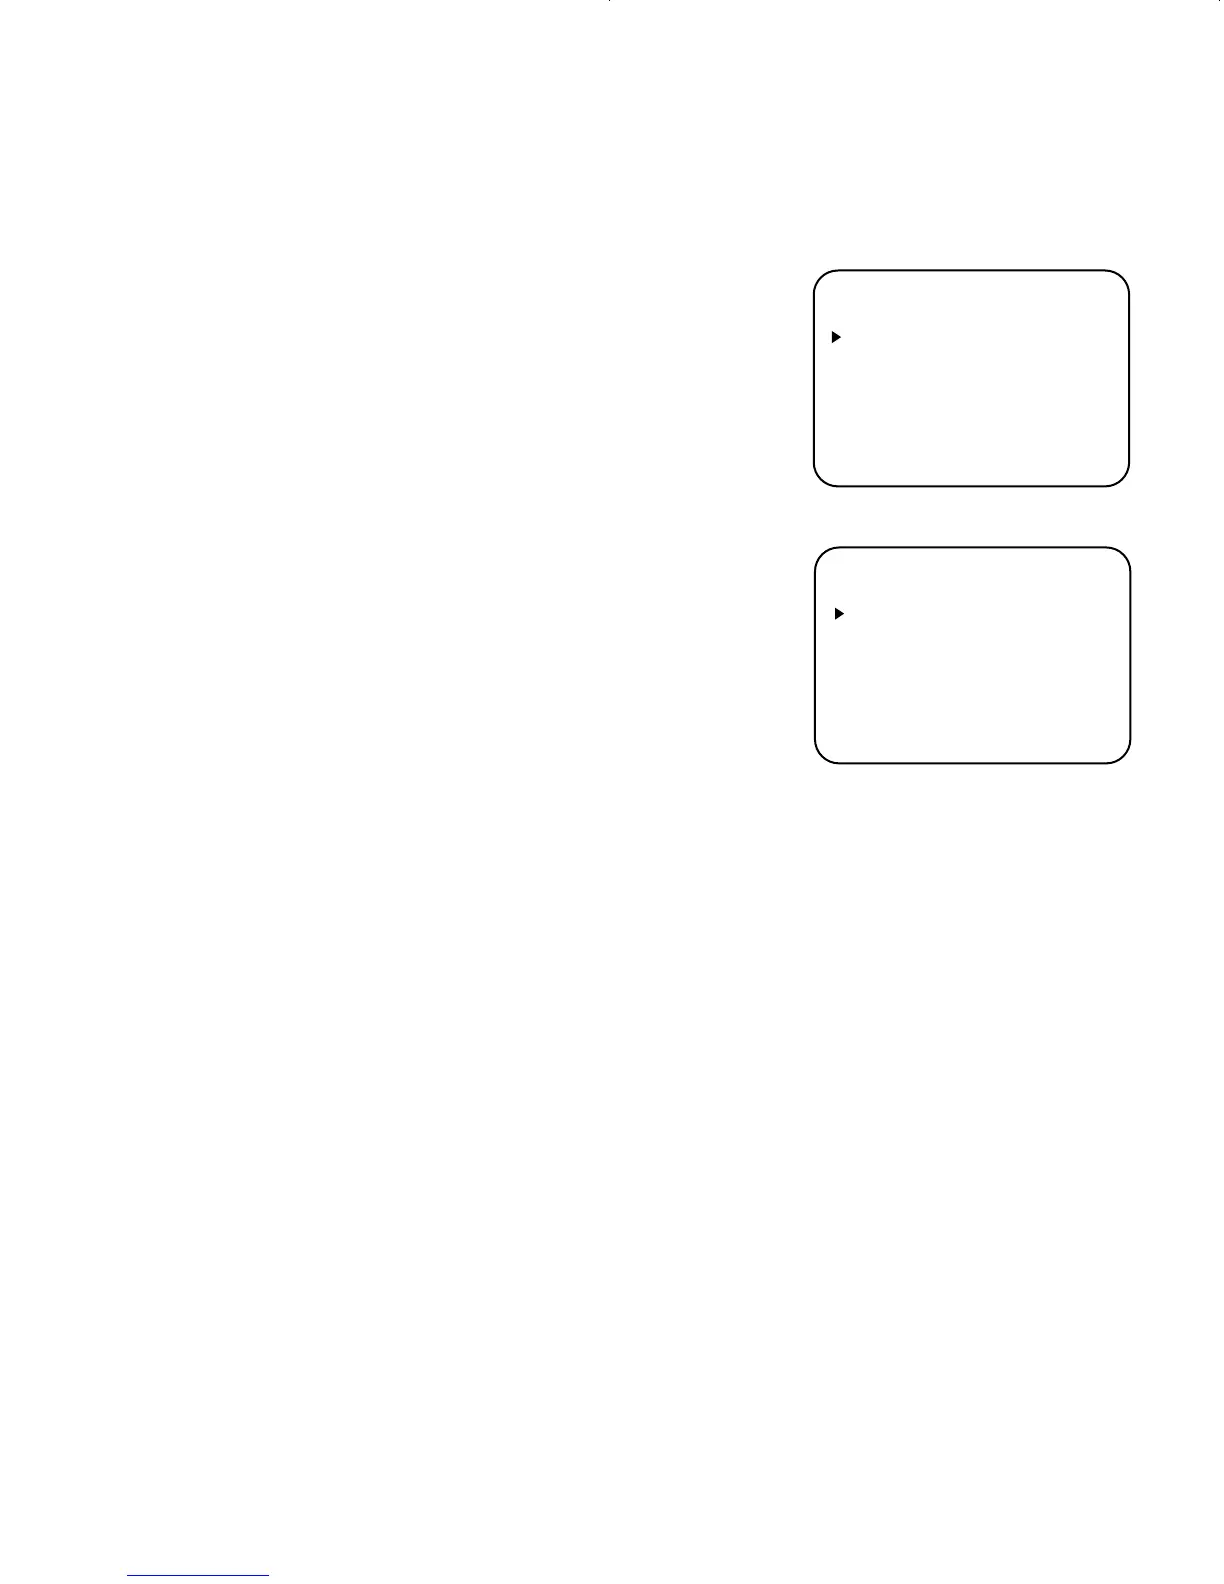
SURROUND MODE: At this menu (see
figure #15) you may change the
surround mode by using the ⁄ or ¤
buttons i to position the on-screen
cursor > next to MODE and using the
‹ or › buttons i to select the desired
mode. To change the delay time position
the cursor next to SURROUND CH and
then use the ‹ or › buttons i to select
desired delay time for the surround
channels. Note that an adjustment for
the delay time of the center channel is
possible only in the Dolby Digital mode.
TEST TONE: At this menu you
may adjust the front and surround
speaker output levels. For information
on this procedure, refer to the System
Configuration section of this manual.
SET UP MENU: For information on
using the Setup menus, refer to the
System Configuration section of this
manual.
SLEEP TIMER SET: This enables you
to set the sleep timer, which will place the
unit in a standby mode after a set period
of time. To reach this menu, press the ⁄
or ¤ buttons i to position the on-
screen cursor >next to SLEEP TIMER
and press Select j. At the next screen,
the SLEEP TIMER SET menu (see fi
gure #16) the cursor will be next to
TIMER SET. Use the ‹ or › buttons
i to select the amount of time before
turn off and note that the time will blink.
Press the ¤ button so that the on-screen
cursor >
is next to TIMER OFF ON. Use the
‹ or › buttons i to highlight ON and
press Select j. The time figure will
stop flashing indicating that the timer
has been started. Press ¤ one more time
so that the cursor is next to RETURN
TO MAIN MENU and press Select j.
Note that when the MAIN MENU returns
to the screen the time figure
will appear next to the words SLEEP
TIMER. You may check the time
remaining before shut off at any time
by pressing the Sleep button z on
the remote and viewing the front panel
or on-screen display (see figure #12).
Position the on-screen cursor >next
to MENU OFF at any time to exit the
menu system and return to normal
operation.
27
SLEEP TIMER SET
TIMER SET 10min
TIMER OFF ON
RETURN TO MAIN MENU
Figure 16
MODE :PRO LOGIC
DELAY TIME CONTROL
CENTER CH :NONE
SURROUND CH :2ms
RETURN TO MAIN MENU
SURROUND MODE
Figure 15
AVR75 om (c) 9/16/98 11:33 AM Page 27

 Loading...