EasyManua.ls Logo

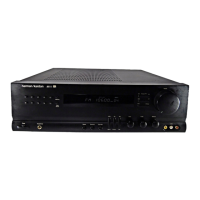
Harman Kardon AVR154 User Manual

Harman Kardon AVR154
140 pages
To Next Page IconTo Next Page
Page #1 background imageLoading...
Page #1 background image
harman/kardon
AVR154
5 X 30W 5.1 CHANNEL A/V RECEIVER
SERVICE MANUAL
CONTENTS
ESD WARNING……………………………….2
LEAKAGE TESTING……………….…..…....3
BASIC SPECIFICATIONS…………………..4
PACKAGING…………………………….……5
FRONT PANEL CONTROLS………..…..…..6
REAR PANEL CONNECTIONS………….…8
REMOTE CONTROL FUNCTIONS……….10
CONNECTIONS/INSTALLATION………....13
OPERATION………………………...………24
TROUBLESHOOTING GUIDE…...……..…29
REMOTE & PROCESSOR RESETS……....30
DISASSEMBLY...…………………………..31
UNIT EXPLODED VIEW…………..…….…..32
EXPLODED VIEW PARTS LIST……………33
AMP BIAS ADJUSTMENT……………….…34
BLOCK DIAGRAM…………………………..35
PCB DRAWINGS……………………………36
ELECTRICAL PARTS LIST………..….……42
SEMICONDUCTOR PINOUTS…….………71
SCHEMATICS………….….……………….132
WIRING DIAGRAM…….….……………….140
harman/kardon, Inc.
250 Crossways Park Dr.
Released 2008 Woodbury, New York 11797 Rev0 5/2008
Discontinued XXXX
Question and Answer IconNeed help?

Do you have a question about the Harman Kardon AVR154 and is the answer not in the manual?

Harman Kardon AVR154 Specifications

General IconGeneral
Channels5.1
Total Harmonic Distortion0.07%
Frequency Response20Hz - 20kHz
HDMI Inputs3
Component Inputs2
Composite Inputs3
HDMI Outputs1
Component Outputs1
Composite Outputs1
Audio Formats SupportedDolby Digital, DTS
Dimensions (W x H x D)17.3 x 5.9 x 13.2 inches
Weight18.5 lbs
TypeAV Receiver
Input Sensitivity200mV
Input Impedance47k ohms
Video UpscalingNo
AM/FM TunerYes
Digital Optical Inputs2
Digital Coaxial Inputs1
Analog Audio Inputs4
Subwoofer Outputs1
Speaker TerminalsBinding Post
Power Output (RMS)50W per channel (8 ohms, 20Hz-20kHz, 0.07% THD)

Summary

ELECTROSTATICALLY SENSITIVE (ES) DEVICES

SAFETY PRECAUTIONS

LEAKAGE CURRENT CHECK

Procedure to check for electrical leakage to prevent shock hazards during servicing.

TECHNICAL SPECIFICATIONS

ACCESSORIES AND PACKAGE

Instruction Manual & Accessories

Information on included manuals and accessories.

Package Drawing

Illustration showing the product packaging.

FRONT-PANEL CONTROLS

REAR-PANEL CONNECTIONS

REMOTE CONTROL FUNCTIONS

CONNECTIONS

Speaker Connections

Details on connecting speaker wires, polarity, and binding posts.

Subwoofer Connection

Connecting a powered subwoofer to the AVR's subwoofer output.

Connecting Source Devices to the AVR

Guidelines for connecting various source components to the receiver.

CONNECTIONS (Continued)

Audio Connections

Types of digital and analog audio connections, coaxial and optical.

Video Connections

Overview of video connection types like HDMI, S-Video, Composite.

CONNECTIONS (Continued)

Antenna Connections

Connecting FM and AM antennas for radio reception.

INSTALLATION

Connecting Speakers

How to connect loudspeakers to the receiver's speaker terminals, ensuring correct polarity.

Connecting the Subwoofer

Connecting the subwoofer output to the subwoofer's line-level input.

Connecting Antennas

Connecting the provided FM and AM antennas to the receiver's terminals.

Connecting Source Components

Guidelines for connecting various source devices like DVD players, CD players, etc.

INSTALLATION (Continued)

Connecting Disc Players (DVD, SACD, Blu-ray)

Detailed steps for connecting various disc players via HDMI, component, or composite video.

Connecting Audio/Video Recorders (PVR, DVR, TiVo)

Instructions for connecting recorders for recording and playback.

Connecting Broadcast TV Sources (Cable, Satellite, HDTV)

How to connect TV sources for broadcast reception.

INSTALLATION (Continued)

Connecting CD Players and Audio-Only Devices

Connecting CD players, MP3 players, or other audio sources.

Connecting Tape Decks and Audio Recorders

Connecting tape decks and audio recorders for playback and recording.

Connecting Portable Audio Players

Connecting portable music players via headphone jack or audio inputs.

Connecting Game Consoles, Cameras, Other Devices

Connecting temporary devices using front-panel inputs.

INSTALLATION (Continued)

Connecting the Video Display

Connecting the receiver's video outputs to the TV for viewing menus and sources.

Plugging in AC Power

Connecting AC power cords to all components and the receiver.

Inserting Remote Batteries

Instructions for inserting batteries into the remote control.

INSTALLATION (Continued)

Programming the Remote Control

How to program the remote to control various source devices like VCRs, DVD players, TVs.

INSTALLATION (Continued)

Turning On the AVR 154

Initial steps to power on the AVR for the first time after setup.

OPERATION

Turning On the AVR 154

How to turn the AVR on from standby mode using the unit or remote control.

Sleep Timer Function

How to set the sleep timer to automatically turn off the receiver.

Volume and Mute Controls

Adjusting volume levels and using the mute function for temporary silence.

Tone Controls

Adjusting bass and treble frequencies to modify the audio output.

OPERATION (Continued)

Source and Input Selection

Selecting audio/video sources and assigning inputs on the AVR.

Headphones Use

How to connect and use headphones with the AVR for private listening.

OPERATION (Continued)

6-Channel Direct Input Usage

Connecting and using multichannel audio sources via 6-channel inputs.

Using the Built-in Tuner

How to select radio stations using the front panel or remote control.

OPERATION (Continued)

Recording Capabilities

Connecting recorders and guidelines for making audio and video recordings.

Auxiliary Audio Input

Connecting portable audio players to the AUX input for playback.

OPERATION (Continued)

Selecting a Surround Mode

Choosing various surround sound modes for an immersive audio experience.

TROUBLESHOOTING GUIDE

REMOTE & PROCESSOR RESETS

Resetting the Remote Control

Steps to reset the remote control to its factory default settings.

Performing a Processor Reset

How to perform a system reset to restore factory defaults.

DISASSEMBLY

Removing the Top Cabinet

Instructions for removing the top cabinet of the AVR.

Removing the Front Panel

Steps to detach the front panel from the AVR unit.

Removing the Rear Panel

Procedure for removing the rear panel of the AVR.

Removing the Main PCB

Instructions for removing the main printed circuit board (PCB).
AVR154 EXPLODED VIEW

AVR154 ELECTRICAL PARTS LIST

AMPLIFIER SECTION BIAS ADJUSTMENT

AVR154 BLOCK DIAGRAM

WIRING DIAGRAM

Related product manuals