9/15/06 888-2586-001 2-3
WARNING: Disconnect primary power prior to servicing.
Section 2 Installation & Initial Turn-On
Platinum Z16HD+
2.5 Z16HD+ Transmitter Installation
Prior to installation, this Technical Manual and the appropriate Exciter Technical
Manuals should be carefully studied to obtain a thorough understanding of the
principles of operation, circuitry and nomenclature. This will facilitate proper
installation and initial checkout.
!
CAUTION:
ALL CONNECTIONS REFERRED TO IN THIS INSTALLATION PROCEDURE
SHOULD BE VERIFIED USING THE SCHEMATICS SUPPLIED WITH THE
TRANSMITTER. THE SCHEMATICS SHOULD BE CONSIDERED THE MOST
ACCURATE IN CASE OF A DISCREPANCY.
The Platinum Z16HD+ Transmitter installation is accomplished in the following order:
1. Transmitter cabinet
2. Visual Inspection
3. Power Supply Installation
4. Transmitter wiring
5. Initial checkout.
6. Remote Control Connections
2.5.1 Transmitter Placement
NOTE:
State, County, and Local Electrical Code may require more distance, but a mini-
mum clearance of 36 inches is recommended for front and rear access to system
equipment.
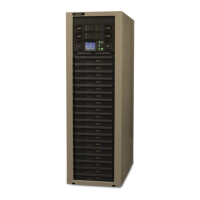
Set the transmitter in place on a level surface near power and signal cables. Either or
both sidewalls of the FM Transmitter may be placed against a wall or other equipment.
Complete access is through the front and rear of the transmitter. The floor must be
capable of supporting a load of 250 pounds per-square-foot (1221 kg per-square-meter)
(refer to Cabinet Outline drawing). Also be aware that the power supplies are very
heavy and roll out the front of the transmitter for maintenance. Be sure to have a smooth
flat surface in front of the transmitter of at least 36 inches for power supply
maintenance. For Dual transmitter installations be sure TX A is on the left and TX B is
on the right, as viewed from the front.
 Loading...

