16 – English
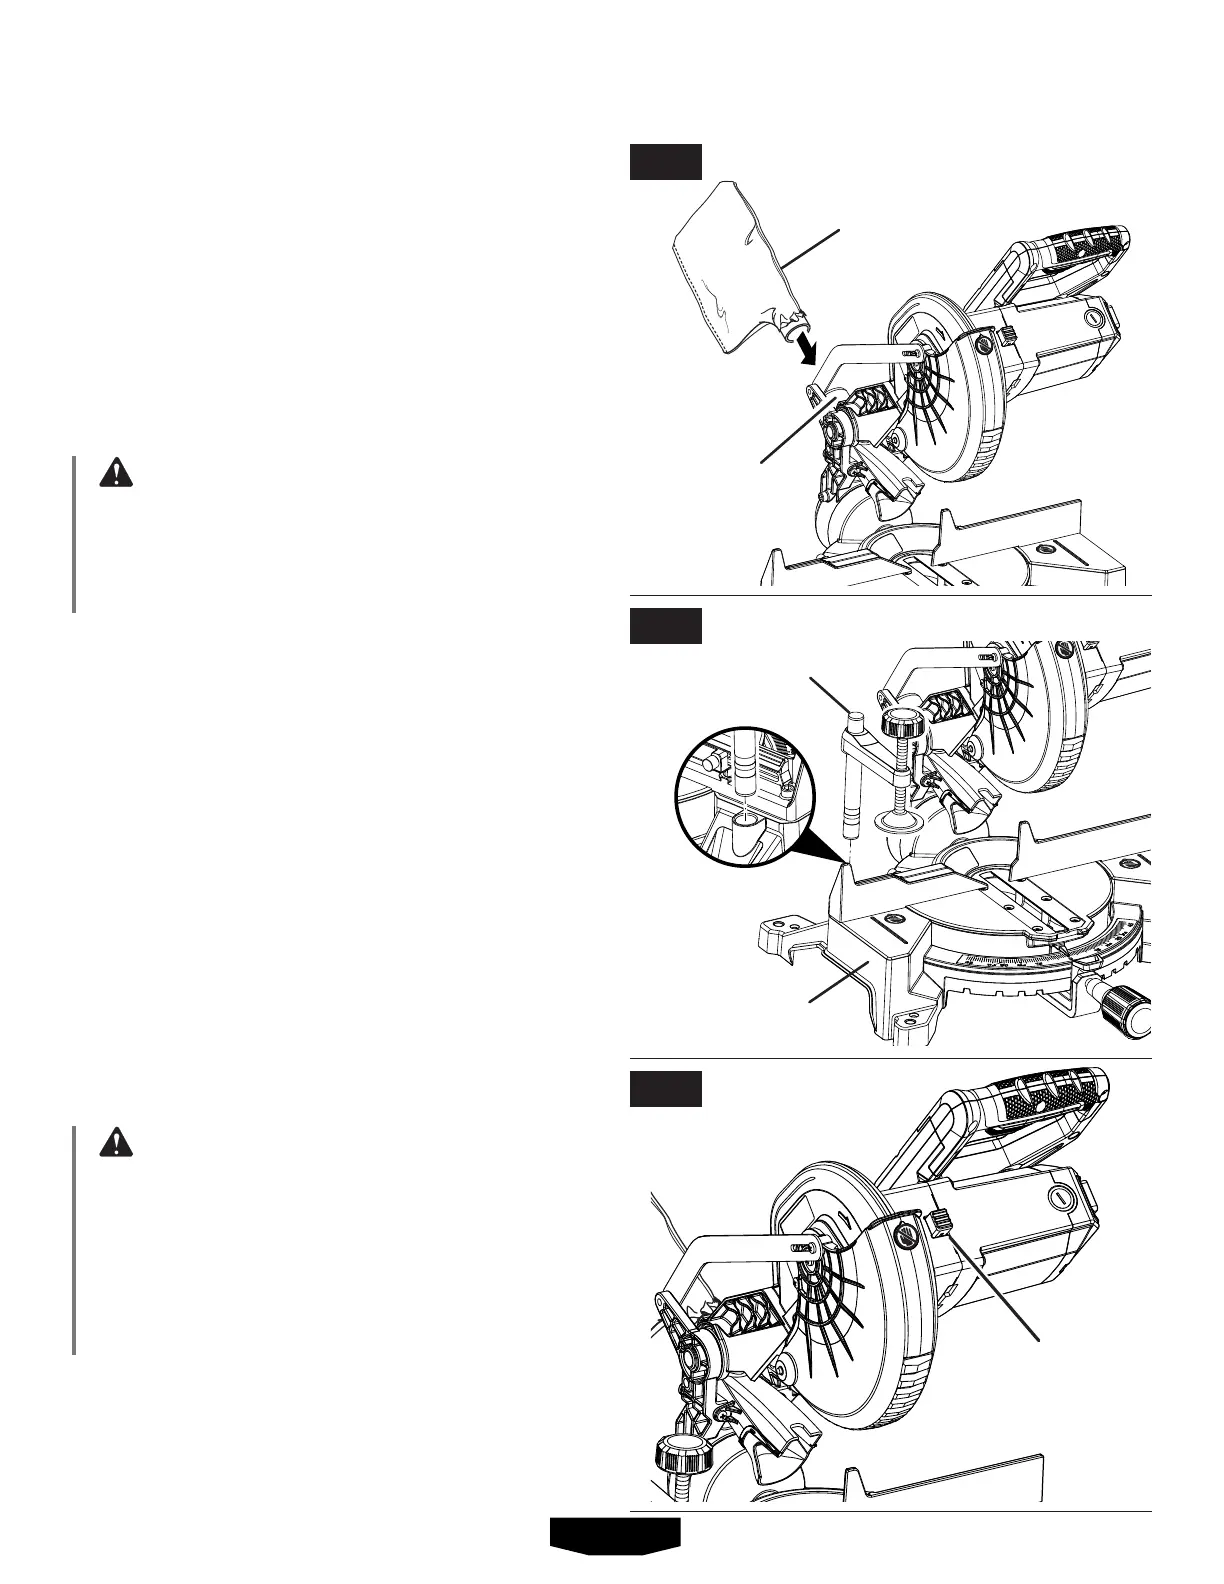
DUST BAG
See Figure 11.
Adustbagisprovidedforuseonthemitersaw.Itfitsover
theexhaustportontheupperbladeguard.Squeezethetwo
metalclipstoopenthemouthofthebagandslideitonthe
exhaustport.Releasetheclips.Themetalringinthebag
shouldlockinbetweenthegroovesontheexhaustport.
Toremovethedustbagforemptying,simplyreversethe
aboveprocedure.
WORK CLAMP
See Figure 12.
WARNING:
In some operations, the work clamp assembly
may interfere with the operation of the blade guard
assembly.Alwaysmakesurethereisnointerference
with the blade guard prior to beginning any cutting
operationtoreducetheriskofseriouspersonalinjury.
Theworkclampprovidesgreatercontrolbyclampingthe
workpiecetothetablesurface.Italsopreventstheworkpiece
fromcreepingtoward the sawblade.This isveryhelpful
whencuttingcompoundmiters.Dependingonthecutting
operationandthesizeoftheworkpiece,itmaybeneces-
sarytouseaC-clamporothersuitableclampinsteadofthe
workclamptosecuretheworkpiecetothemitertableprior
tomakingthecut.
To install the work clamp:
Placetheshaftoftheworkclampineitherholeonthe
mitertablebase.
Rotatetheworkclampknobtomoveitupordownas
neededtosecuretheworkpiece.
TO INSTALL/REPLACE THE BLADE
See Figures 13 - 14.
The bladeisshippedinstalledon this miter saw model.
Instructionshavebeenincludedforreferencewhenchang-
ingorreplacingblades.
WARNING:
A7-1/4in.bladeisthemaximumbladecapacityofthe
saw.Neveruseabladethatistoothicktoallowouter
bladewashertoengagewiththeflatsonthespindle.
Larger blades will come in contact with the blade
guards,whilethickerbladeswillpreventthebladebolt
fromsecuringthebladeonthespindle.Eitherofthese
situations could result in a serious accident and can
causeseriouspersonalinjury.
Unplugthesaw.
Raisethesawarm.
Rotatelowerblade guardupand back to exposethe
bladebolt.
DUST
BAG
EXHAUST
PORT
BASE
WORK
CLAMP
SPINDLE
LOCK BUTTON
ASSEMBLY
FIG. 11
FIG. 12
FIG. 13