17 – English
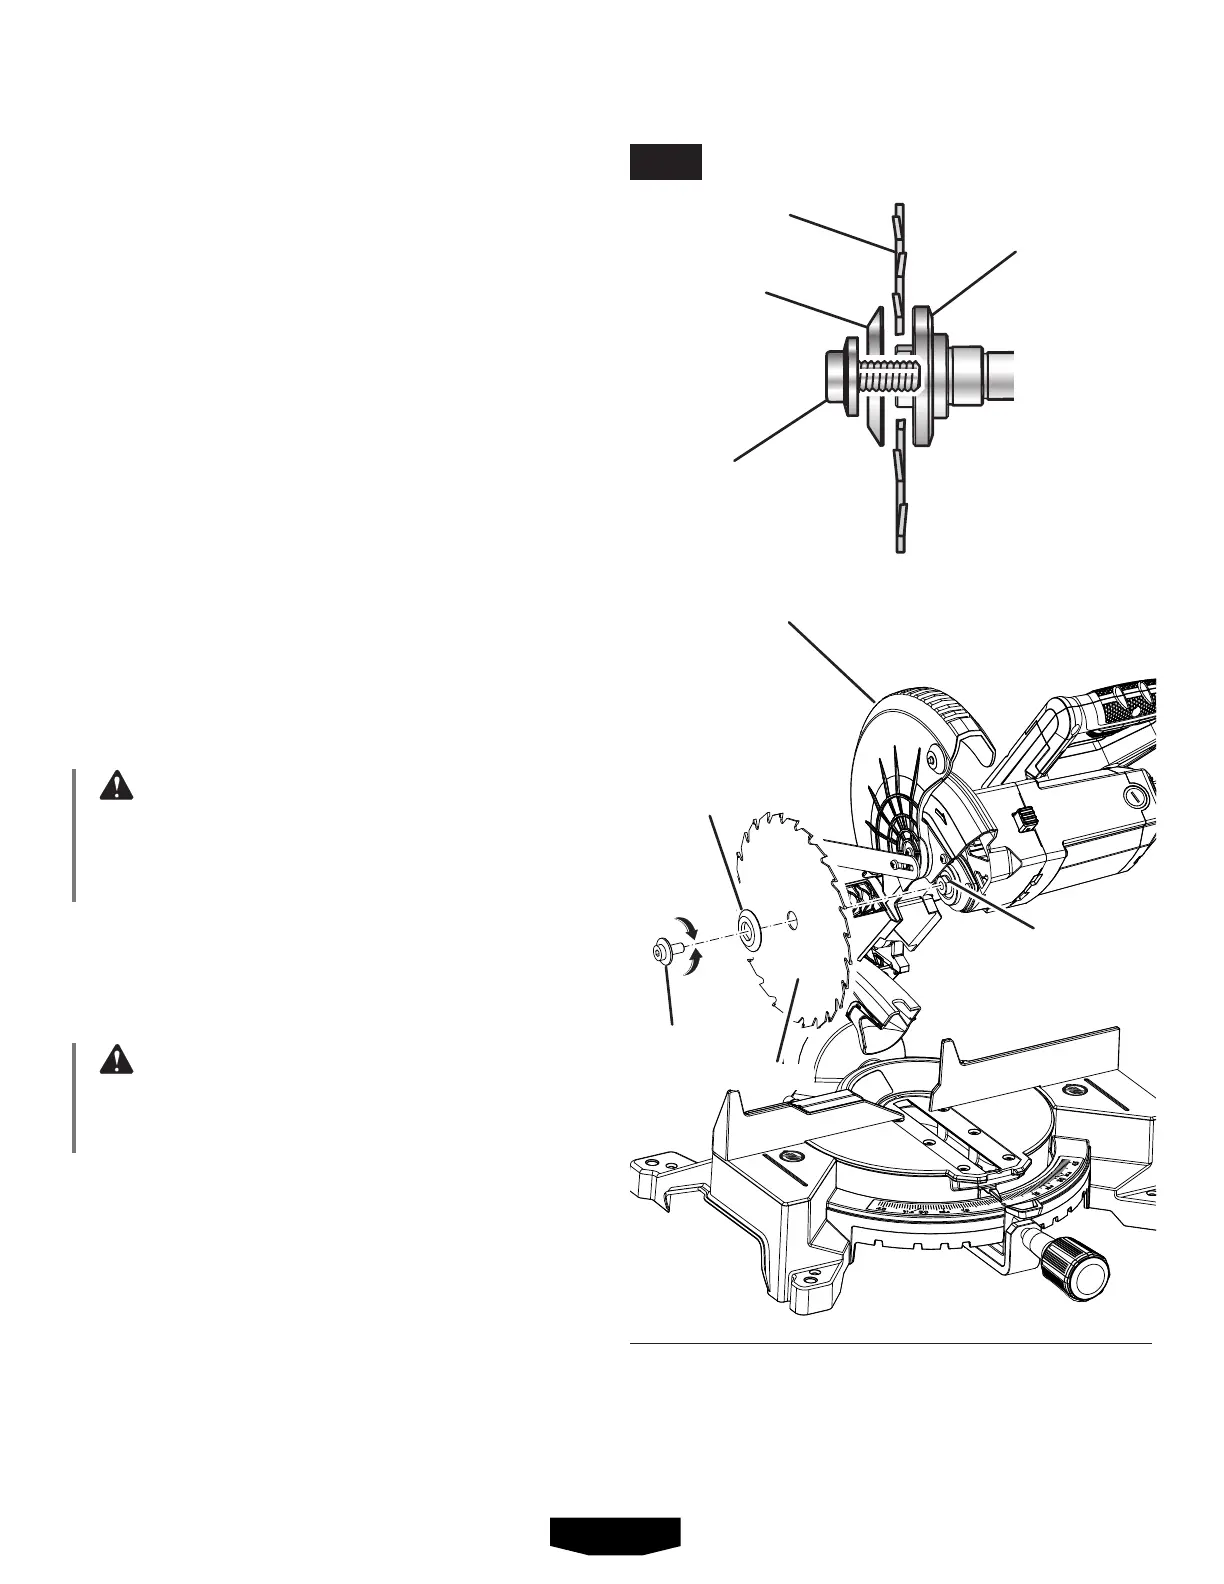
NOTE: Raisethebladeguarduntilresistanceismetand
continuetoraisetheguarduntil itreachesthelocked
openposition.
Depressandholdthespindlelockbuttonandrotatethe
bladeboltuntilthespindlelocks.
Usingthehexendofthebladewrench,loosenandre-
movethebladebolt.
NOTE: Thebladebolthaslefthandthreads.Turnblade
boltclockwisetoloosen.
Removeouterbladewasher.
NOTE: The inner bladewasherisintegratedinto the
spindleandcannotberemoved.
Wipeadropofoilontothespindleandouterbladewasher
wheretheycontacttheblade.
Fitsawbladeinsidelowerbladeguardandontospindle.
Thebladeteethpointdownwardatthefrontofsawas
showninfigure 14.
Replaceouterbladewasher.Thedouble“D”flatsonblade
washersalignwithflatsonspindle.
Depressandholdspindlelockbuttonandreplaceblade
bolt.
NOTE:Thebladebolthaslefthandthreads.Turnbladebolt
counterclockwisetotighten.
CAUTION:
Alwaysinstallthebladewiththebladeteethandthe
arrowprintedonthesideofthebladepointingdownat
thefrontofthesaw.Thedirectionofbladerotationis
alsostampedwithanarrowontheupperbladeguard.
Tightenbladeboltsecurely.
Lowerthebladeguard.
Raiseandlowerthesawarmtoensurelowerbladeguard
functionscorrectly.
WARNING:
Make sure the spindle lock button is not engaged
before reconnecting saw into power source. Never
engagespindlelockbuttonwhenbladeisrotating.
BLADE
BOLT
LOWER
BLADE GUARD
BLADE
TO
TIGHTEN
TO
LOOSEN
FLAT(S)
ON SPINDLE
OUTER BLADE
WASHER WITH
DOUBLE “D”
FLATS
OUTER
BLADE WASHER
BLADE
BLADE
BOLT
SPINDLE
ASSEMBLY
FIG. 14