18 – English
VIEW OF BLADE SQUARE WITH FENCE
MITER
TABLE
BLADE
SQUARE
MITER
FENCE
THROAT
PLATE
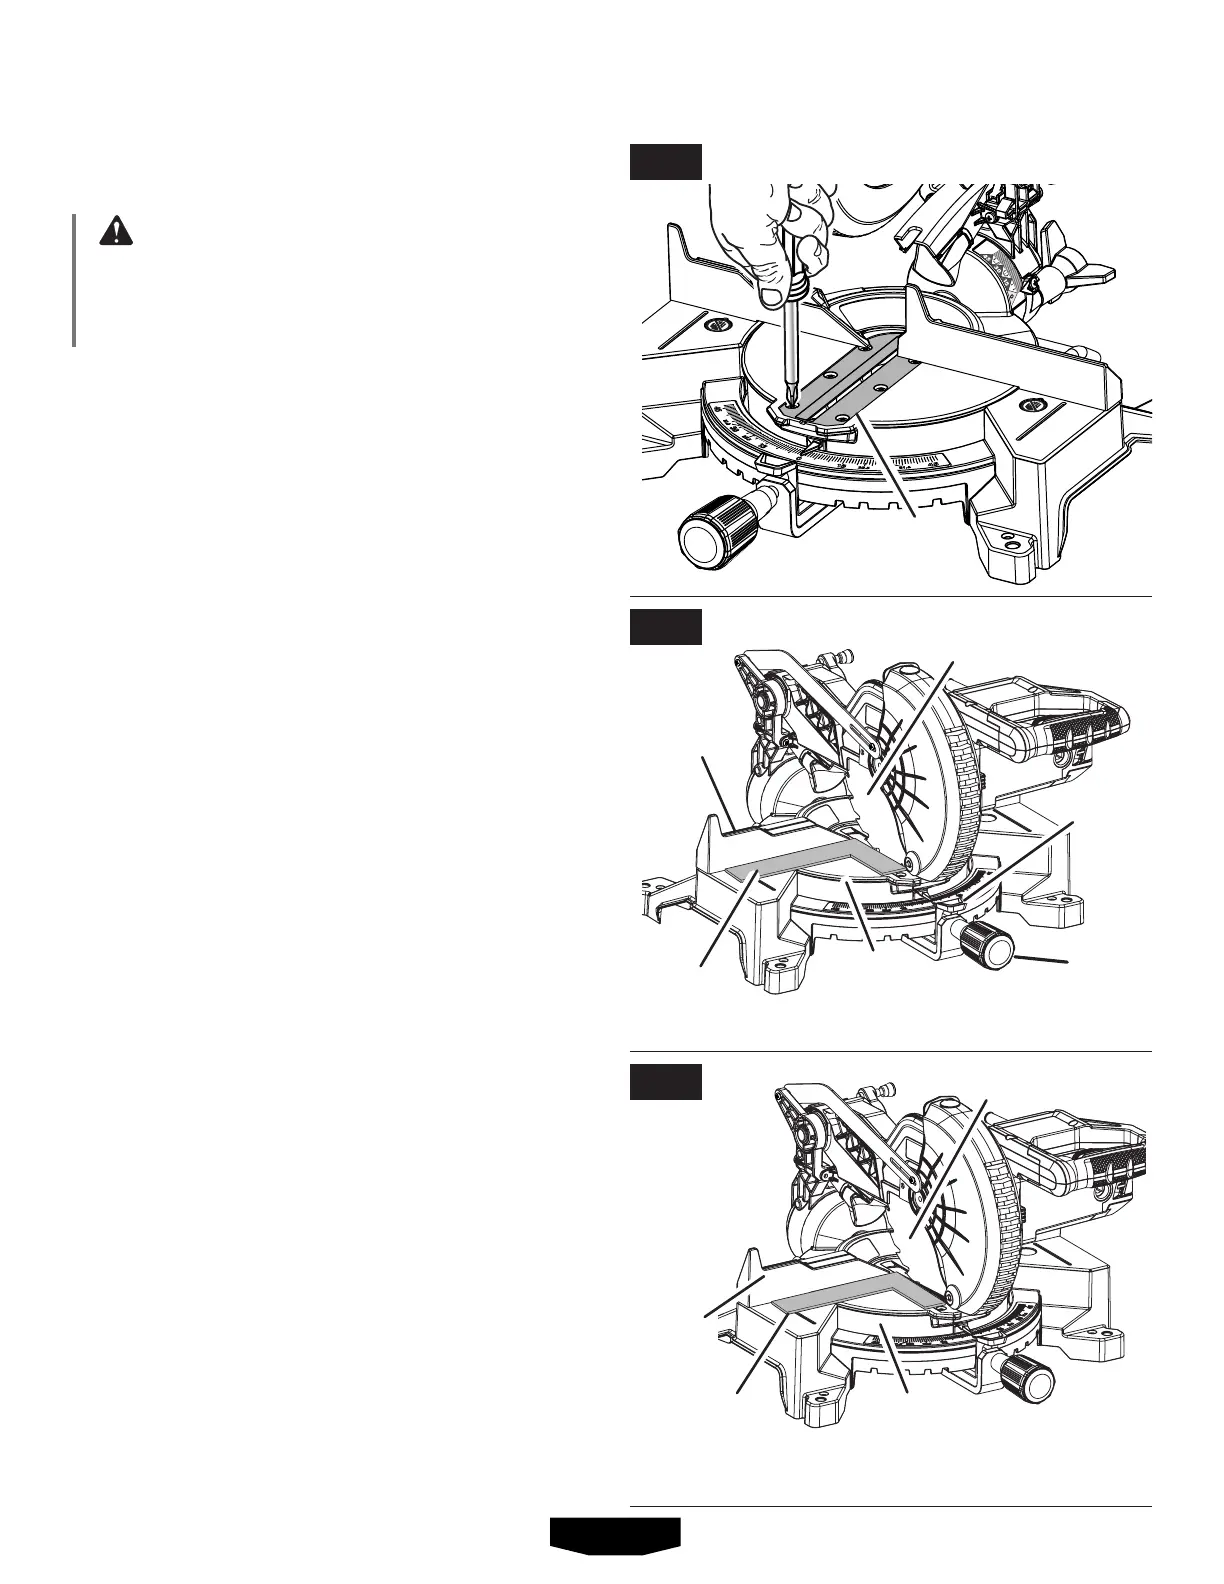
REMOVING/REPLACING THE THROAT PLATE
See Figure 15.
WARNING:
Thethroatplatemustbebelowthemitertable.Ifthe
throatplateistoohighortoolow,theworkpiececan
catchontheunevenedgesresultinginbindingwhich
couldresultinseriouspersonalinjury.
Neveroperatethesawwithoutathroatplateinstalled.
To remove/replace:
Unplugthesaw.
Removethescrewssecuringthethroatplate.
Liftthethroatplatefromthesaw.
Toreinstallthethroatplate,aligntheholesinthethroat
platewiththeholesinthesawbase.
Retighten thescrews,beingcarefulnottoovertighten
whichcancausethethroatplatetoboworbend.
NOTE:Manyoftheillustrationsinthismanualshowonly
portionsofthecompoundmitersaw.Thisisintentionalso
thatwecanclearlyshowpointsbeingmadeintheillustra-
tions.Never operate the saw without all guards securely
in place and in good operating condition.
SQUARING THE BLADE TO THE FENCE
See Figures 16 - 21.
Unplugthesaw.
Pullthesawarmallthewaydownandengagethelock
pintoholdthesawarmintransportposition.
Loosenthemiterlockknobapproximatelyone-halfturn
andpressthedetentreleasebutton.
Rotatethemitertableuntilthescaleindicatorisposi-
tionedat0°.
Releasethedetentreleasebutton,engagingthepositive
stopnotch,thentightenthemiterlockknobtosecurethe
mitertable.
Loosen bevellockknoband set sawarmat0° bevel
(bladeset90°tomitertable).Tightenbevellockknob.
Layasquareflatonthemitertable.Placeonelegofthe
squareagainstthefence.Slidetheotherlegofthesquare
againsttheflatpartofsawblade.
NOTE: Makesurethatthesquarecontactstheflatpart
ofthesawblade,notthebladeteeth.
The edgeofthesquare andthesawbladeshould be
parallelasshowninfigure 16.
Ifthefrontorbackedgeofthesawbladeanglesaway
fromthesquareasshowninfigures 17 - 18,adjustments
areneeded.
VIEW OF BLADE NOT SQUARE WITH FENCE,
ADJUSTMENTS ARE REQUIRED
MITER
FENCE
MITER
TABLE
BLADE
SQUARE
MITER
LOCK
KNOB
ASSEMBLY
FIG. 15
FIG. 16
FIG. 17
DETENT
RELEASE
BUTTON