Form No. TQ2M_CN-0519
7
English
INSTALLATION
General
Hatco Toast-Qwik
®
Conveyor Toasters are shipped with most
components pre-assembled. Care should be taken when
unpacking the shipping carton to avoid damage to the unit and
the components enclosed.
ELECTRIC SHOCK HAZARD: Unit is not weatherproof.
Locate unit indoors where ambient air temperature is a
minimum of 21°C (70°F) and a maximum of 29°C (85°F).
EXPLOSION HAZARD: Do not store or use gasoline or
other flammable vapors or liquids in the vicinity of this or
any other appliance.
FIRE HAZARD:
• Do not locate toaster under shelving or closer than
305 mm (12″) from the ceiling.
• Do not place anything on top of toaster. Do not
place toaster near or underneath curtains or other
combustible materials. Items near or on top of toaster
could catch fire causing injury and/or damage to the
toaster.
1. Remove the unit from the carton.
NOTE: To prevent delay in obtaining warranty coverage, complete
online warranty registration. See the IMPORTANT
OWNER INFORMATION section for details.
2. Remove tape and protective packaging from all surfaces
of the unit.
Locate unit at the proper counter height in an area that is
convenient for use. Location should be level and strong
enough to support weight of unit and contents.
NOTICE
Do not locate unit in an area subject to temperatures above
29°C (85°F) or grease from grills, fryers, etc. Excessive
temperatures and grease could cause damage to unit.
3. Place the unit in the desired location.
• Locate the unit in an area where the ambient air
temperature is constant and between 21°C (70°F) and
29°C (85°F). Avoid areas that may be subject to active
air movements or currents (i.e., near exhaust fans/
hoods, air conditioning ducts, exterior doors).
• Make sure the unit is at the proper counter height in an
area convenient for use.
• Make sure the countertop is level and strong enough to
support the weight of the unit and food product.
• Make sure all the feet on the bottom of the unit are
positioned securely on the countertop.
4. Level the unit by turning the leveling feet on each leg, if
necessary.
5. Install the front or rear discharge chutes. Refer to the
“Front or Rear Discharge Installation” procedure in this
section.
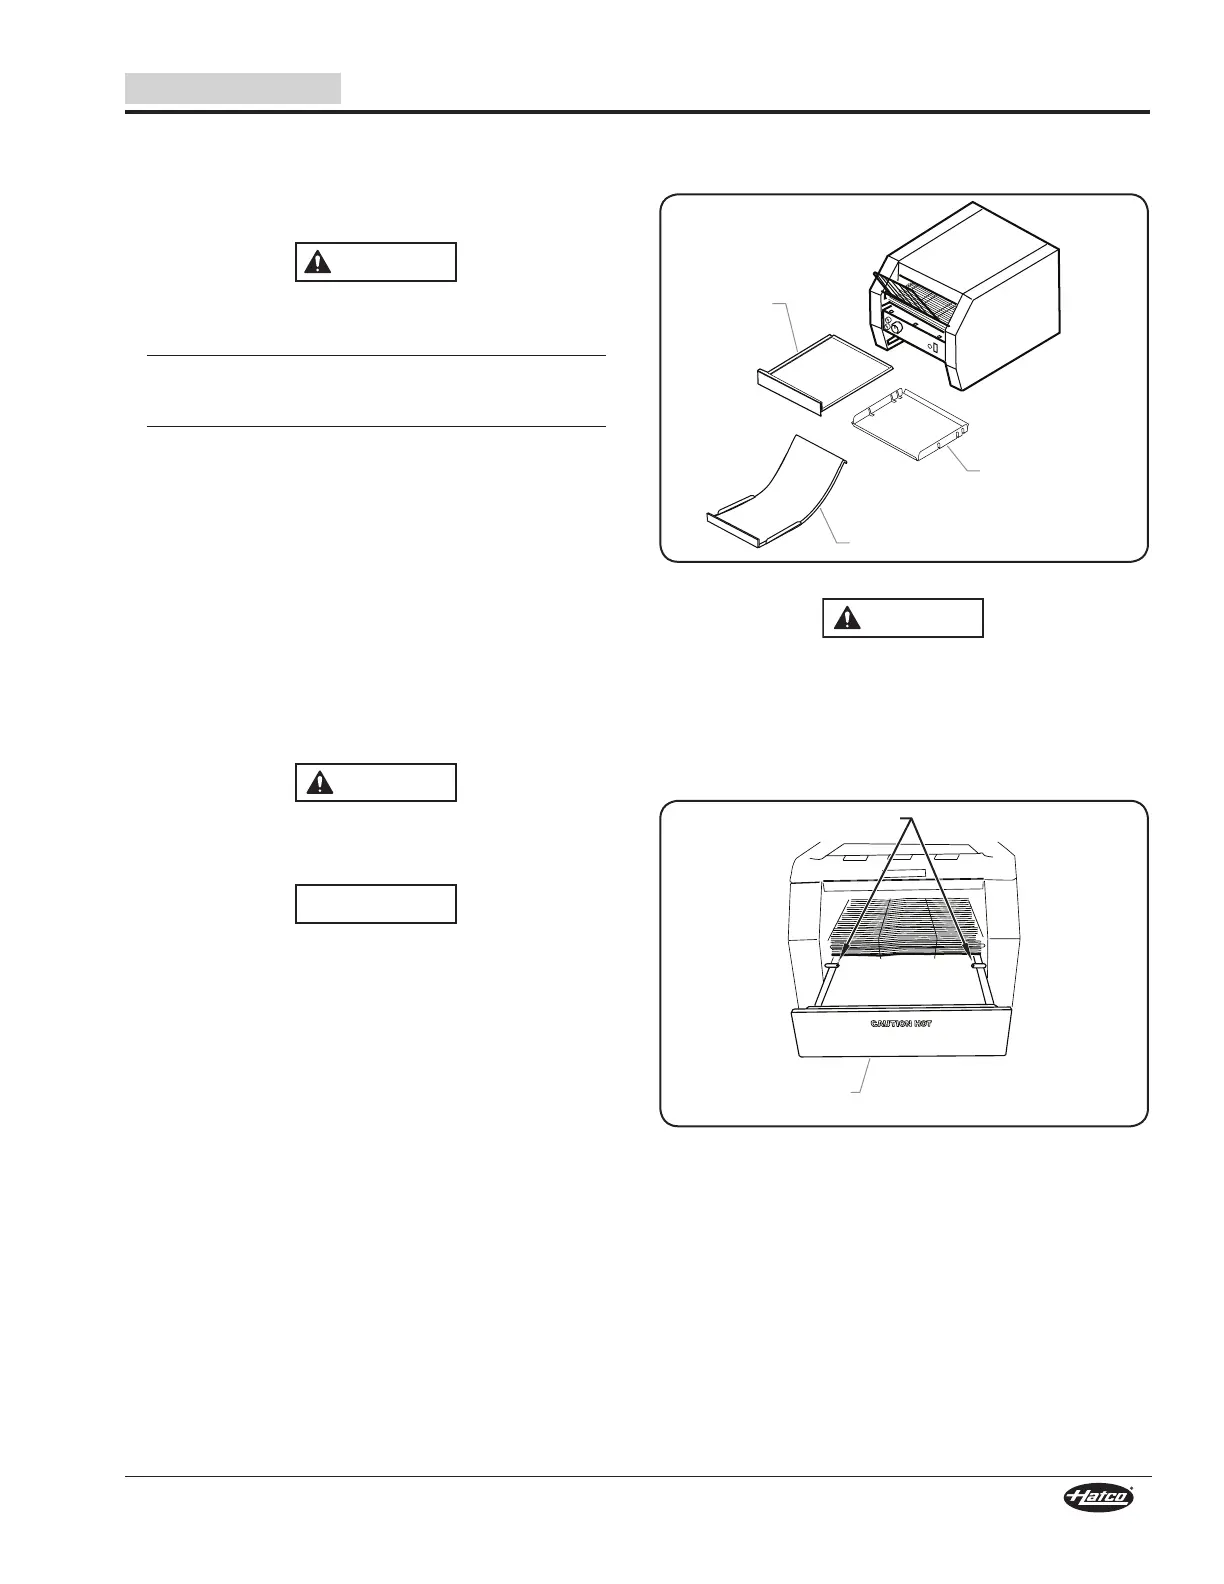
Crumb
Tray
Toast Collector
Pan
Discharge Chute
Components
Always operate toaster with crumb tray installed.
6. Install the crumb tray.
a. Position the crumb tray directly below the stop pins
under the conveyor belt at the front of the toaster.
b. Slide the crumb tray into the toaster until the front of the
crumb tray meets the stop pins.
Installing the Crumb Tray

 Loading...