8
Form No. TQ2M_CN-0519
English
INSTALLATION
Front or Rear Discharge Installation
Toast-Qwik units can be set up so toasted product discharges
at either the front or the rear of the unit.
FIRE HAZARD:
• For front discharge operation: Allow a minimum
clearance of 25 mm (1″) along the sides and rear of
unit. Allow a minimum clearance of 305 mm (12″) in the
front. If safe distances are not maintained, discoloration
or combustion could occur.
• For rear discharge operation: Allow a minimum
clearance of 25 mm (1″) along the sides of unit. Allow
a minimum clearance of 305 mm (12″) in the front and
rear. If safe distances are not maintained, discoloration
or combustion could occur.
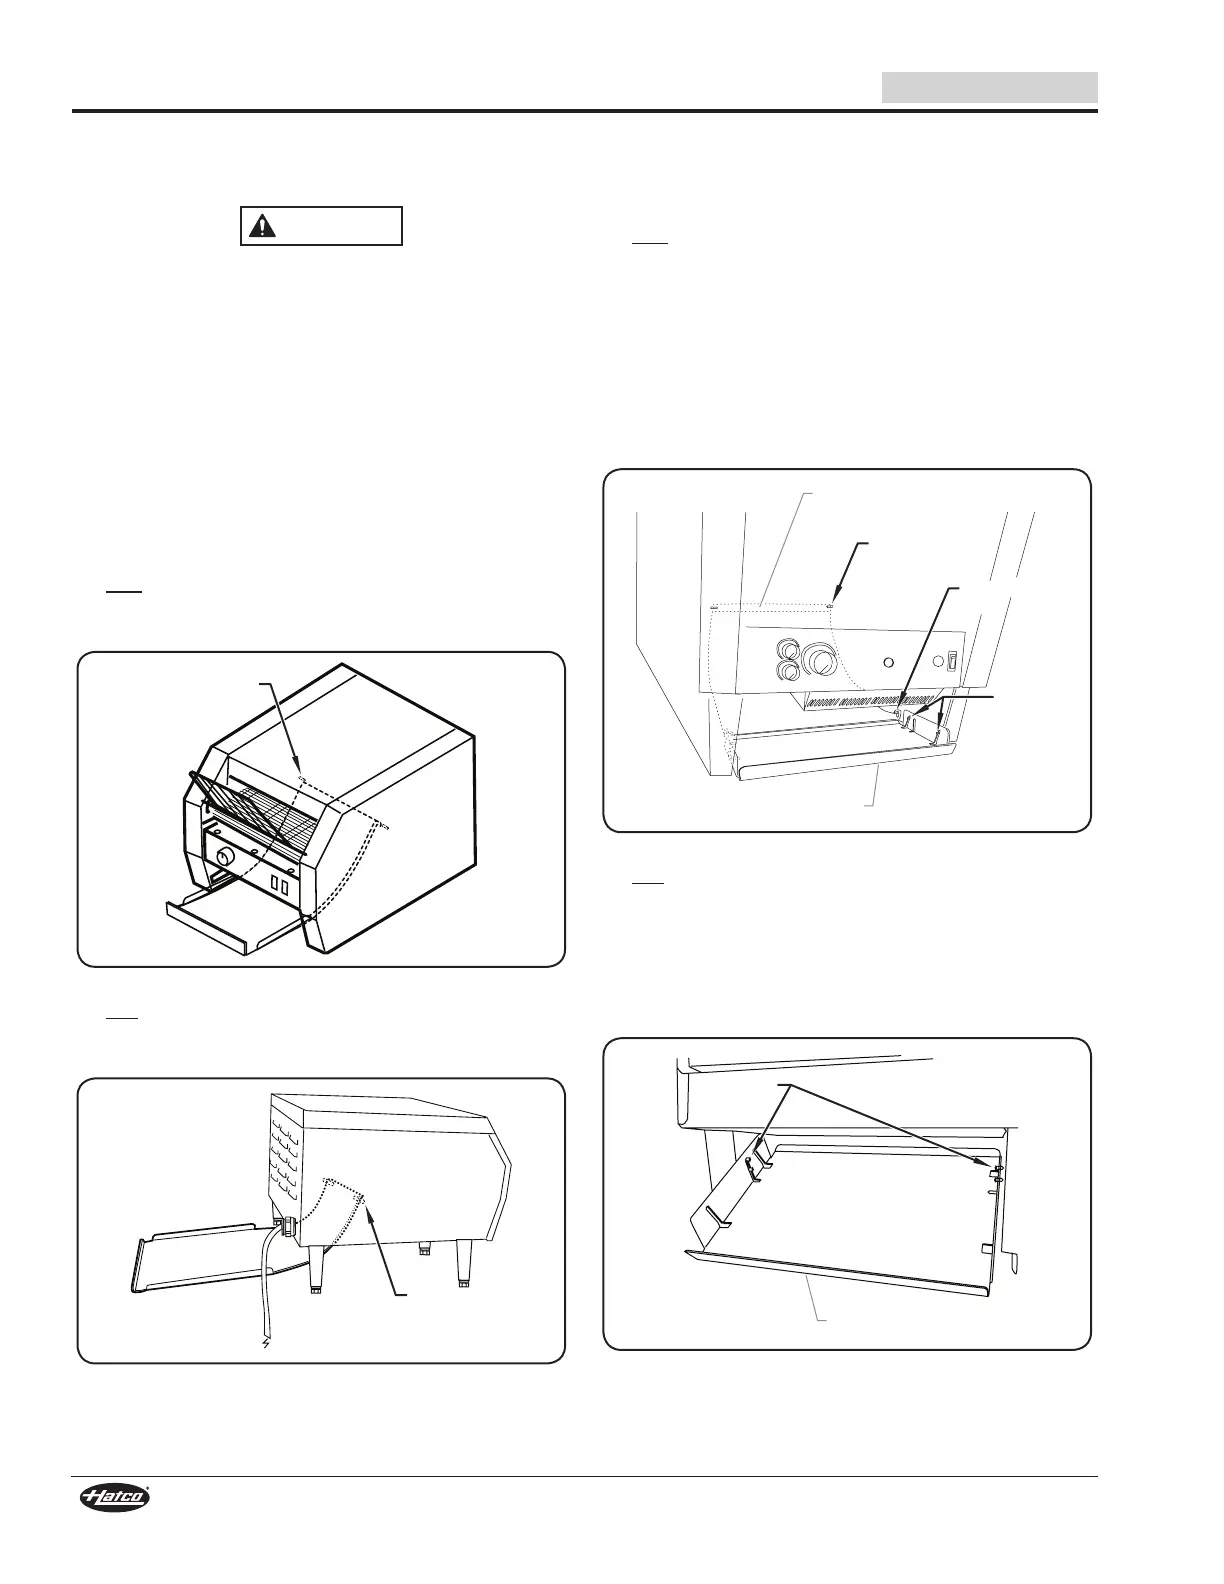
Model TQ-10
Model TQ-10 uses a one piece discharge chute/collector pan.
The installation location determines the discharge area.
For front discharge:
• Slide the toaster chute into the toaster from the front of the
toaster with the rear lip of the chute on the rear most pins.
TQ-10 Front Discharge
For rear discharge:
• Slide the toaster chute into the toaster from the rear of the
toaster with the lip of the chute over the inside set of pins.
TQ-10 Rear Discharge
TQ-400 and TQ-800 Series
TQ-400 and TQ-800 series toasters use a separate discharge
chute and toast collector pan. The installation location
determines the discharge area.
For front discharge:
1. Install the discharge chute.
• Place the curved end inward until the rear lip of the
chute is on the rear chute pins.
• Lower the front slots of the chute onto the front chute
pins.
2. Position the toast collector pan, with the open end in first,
over the pan pins.
• Align the slanted notches over the pan pins and lower
into place.
Toast Collector Pan
Discharge Chute
Pan
Pins
Front Chute
Pin
Front Chute
Pin
Rear Chute
Pin
TQ-400 and TQ-800 Series Front Discharge
For rear discharge:
1. Remove the discharge chute if it is installed. It is not used
for rear discharge.
2. Slide the toast collector pan, with the open end first, over
the set of pan pins at the rear of the unit.
• Align the slanted notches over the two sets of rear pan
pins and lower into place.
Toast Collector Pan
Rear
Pan Pins
TQ-400 and TQ-800 Series Rear Discharge (Rear View)

 Loading...