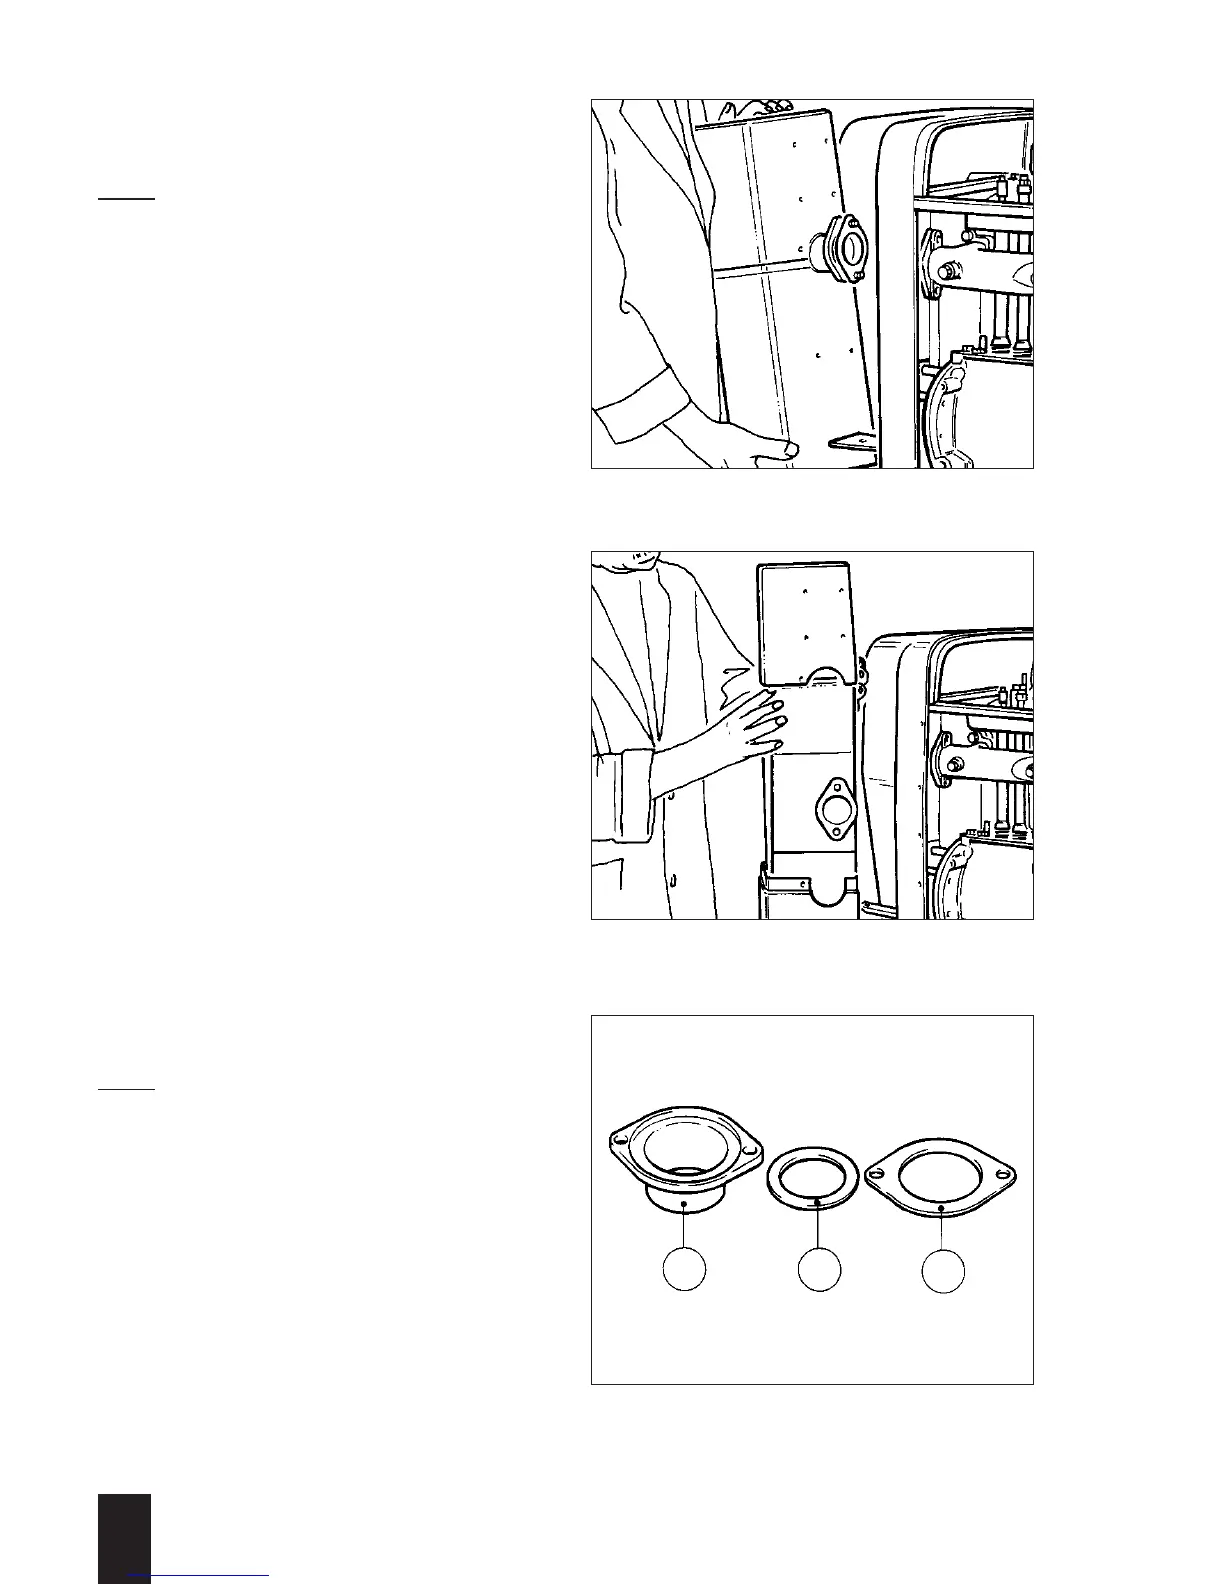
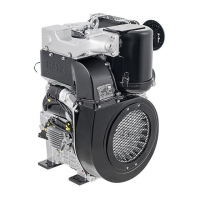
Lift off the enclosure with exhaust silencer
(muffler); see Fig. 187.
Note:
In some cases a spacing plate is installed
between the silencer enclosure and the
air duct housing.
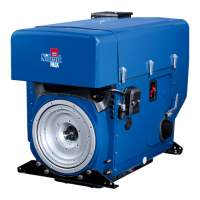
– On the 2 - 3 L 40 from date of manufac-
ture 5.85 on, 4 L 40 from 1.86 on and L
31, the connecting stub pipe (189/1),
sealing washer (189/2) and plate
(189/3) are deleted.
Five sealing washers are installed
between the silencer and the exhaust
manifold.
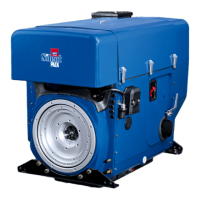
– Pull the upper and lower sections of the
enclosure apart and lift out the silencer;
see Fig. 188.
Check the parts:
– Examine the enclosure sections and the
silencer for fractured welds or tapped
holes which are unfit for further use.
Installing:
– Install by following the removal instruc-
tions in the reverse order as
appropriate.
The silencer must be installed without
trapped stresses (a two-piece holder for
the silencer has been installed since
March 1989).
Note:
Before installing the connecting stub pipe
(189/1), check free movement of the seal-
ing washer (189/2).
Place the sealing washer in the connect-
ing stub pipe and install the plate (189/3).
It should be possible to move the sealing
washer radially. Next, place the sealing
washer on the silencer. Radial play must
not exceed 0.1 mm. If necessary, renew
the sealing washer.
2
L / M . . 09.96
187
188
189