–
Preparations:
– Remove the injector; see M 14.30.
Dismantling:
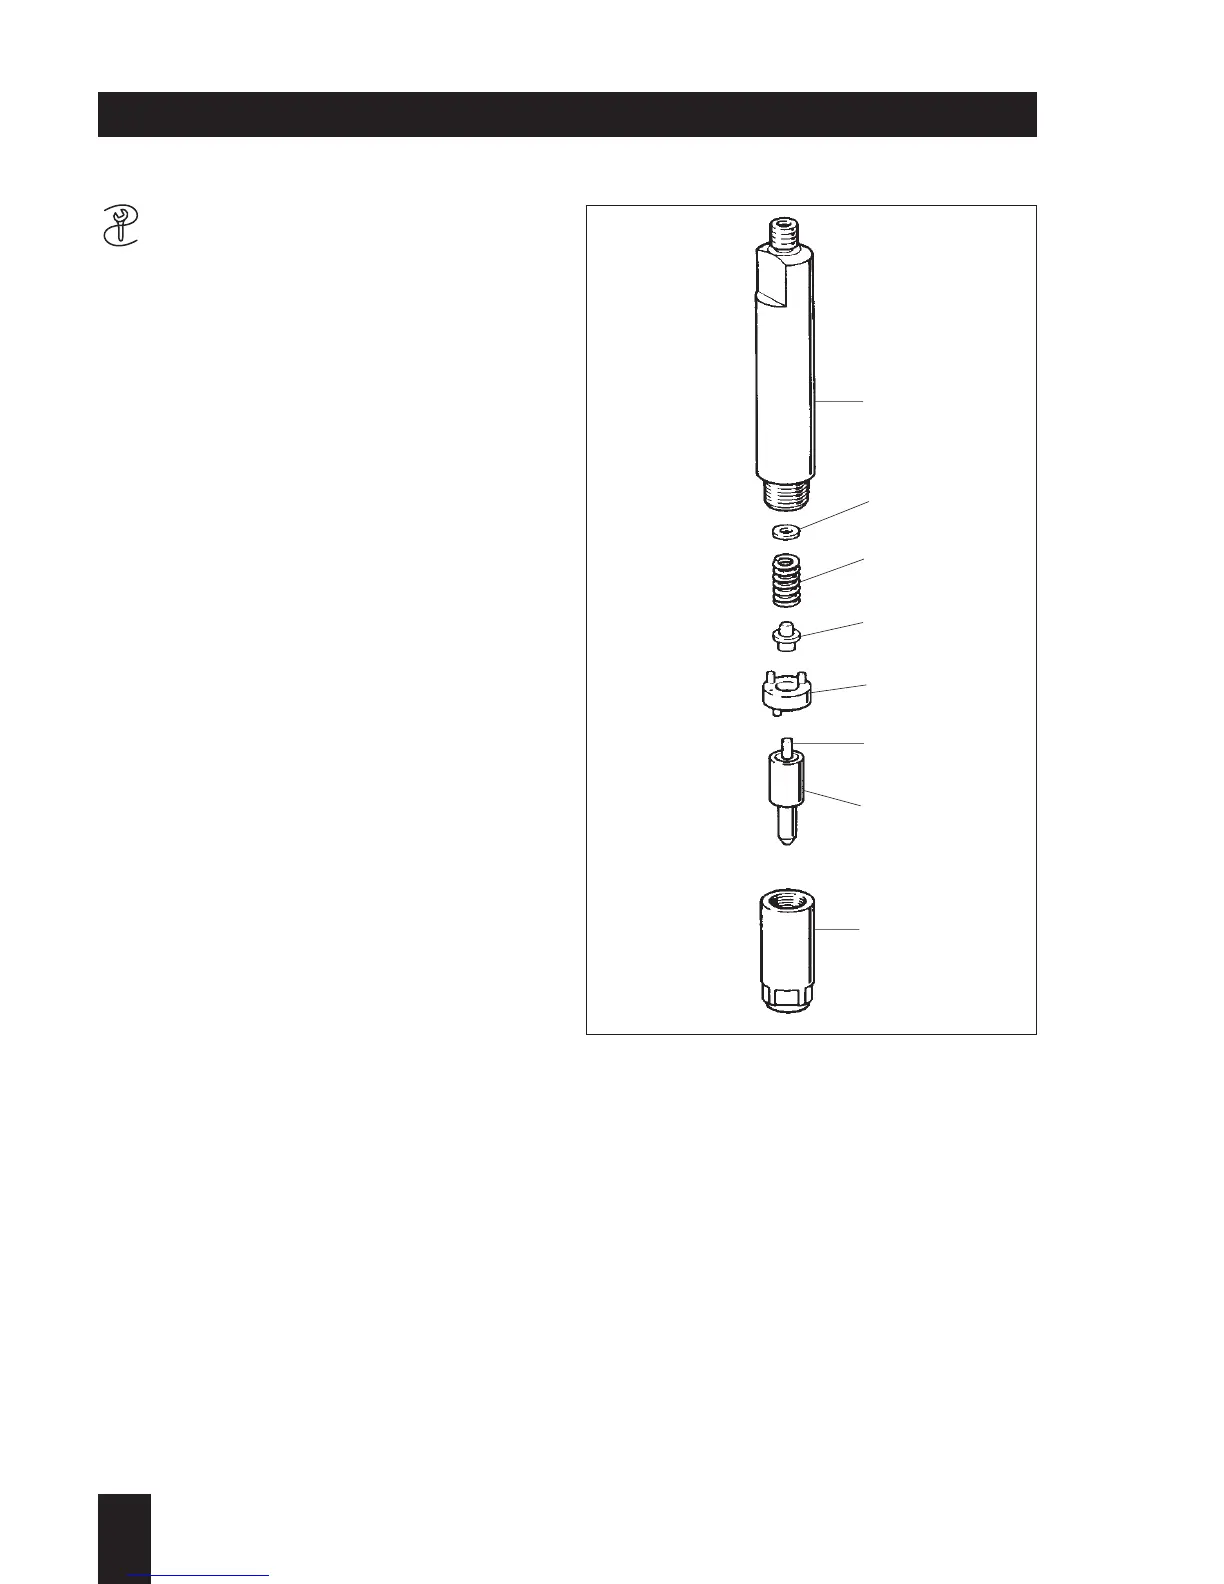
– Take off the collar nut (132/1) and remo-
ve the nozzle with needle (132/2).
– Take out spacer (132/3), pressure pin
(132/4), spring (132/5) and shim
washers (132/6).
Checking parts:
– Inspect the needle of the nozzle for
score-marks or signs of overheating.
– The nozzle needle (132/2a) must, when
the nozzle is held vertical, slide down
slowly and smoothly under its own
weight on to its seat.
– Renew the nozzle if necessary.
– Check the sealing faces on the nozzle
holder for damage.
Assembling:
– Install the shim washers, spring, pres-
sure pin and spacer in the nozzle holder
again as shown in Fig. 132, in the oppo-
site order from their removal.
– Attach the injector nozzle so that the
pins on the spacer locate in the holes
on the nozzle.
– Screw on the collar nut and tighten it.
– Mount the injector on the tester and
determine its fuel delivery pressure; for
values, see Section 4.
– Correct the fuel delivery pressure by in-
serting shim washers:
Thicker washers = higher delivery
pressure
Thinner washers = lower delivery
pressure 0.15 mm » 15 bar.
3
L / M . . 09.96
132
M 14.00 Fuel injection equipment
M 14.40 Injector nozzle