If the limit values are exceeded, adjust
this dimension as follows:
– Take off the exhaust rocket, grind down
the pressure pin at the riveted side and
drive it out.
– Install the rocker temporarily, insert the
new pressure pin (95/b) and place
shims (95/c) under it to the required
thickness, until the correct dimension
(95/B) is reached.
Note that when it is riveted into position,
the pressure pin is about 0.1 mm lower.
– Rivet the pressure pin into position,
pressing it firmly into the bore. The
pressure pin should project by at least
1 mm at the riveting point, to ensure
firm seating. If it does not project
sufficiently, grind the rocker away slight-
ly at the appropriate point.
Install the rocker finally, noting the
endplay; adjust valve clearance and
check dimension (95/B) again.
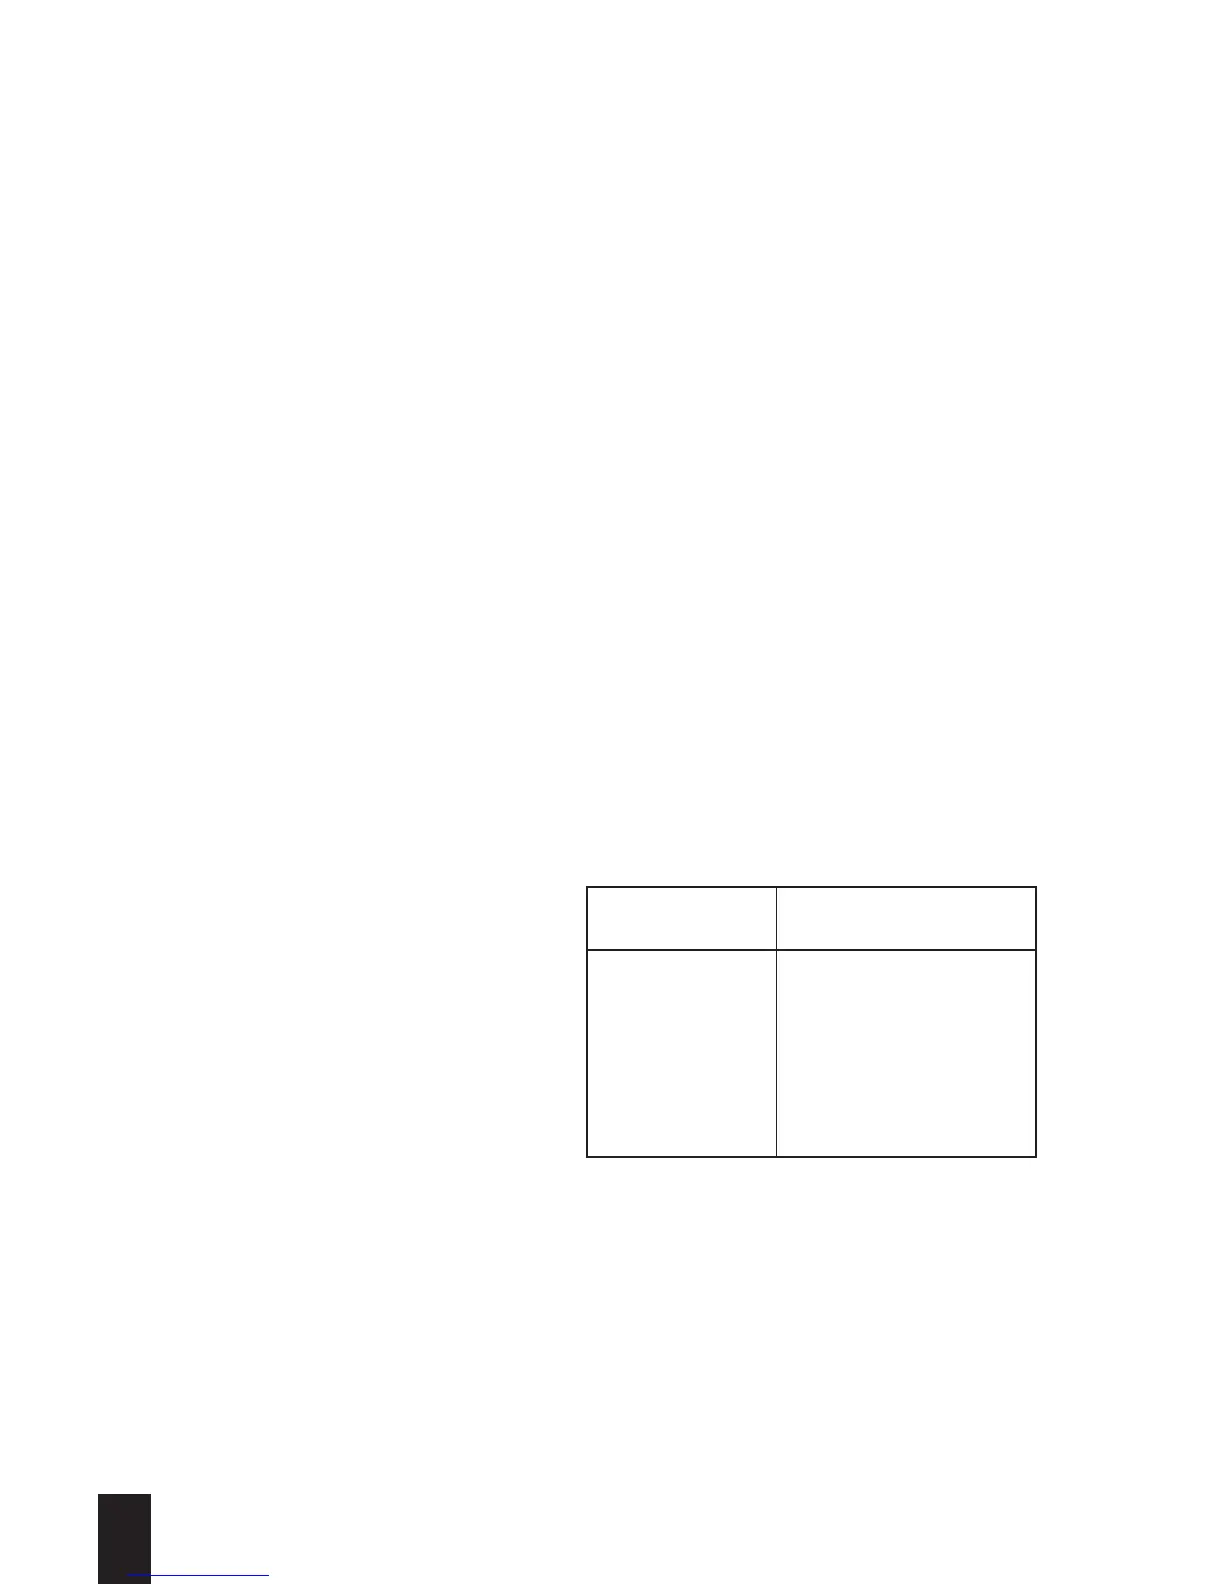
Checking dimension „A“:
– Using a depth gauge, determine dimen-
sion „A“ (Fig. 95); work out the number
of shim washers (94/9) needed
according to the table, and secure them
with the pressure pin (94/10) to the
actuating pin (94/8).
– Check operation of the automatic
decompressor.
When decompression is active, it must
be possible to turn the engine over with-
out compression resistance, but the
exhaust valve must never strike the
piston.
2
L / M . . 09.96
Dimension
„A“ in mm
Number of shim
washers (Fig.94/9)
14,0 - 14,5
14,5 - 15,0
15,0 - 15,5
15,5 - 16,0
16,0 - 16,5
16,5 - 17,0
17,0 - 17,5
6
5
4
3
2
1
0