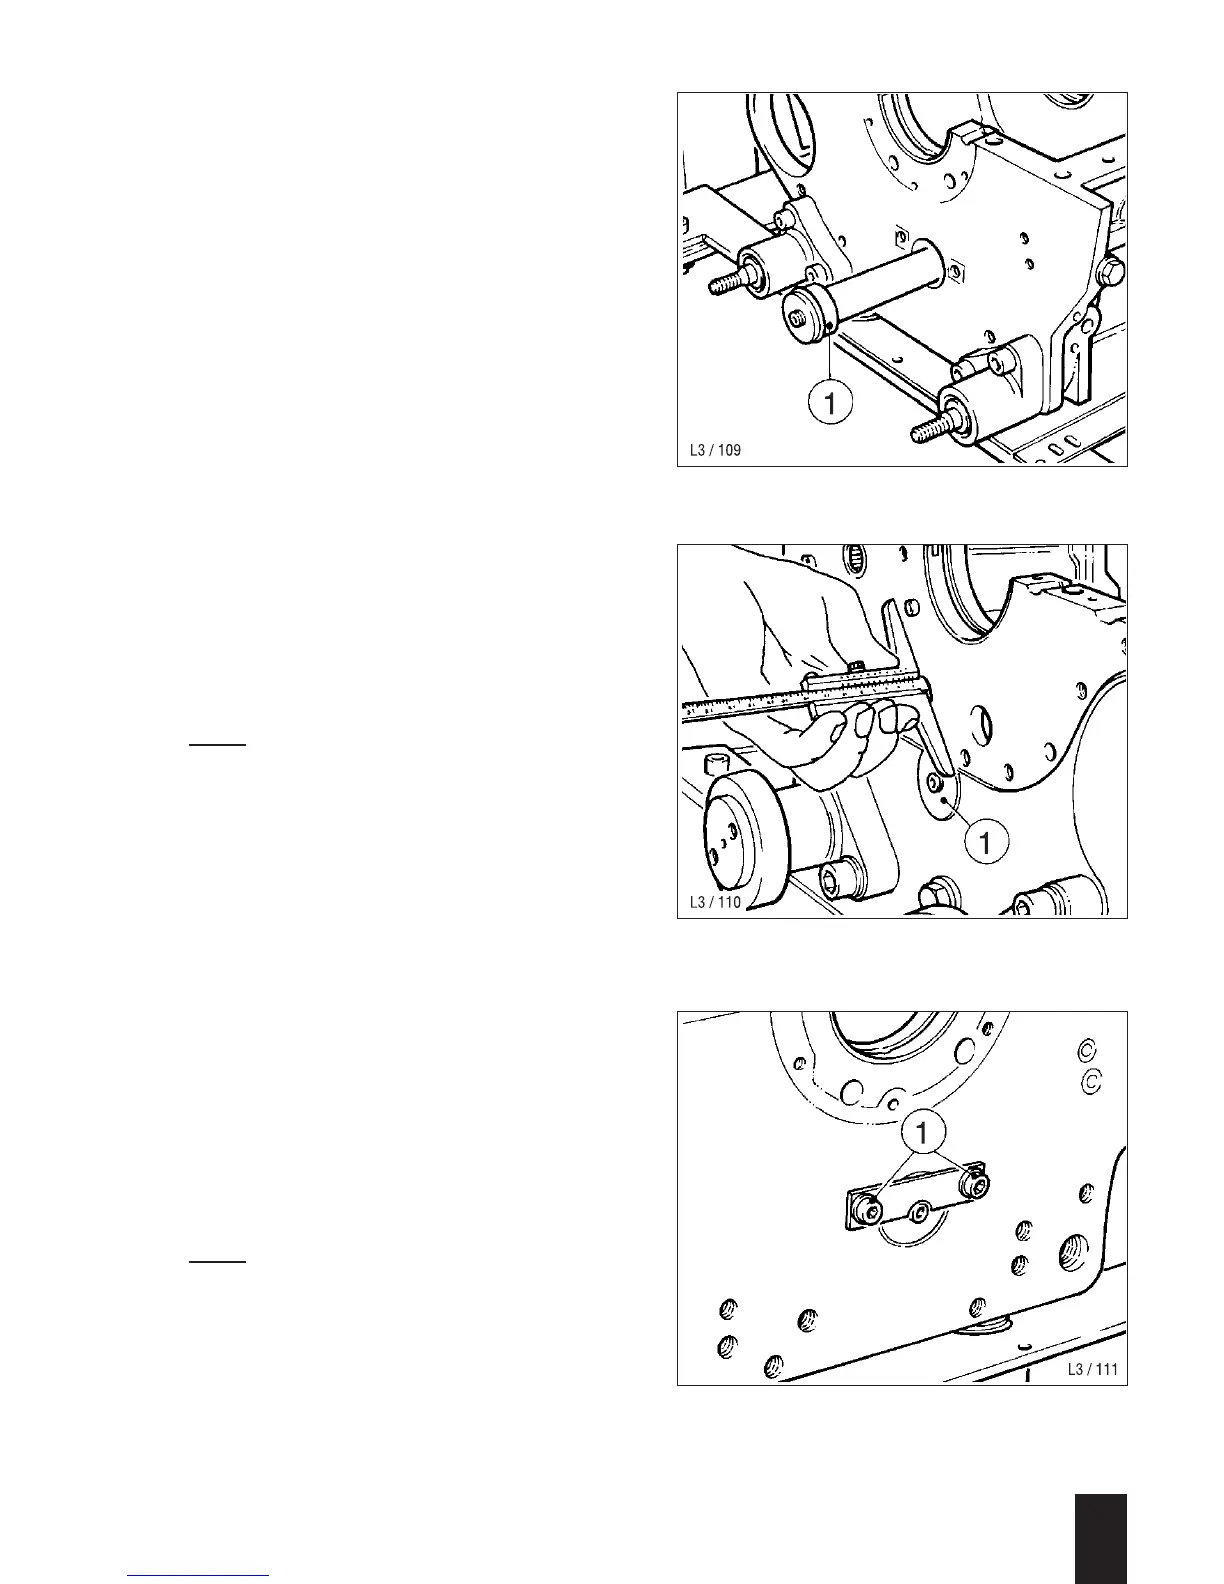
Assembling:
– Insert the thrush bushing (timing end)
until flush with the housing.
– Place the gearwheel with balancing
weight (flywheel end) and the balancing
weight (timing end) in the lower part of
the crankcase, insert the driver and
screw hand-tight to the balancing
weights. Insert the shaft with thrust bus-
hing (4/1) from the flywheel end , see
Fig. 4, and drive it fully into the timing-
end thrust bushing.
– Tighten the machine screws for the dri-
ver and use a depth gauge to measure
endplay at the balancing weights; see
Fig. 5.
Note:
The timing-end thrust bushing (5/1) forms
part of the sealing face at the timing case
cover, and must therefore be flush with
the endface of the crankcase after driving
in the shaft.
Endplay can be adjusted by moving the
flywheel-end thrust bushing axially until
the value stated in Section 4 is obtained.
– Apply sealant D to the machine screws
(6/1) and attach the plate; also coat the
screw plug for the timing-end thrust bus-
hing with sealant D and screw it in.
Turn the balancing weights to ensure
free rotation.
Note:
When installing the oil sump and the
crankcase cover, apply sealant D to two
M8 hex bolts in each case at the timing
and flywheel ends, where a through-hole
has been drilled.
3
L / M . . 09.96
4
5
6