Page 4 For technical questions, please call 1-888-866-5797. Item 62837
SAFETY OPERATION MAINTENANCEASSEMBLY
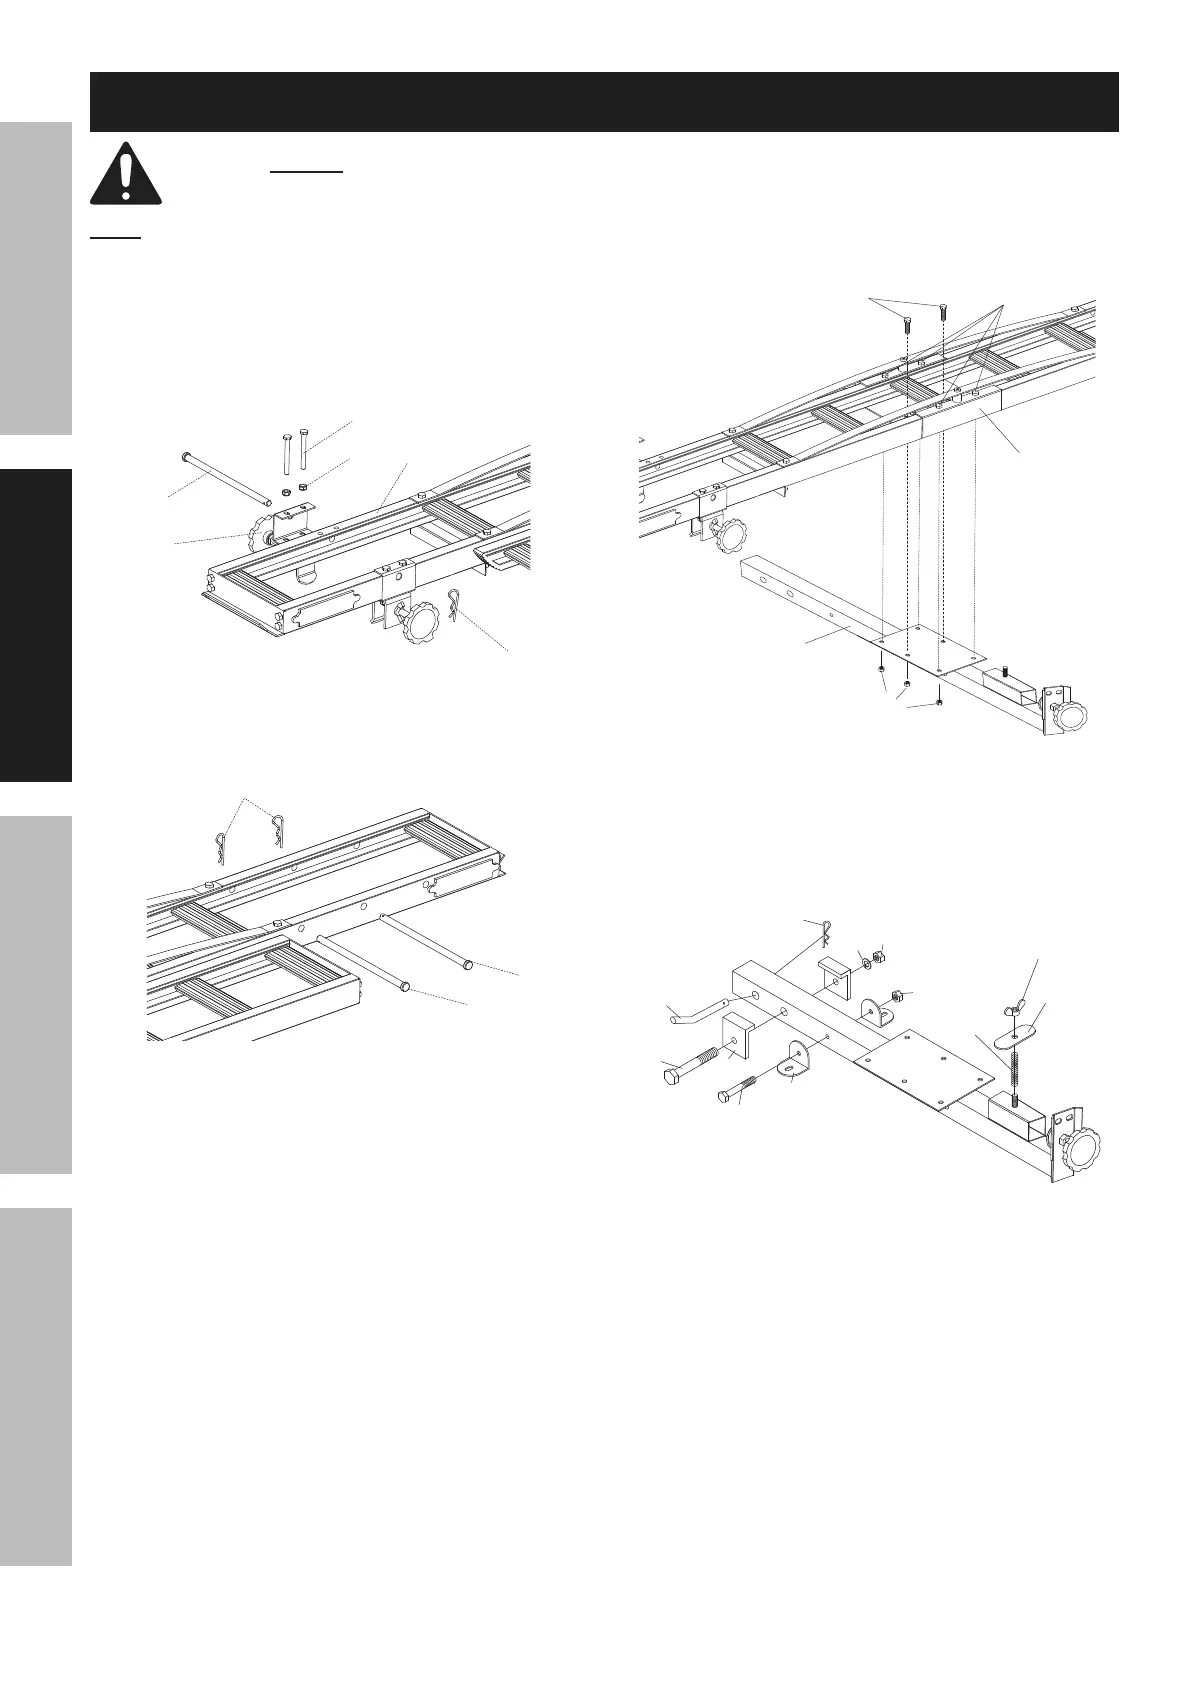
Assembly Instructions
Read the ENTIRE IMPORTANT SAFETY INFORMATION section at the beginning of this
manual including all text under subheadings therein before set up or use of this product.
Note: For additional information regarding the parts listed in the
following pages, refer to Parts List and Diagram on page 7.
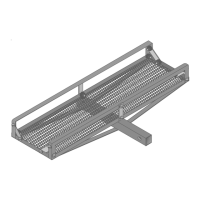
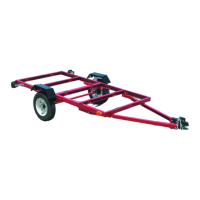
1. Attach the two Wheel Clamps (23) to the
Platform (1), using two Bolts (21) and Lock
Nuts (22) for each Clamp. Install Lock Pin (8)
into Platform. Secure with with R-pin (6).
21
22
23
6
1
6
5
3
7
20
17
18
19
21
4
22
22
10
9
24
21
26
25
2. Install Lock Pins (8) and Adjustment Pin (16)
into Platform. Secure with with R-pins (6).
16
8
1
6
5
3
7
20
17
18
19
21
4
22
22
10
9
24
21
26
25
3. Unscrew Nuts (22) from underside of Bracket (25).
4. Line up Bracket Bolts (21) with corresponding
holes in Tube (3). Secure with Nuts (22).
22
26
25
3
21
5. Further secure Bracket to Tube with two
additional Bolts (26) and Nuts.
6. Attach Tie Down Brackets (4) to Tube
with Bolt (21) and Nut (22).
5
17
18
19
21
4
22
10
9
24
7. Insert Tube into Class III (or better) 2" receiver of a
vehicle and lock in place with Hitch Pin (5). Insert
R-Pin (7) through hole in Hitch Pin to hold it in place.
8. Attach Stabilizers (17) to Tube using Bolt (20),
Washer (18), and Nut (19). Tighten Stabilizers
in place to reduce vibration of the Carrier.
9. Mount Ramp (2) to Tube with Press
Spring (24), Wingnut (10), and Press Plate (9).
Secure tightly before moving vehicle.