– 24 –
1. Remove the rip fence and place it on the hooks
located on the left side of stand.
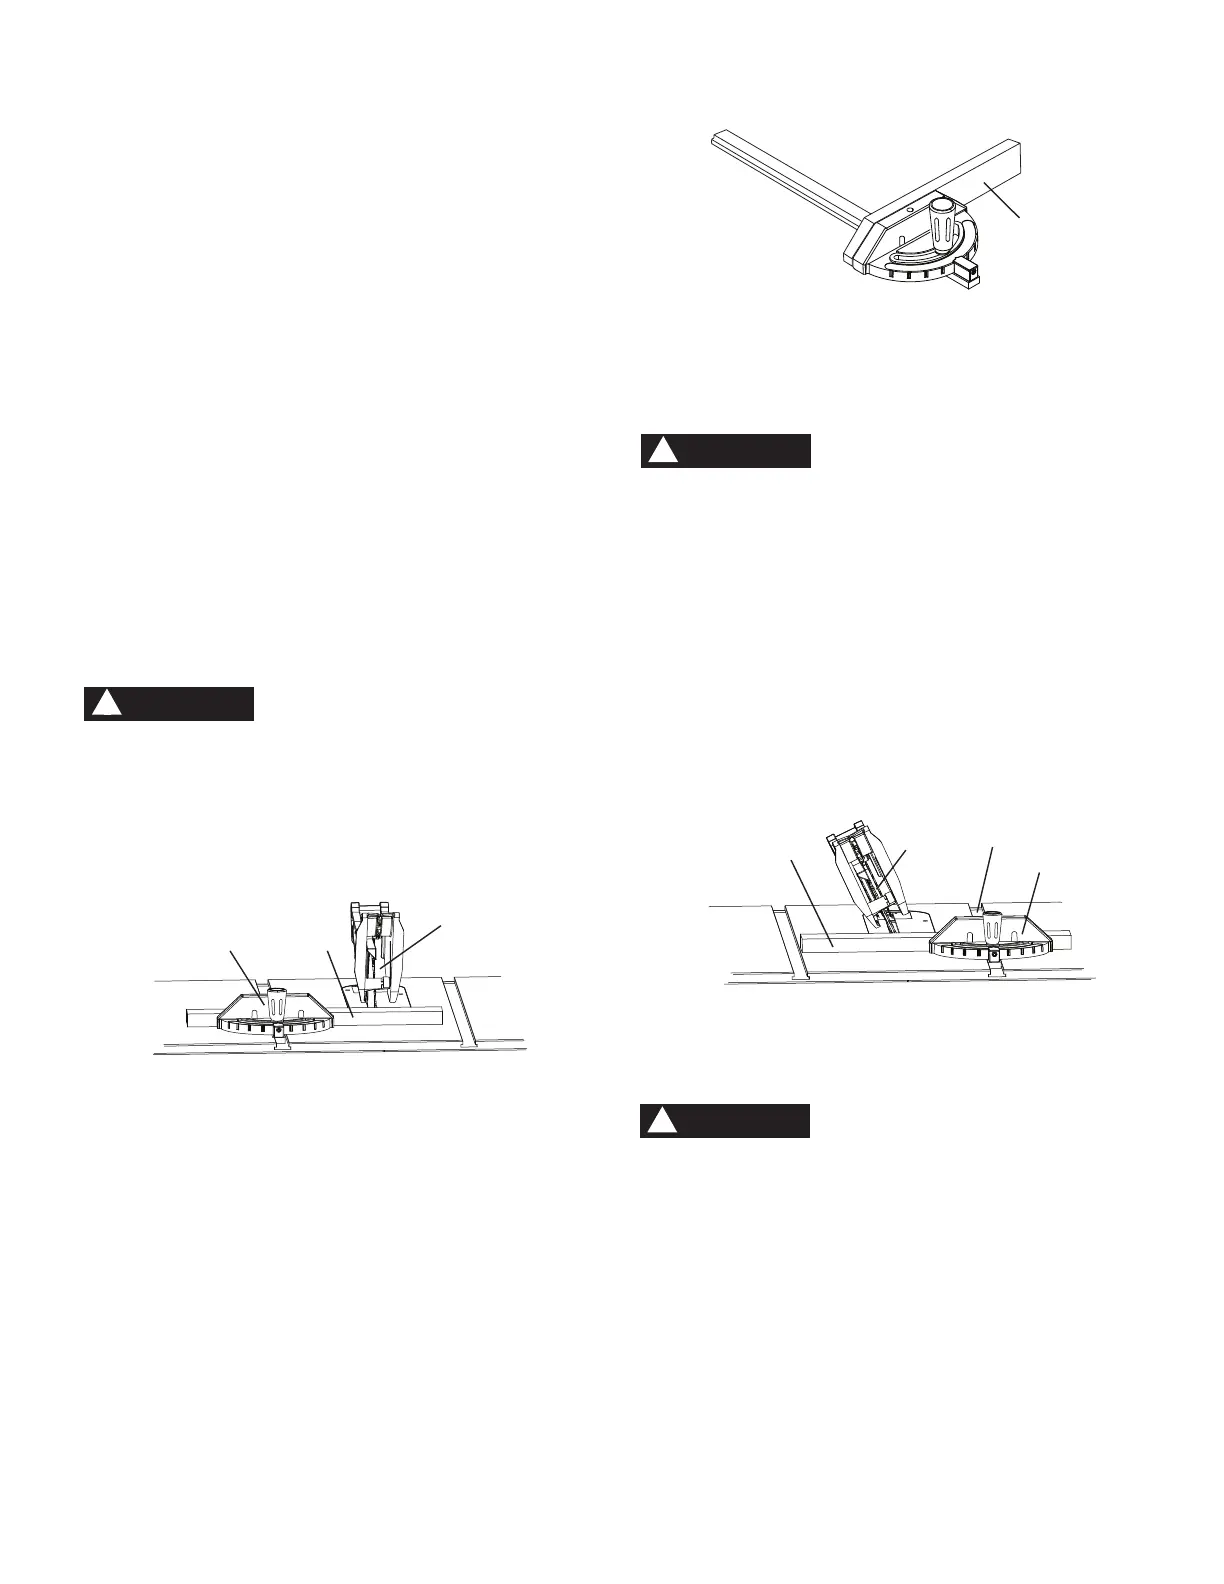
2. Place the mitre gauge (1) into either groove in the
table top.
3. Adjust the blade height so it is 1/8 in. (3.2 mm)
higher than the top of the workpiece (2).
4. Hold the workpiece firmly against the mitre gauge
with the blade path in line with the desired cut
location. Move the workpiece to 1 in. (25.4 mm)
distance from the blade (3).
5. Start the saw and wait for the blade to come up to
full speed. Never stand directly inline of the saw
blade path, always stand to the side of the blade
that you are cutting on.
6. Keep the workpiece against the face of the mitre
gauge and flat against the table. Then slowly push
the workpiece through the blade.
7. Do not try to pull the workpiece back with the blade
turning. Turn the switch OFF, and carefully slide
the workpiece out when the blade is completely
stopped.
Always position the larger surface of the workpiece
on the table when crosscutting and/or bevel
crosscutting to avoid instability.
USING WOOD FACING ON THE MITRE GAUGE
(Fig. LL)
Slots are provided in the mitre gauge for attaching an
auxiliary facing (1) to make it easier to cut very long or
short pieces. Select a suitable piece of smooth wood,
drill two holes through it and attach it to the mitre gauge
with screws. Make sure the facing does not interfere
with the proper operation of the sawblade guard. When
cutting long workpieces, you can make a simple outfeed
support by clamping a piece of plywood to a sawhorse.
BEVEL CROSSCUTTING (Fig. MM)
This cutting operation is the same as crosscutting
except the blade is at bevel angle other than 0°.
Always work to the right side of the blade during
this type of cut. The mitre gauge (1) must be in the
right side groove (4) because the bevel angle may
cause the blade guard to interfere with the cut if
used on the left side groove.
1. Adjust the blade (3) to the desired angle, and
tighten the blade bevel lock handle.
2. Tighten mitre lock handle at 0
°.
3. Hold workpiece (2) firmly against the face of the
mitre gauge throughout the cutting operation.
COMPOUND MITRE CROSSCUTTING (Fig. NN)
This sawing operation is combining a mitre angle with a
bevel angle.
Always work to the right side of the blade during
this type of cut. The mitre gauge (1) must be in the
right side groove (4) because the bevel angle may
cause the blade guard to interfere with the cut if
used on the left side groove.
1. Set the mitre gauge to the desired angle.
2. Place the mitre gauge in the right side groove of the
table.
3. Set the blade (3) bevel to the desired bevel angle
and tighten the blade bevel lock handle.
4. Hold workpiece (2) firmly against the face of the
mitre gauge throughout the cutting operation.
1
3
2
WARNING
!
Fig. KK
Fig. LL
1
WARNING
!
1
3
4
2
WARNING
!
Fig. MM


 To Next Page