12
ENGLISH
ASSEMBLY INSTRUCTIONS
Once you have conrmed that you have all the pieces required for assembly, you
may begin.
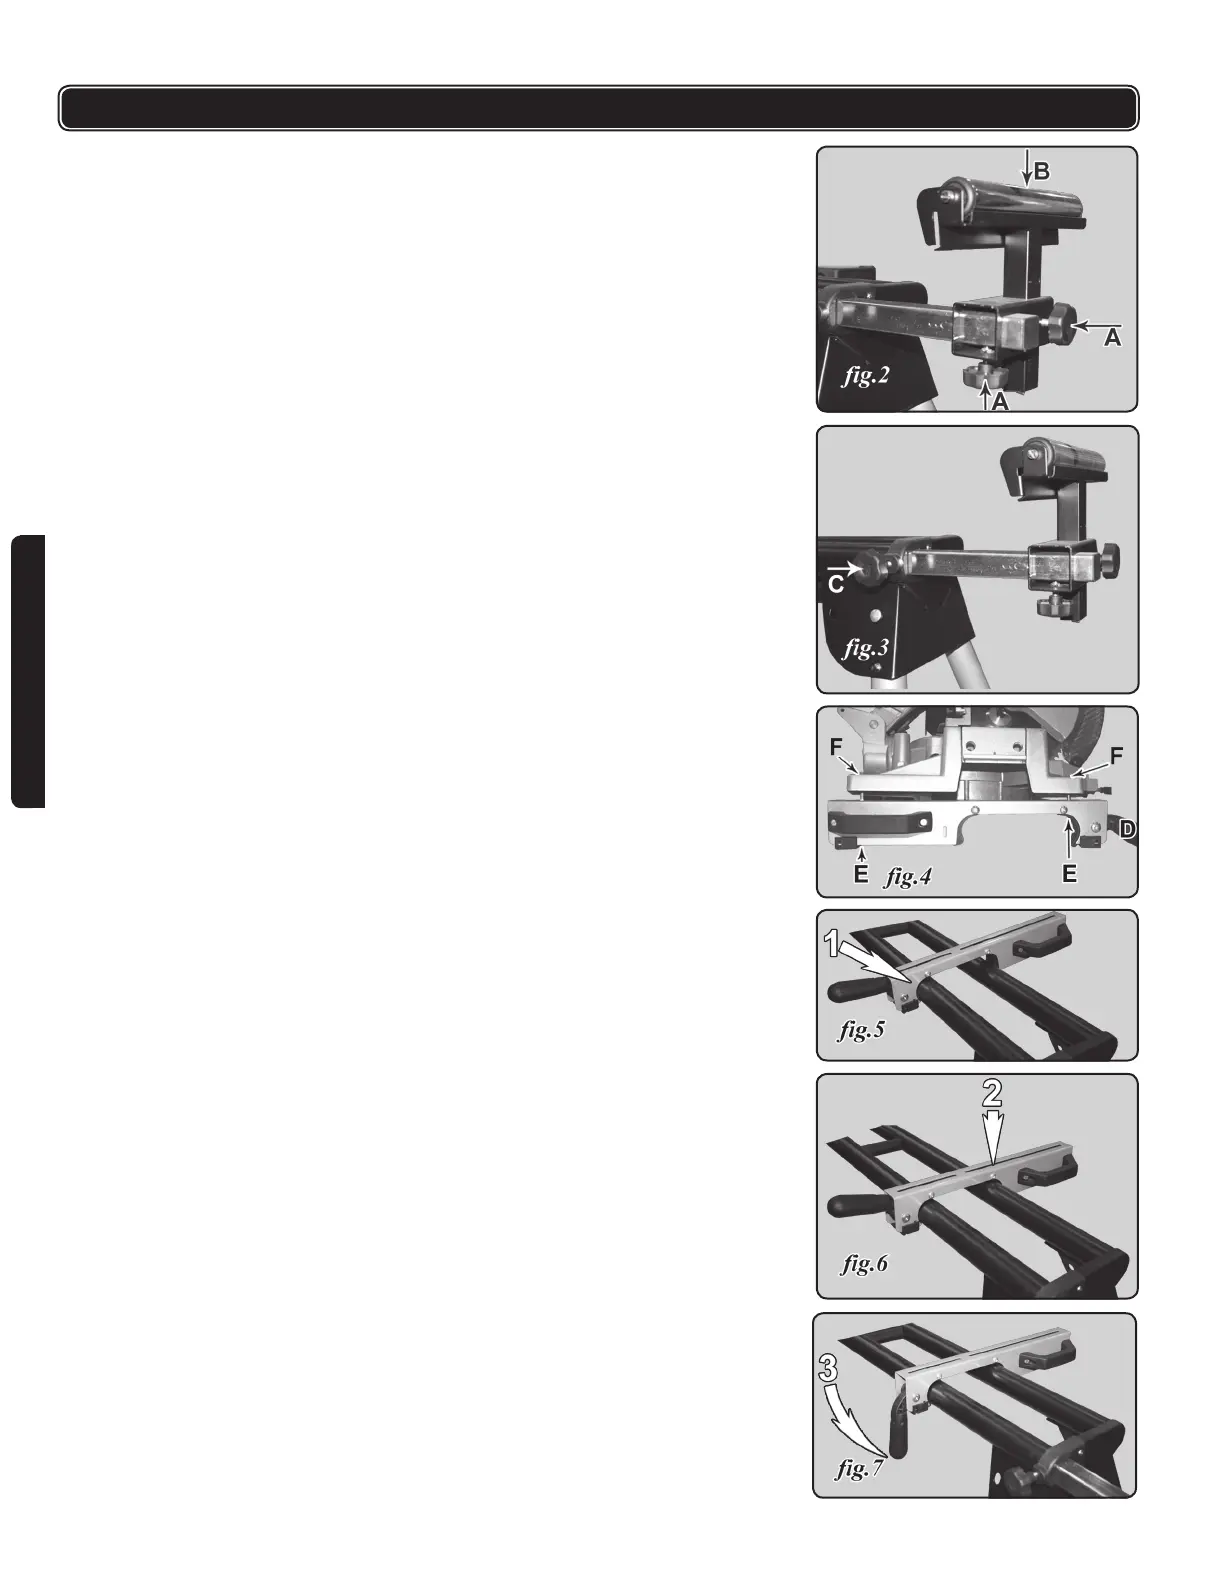
1. Attach the work support mounting bracket as shown in gure 2.
2. Slide the work support through from the top and fasten using 2 of the 4 short
knobs provided in the locations marked ‘A’.
3. Repeat for other side.
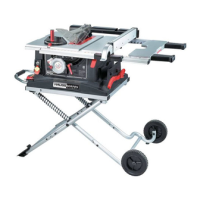
4. Attach the long threaded knob to point marked ‘C’ in Figure 3. This is used to
set the length of the Extension Rail.
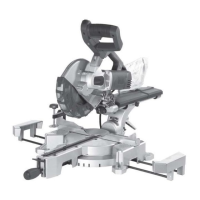
ATTACHING THE SAW MOUNT BRACKETS TO THE SAW
1. Follow Figure 4 for both sides of the saw to attach the Saw Mount Brackets to
the saw.
2. The quick-release handles (D, g.4) should be oriented towards the front of the
saw.
3. Insert the carriage bolts from the bottom (E, g.4) and fasten them with a at
washer and a nut at the top (F, g.4).
ATTACHING THE SAW MOUNT BRACKETS TO THE
STAND
1. .Hook the front side rst (g.5).
2. Press back side down (g.6).
3. Turn lever down to lock the saw mount in place (g.7).