29
www.coreservice.co.uk
Hotline: +44 01904 947568
Email support@coreservice.co.uk
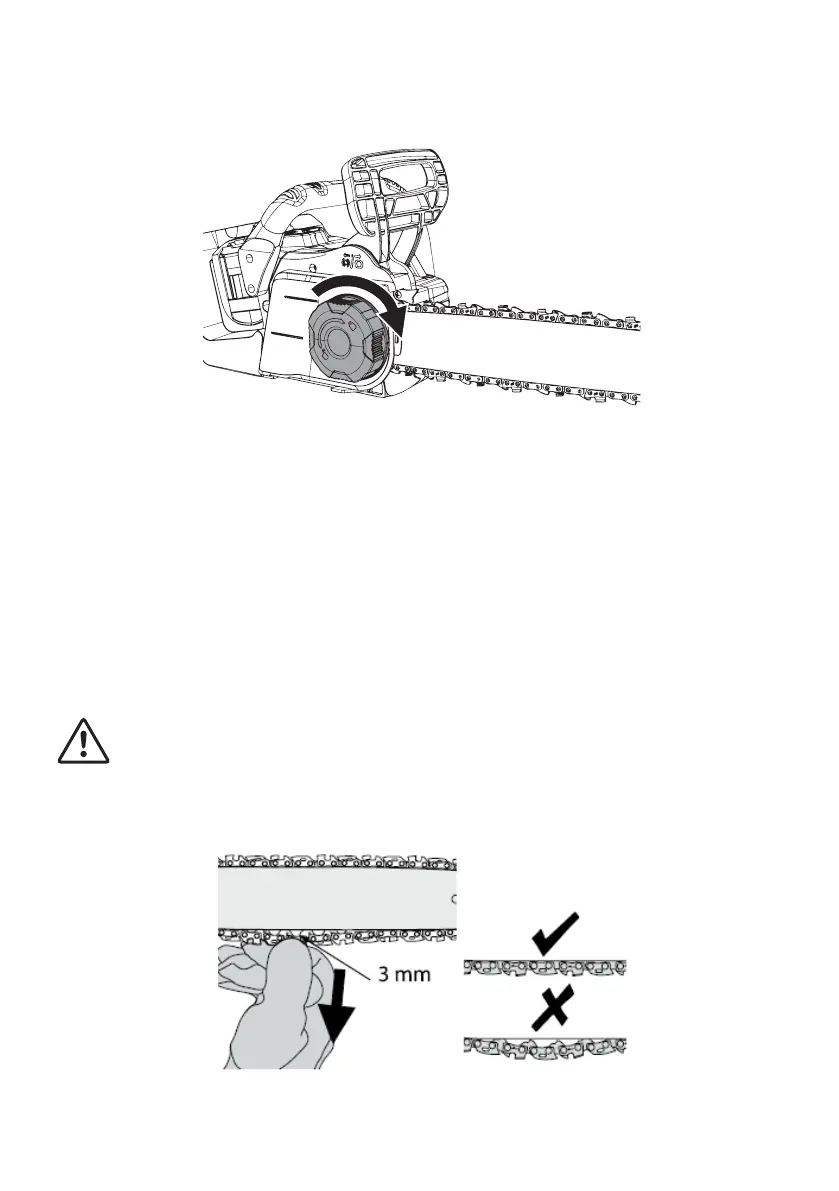
6. Rotate the chain quick tensioning dial(5) clockwise until the guide bar and saw chain are firmly
tightened.
7. Tensioning chain and bar
NOTE: New saw chains will stretch slightly. Check the chain tension frequently when first used and
tighten when the chain becomes loose around the guide bar.
The tension is correct when the chain snaps back after being pulled 3 mm away from the guide bar
with light force from the index finger and thumb as shown in Figure below. There should be no “sag”
between the guide bar and the chain on the underside. Rotate the chain quick tensioning dial(5)
clockwise until the chain tension is correct as instructed above.
In case the chain quick tensioning dial(5) has been adjusted to its end and not able to be
further rotated clockwise to tension the chain correctly, then rotate the quick tensioning dial (5)
counterclockwise two full turns to loose the chain cover, hold the guide bar still and pull it out slightly
and rotate the chain quick tensioning dial(5) to tighten it until the chain tension is correct.
Do not over-tension the chain as this will lead to excessive wear and will reduce the life of the bar and
chain.
WARNING:
1) Remove the battery pack before adjusting saw chain tension.
2) Cutting edges on chain are sharp. Use protective gloves when handling chain.
3) Always maintain the correct chain tension. A loose chain will increase the risk of
kickback. A loose chain may jump out of guide bar groove. This may injure operator
and damage chain. A loose chain will cause chain, bar, and sprocket to wear rapidly.
 Loading...