Page 7
USE ONLY HAYWARD
®
GENUINE REPLACEMENT PARTS
Removing the Dead Front Panel - For Flow Switch and Accessory Connecons
To access the internal circuity of the AquaRite+, the Dead Front Panel needs to be carefully removed. Follow the instructions below to avoid
damaging the device and/or its casing.
Caution -
Risk of Electric Shock.
Ensure that the unit has been disconnected from all power supplies before removing the Display and Dead
Front Panel. Only a suitably qualified person should remove the Dead Front Panel in accordance with Local/
State/Federal Government regulations and the latest edition of the AS/NZS 3000 Wiring Rules.
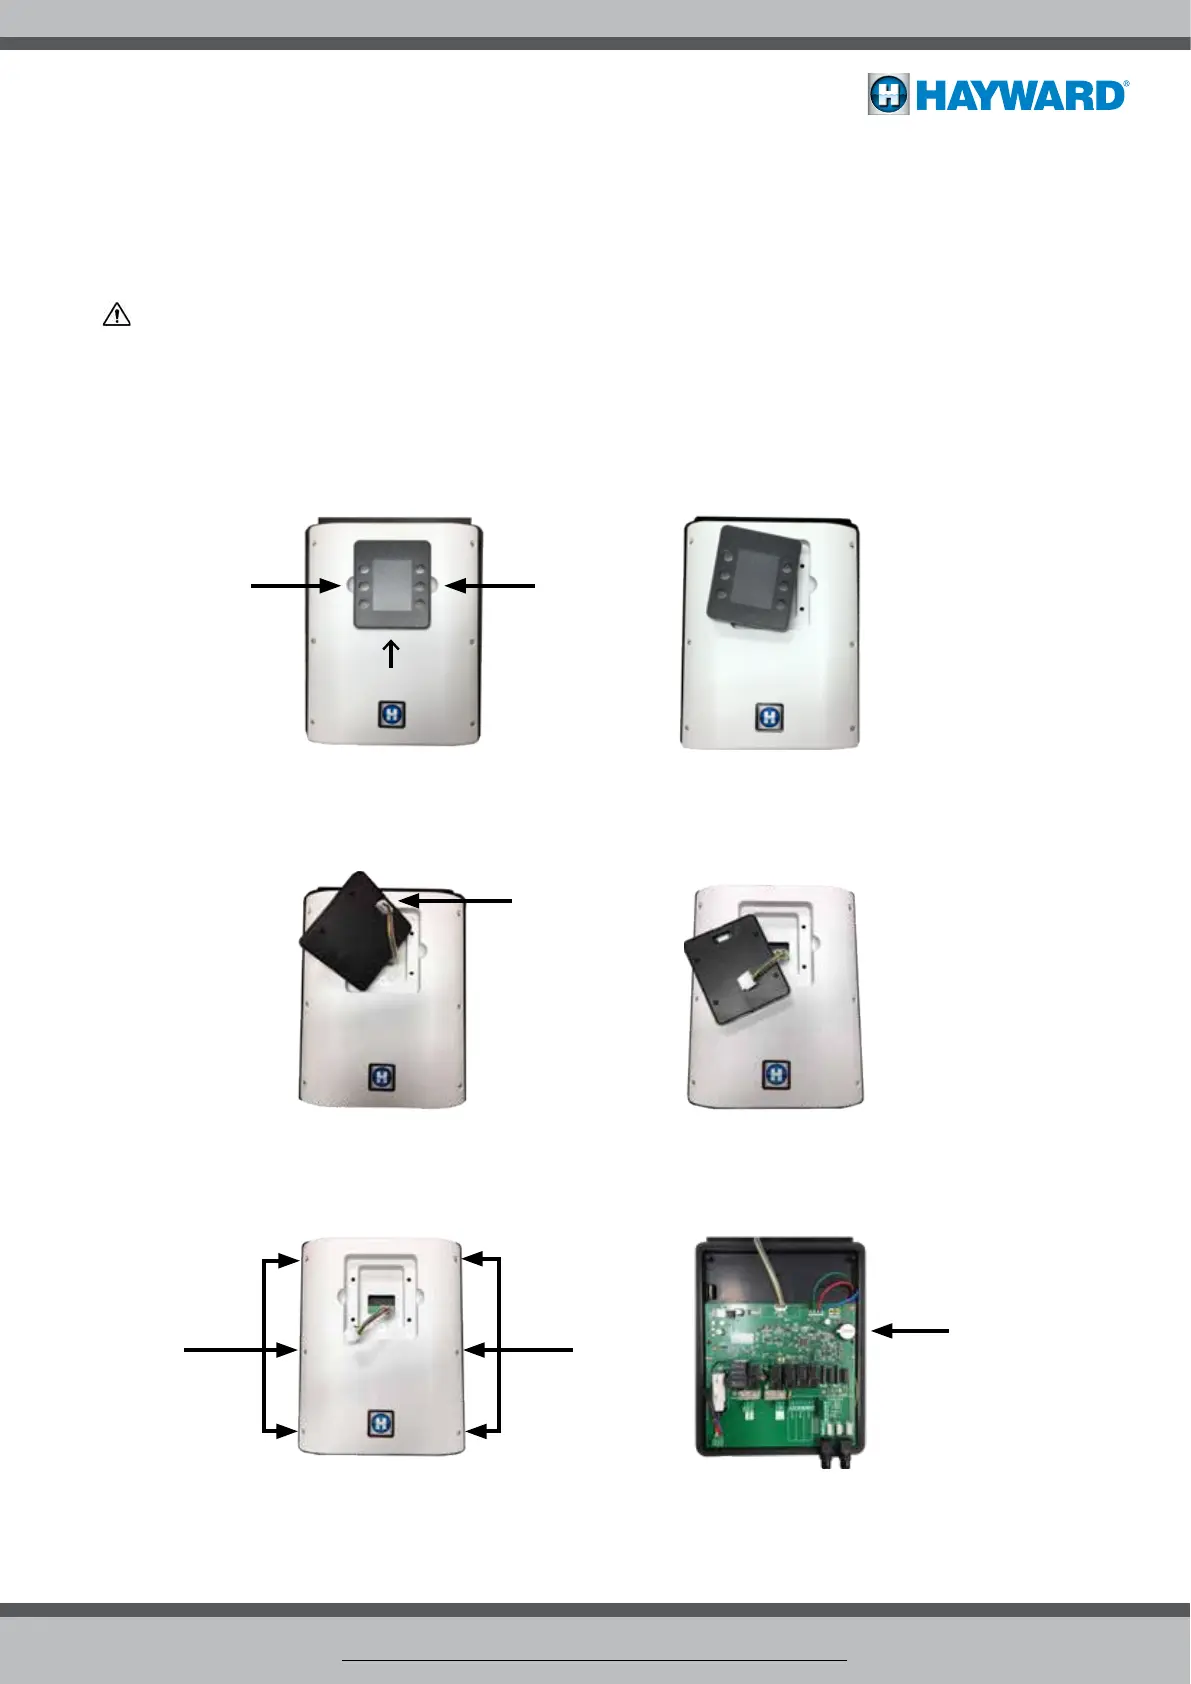
Lift Out Interactive Display Module:
Remove display module from its compartment. Use the grooves on either side to pry it out by hand. Take care to not use excessive
force as the module is still wired to the PCB at this stage.
Detach Interactive Display Module:
Turn over the display module and remove the wired plug from the port on the back of the unit. Store the Display Module where it
will not get damaged until it is re-installed.
Unscrew Dead Front Panel:
Remove the six (6) screws fastening the panel to the unit. Once all loose, lift the panel off the unit to access the PCB.
Lift Lift
Display Module
Pull
Unscrew Unscrew
PCB
1.
3.
5.
2.
4.
6.



 To Next Page