InstallationInstructions11
059840‐00Rev.AHeat‐TimerCorp.
InstallationInstructions
TheEPU‐Dinstallationprocessconsistsofthefollowingbasicsteps:
1. Initialinstallation(see“DesignConsiderations”onpage 11).
• Locatingandinstallingthesensors.
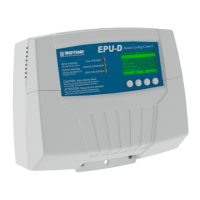
2. MountingtheEPU‐DModule(seepage 14).
3. ConnectingtheEPU‐Dwiring(see“WiringtheEPU‐D”onpage 16).
• Powerwiring
• Outputwiring
• Inputwiring
4. CompletinginitialprogrammingoftheEPU‐D(seepage 20).
SuppliedMaterials
Thefollowingmaterialsaresuppliedwiththecontrolmodule:
• EPU‐DControlModule(p/n926840‐00)
• TwoSensorswithEnclosures(p/n904220‐00)
• WallAnchorsandScrews
• InstallationandOperationManual(p/n059840‐00)
• WarrantyCard(p/n059115‐00)
RequiredMaterials(NotSupplied)
Thefollowingmaterials/toolsarerequiredforinstallation,butarenotsupplied:
• Generaltoolkit(screwdrivers,wirestrippers,powerdrill,etc.)
• 18AWGcable(Heat‐Timerp/n703001‐01orequivalent#18/2cable)–usedforEPU‐Dwiring
DesignConsiderations
Wheninstallingthesystem,certaindesignconsiderationsmustbetakenintoaccount.Theseinclude:
• OutdoorTemperatureSensorLocations
• HeatingSystemSensorLocation
• OutputControl:BurnerorMotorizedValve