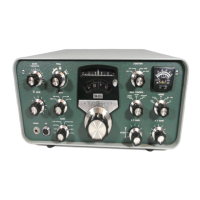
af.2. LMO Repair and Service Notes
af.2.1. LMO Remove and Replace
While not easy, the LMO can be removed from the unit without removing the front panel
using the following procedure:
1. Disconnect the power cable from the back of the radio since you will be working close to the
A.C. power switch.
2. Turn the main tuning dial fully counter-clockwise until it hits the stop (the slide rule dial
should be near 0 and the circular dial near 90.
3. Remove the main tuning knob on the front panel
4. Loosen the nut on the main tuning shaft bushing so that the bushing can be lifted up and the
shaft pulled forward to disengage the beveled pulley from the metal ring on the circular dial.
5. Loosen the set screw on the circular dial and move the dial slightly forward to disengage the
spiral groove follower from the spiral groove on the rear of the circular dial.
6. Disengage the spiral groove follower from the slide rule dial pointer and move it to the right
so it is next to the power switch.
7. Disconnect the wires soldered to the terminal strip on the rear of the LMO being sure to note
which wire connects to each lug on the terminal strip.
Tube type LMOs have three wires, B+, Fil, and Bias (goes to 33k resistor)
The solid-state LMO used in the SB-102 only has 2 wires, +10v and SSB Bias (goes to
33k resistor)
8. Disconnect the LMO output by unplugging RCA connector on the rear of the LMO.
9. Under the chassis, remove the four nuts and lock washers holding the LMO assembly in
place. Two of the nuts are located under cable bundles and may be difficult to get to, but it
should be possible to get a 1/4” socket in to remove the nuts.
Remove assemblies mounted to the top of the LMO:
SB-102 only: Remove the 4 screws holding the “doghouse” to the top of the LMO and lift the doghouse,
slide rule dial assembly and pilot lights off to the side
All others with tube type LMO: Remove the two screws holding the slide rule dial and pilot light
assembly to the LMO and lift the assembly off to the side
At this point, it should be possible to lift the LMO and circular dial from the chassis.
To replace the LMO use the following procedure.
1. Use a small screwdriver to turn the LMO shaft fully counter clockwise
2. Place the circular dial on the LMO shaft – leave the set screw loose for now
Heathkit Linear Master Oscillators (LMOs) Page 122

 Loading...