EasyManua.ls Logo

Heatilator EL42 Series - User Manual

Heatilator EL42 Series
56 pages
Print Icon
To Next Page IconTo Next Page
Loading...
Heatilator • EL36/EL42 • 4044-132 Rev T • 11/07
1
Owners Manual
Installation and Operation
Models:
EL36 Series
EL42 Series
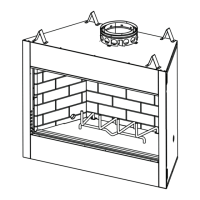
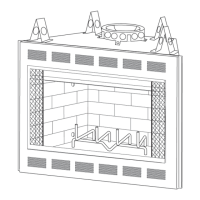
Woodburning Fireplace
DO NOT DISCARD THIS MANUAL
CAUTION
Important operating
and maintenance
instructions included.
Leave this manual with
party responsible for
use and operation.
Read, understand
and follow these
instructions for safe
installation and
operation.
DO NOT
DISCARD
Installation and service of this replace should be
performed by quali ed personnel. Hearth & Home
Technologies suggests NFI certi ed or factory-
trained professionals, or technicians supervised
by an NFI certi ed professional.
If the information in these instruc-
tions is not followed exactly, a
re may result causing property
damage, personal injury, or death.
Do not store or use gasoline or other am-
mable vapors and liquids in the vicinity of
this or any other appliance.
Do not over re. Over ring will void your war-
ranty.
Comply with all minimum clearances to
combustibles as speci ed. Failure to comply
may cause house re.
WARNING
Fire Risk
For use with solid wood fuel or decorative
gas appliance only.
Do not install unvented gas logs.
WARNING
WARNING
Hot glass will cause burns.
Do not touch glass until it is cooled
NEVER allow children to touch glass
Keep children away
CAREFULLY SUPERVISE children in same room
as replace.
Alert children and adults to hazards of high
temperatures.
High temperatures may ignite clothing or other
ammable materials.
Keep clothing, furniture, draperies and other
ammable materials away.
HOT SURFACES!
Glass and other surfaces are
hot during operation AND
cool down.
¨


Table of Contents

Questions and Answers

  • T
    Teresa AdamsJul 31, 2025
    Why do I smell smoke in the house when using my Heatilator EL42?
    • K
      Kathleen GarciaJul 31, 2025
      If you smell smoke in the house during operation of your Heatilator Indoor Fireplace, ensure the damper is fully open. If needed, clean the chimney. Use sufficient kindling and fuel. You may also need to open the glass doors or a window. Check if you need a balanced air make-up.
  • T
    Timothy PowersAug 6, 2025
    How to get a good fire going in my Heatilator EL42?
    • C
      carolinesloanAug 6, 2025
      To get a good fire going in your Heatilator Indoor Fireplace, make sure the damper is open to ensure proper draft. Use more paper or starter to ignite the kindling. Use more dry kindling to ignite the fuel. Use well-seasoned small split wood. Arrange kindling and wood to allow for air movement. If you have an exposed, cold chimney, use a lighted rolled newspaper at the throat or flue opening to start upward movement. Also, check for obstructions in the chimney, pre-warm the chimney, shut off exhaust devices, and slightly open a window. Use more, drier, well-spaced kindling and fuel.
  • H
    Heather MartinezAug 12, 2025
    Why does my Heatilator EL42 burn wood too fast?
    • R
      richardsgregoryAug 13, 2025
      If your Heatilator Indoor Fireplace burns wood too fast, consider adding glass doors to slow air intake. If the wood is extremely dry, mix in less seasoned wood after the fire is established.
  • J
    Justin HebertAug 18, 2025
    How to get more heat from Heatilator EL42?
    • A
      Angela HarmonAug 18, 2025
      To get more heat from your Heatilator Indoor Fireplace, make larger fires and burn seasoned wood that has been covered on top, split, and stacked for 9 months to 2 years. If you have a blower, wait until the fire is established and leave it on a lower speed. If one is available, add a blower.
  • C
    Calvin BrooksAug 23, 2025
    What to do if I smell smoke after using my Heatilator EL42 Indoor Fireplace?
    • H
      Hannah BarnesAug 25, 2025
      If you smell smoke in the house after using your Heatilator Indoor Fireplace, close the damper at the end of the burn. Check if you need glass doors, a balanced air make-up system, or a higher chimney. If the odor is from creosote, have the chimney cleaned. If the damper was closed too early, wait until the fire is completely out before closing it.

Summary

General Information and Safety Warnings

Warning: Fire Risk from Non-Compliance

Failure to follow instructions can cause fire, property damage, injury, or death.

Warning: Fire Risk from Fuel;Installation

Risk of fire if improper fuel or installation methods are used.

Appliance Certification and Approvals

Appliance Certification

Fireplace system tested and listed according to UL 127 and ULC-S610 standards.

Warning: Fire Risk & Prohibited Actions

Prohibits installation of damaged or modified fireplaces, unapproved components, or unvented gas logs.

Getting Started: Design and Installation

Warning: Asphyxiation Risk from Negative Pressure

Negative pressure can cause spillage of combustion fumes and soot, requiring proper draft.

Minimizing Negative Air Pressure Effects

Recommendations for installing outside air kits and ensuring adequate ventilation.

Installation Tools, Supplies, and Inspection

Warning: Inspect Fireplace and Components

Inspect for damage; do not install damaged, incomplete, or substitute components.

Framing and Clearances: Location

Selecting Fireplace Location

Options include room divider, wall, corner, or exterior chase installation.

Clearances to Combustible Materials

Warning: Fire Risk from Clearance Violations

Comply with minimum clearances. Non-combustible materials required closer than minimums.

Framing and Clearances: Sidewalls and Surrounds

Chimney System: Chase Construction and Requirements

Chimney Requirements and Clearances

Details minimum heights, offsets, lengths, and clearances for chimney components.

Outside Air Kit Installation

Outside Air Kit Function

Provides combustion air, minimizes negative pressure, and requires specific placement and height.

Warning: Outside Air Intake Restrictions

Do not draw air from wall/floor/ceiling cavities, enclosed spaces, or near exhaust vents.

Fireplace Securing and Air Control

Securing the Fireplace

Position fireplace on a flat surface and secure to framing, ensuring minimum air clearance.

Warning: Fire Risk with Hearth Strips

Metal hearth strips must be installed to prevent ignition of flooring.

Chimney System: Requirements and Component Selection

Chimney Vertical Distances

Details minimum and maximum heights, lengths, and clearances for chimney components.

Warning: Chimney Clearance

Maintain 2 in. (551 mm) air clearance to insulation and combustible materials.

Chimney System: Offsets and Returns

Offset;Return Guidelines

To bypass obstructions, use offsets/returns; ensure draft is not restricted beyond 30°.

Chimney System: Assembly and Firestops

Warning: Use Approved Chimney Components

Only use specified chimney components; do not use substitute or damaged parts.

Chimney System: Attic Insulation Shield

Warning: Fire Risk with Insulation

Do not pack insulation near chimney; maintain specified clearances to prevent fire.

Chimney System: Securing the Assembly

Warning: Fire Risk from Improper Securing

Secure offsets and straight sections with screws; prevent separation or twisting.

Chimney System: Termination Requirements

Termination Cap Approval

Must use an approved and listed cap; avoid locations prone to plugging.

Termination Height and Clearance

Terminate at least 3 ft above roof and 2 ft above any roof portion within 10 ft.

Chimney System: Roof Exit and Flashing

Warning: Roof Clearance

Maintain 2 in. (51 mm) air clearance to insulation and combustibles at roof opening.

Chimney System: Termination Cap Details

Warning: Cap-to-Pipe Overlap

Minimum overlap required to prevent separation and escape of sparks, heat, and embers.

Chimney System: Square and Terra Cotta Caps

Accessories: Gas Log and Lighter Provisions

Warning: Asphyxiation Risk with Gas Logs

Damper must be open when gas logs are installed; gas fire generates fumes.

Finishing: Hearth Extension Requirements

Warning: Fire Risk from Hearth Strips

Metal hearth strips must be installed; sparks or embers may ignite flooring.

Finishing: Hearth Extension and Materials

Warning: Hearth Extension Installation

Hearth extensions must be installed as specified; high temperatures may ignite concealed combustibles.

Finishing: Decorative Facing and Materials

Warning: Finishing Edges and Fronts

Finish to clearances; use non-combustible material for metal front; seal joints with 300°F sealant.

Operating Instructions: General Overview

Warning: Fire Risk from Improper Operation

Do not operate before reading instructions; failure to operate properly may cause fire.

Warning: Hot Surfaces

Glass and surfaces are hot; avoid touching hot glass; supervise children.

Warning: Fire Risk with Fuel Type

Use only solid wood or decorative gas appliances; do not install unvented gas logs.

Operating Instructions: Air, Clearances, Doors, and Firescreen

Operating Instructions: Fueling and Wood

Warning: Use Integral Grate

Use only factory installed grate; may cause overfire if not used.

Operating Instructions: Starting a Fire

Warning: Flammable Liquids

Do not use gasoline or other flammable liquids to start fire; keep them clear of the fireplace.

Troubleshooting: Venting Issues

Troubleshooting: Fire Starting and Heat

Troubleshooting: Burning and Smoke

Maintenance: Ashes and Chimney Care

Warning: Ash Disposal

Dispose of ashes in a metal container with a lid, away from combustibles, until cooled.

Warning: Firebox Refractory

Inspect refractory annually; replace if cracks exceed 1/4 in. (6 mm).

Maintenance: Tasks and Chimney Fire

Warning: Chimney Fire Response

Have chimney inspected by professionals; replace damaged components; failure creates fire risk.

Reference Materials: Woodburning Cap Specs

Service Parts: List

Limited Warranty

20-Year Buyer Protection Program

Details the limited warranty and replacement parts advantage for Heatilator fireplaces.

Heatilator EL42 Series Specifications

General IconGeneral
Model SeriesEL42
Product TypeDirect Vent Gas Fireplace
Vent TypeDirect Vent
Fuel TypeNatural Gas
EfficiencyUp to 70%
Width42 inches
Glass Size30 x 20 in.
Viewing Area30 x 20 in.

Related product manuals