EasyManua.ls Logo

Heatilator GNDC30 User Manual

Heatilator GNDC30
36 pages
To Next Page IconTo Next Page
Page #1 background imageLoading...
Page #1 background image
01-03 1 34616 Rev F
INSTALLATION & OPERATING INSTRUCTIONS
NOVUS SERIES
TOP DIRECT VENT GAS APPLIANCE
GNDC30/33/36 & GNDH30/33/36
WARNING!
Improper installation, adjustment, alteration, service or maintenance can cause injury or property damage. Refer to this
manual. For assistance or additional information, consult a qualified installer, service agency or the gas supplier.
WARNING: If the information in this manual
is not followed exactly, a fire or explosion may
result causing property damage, personal in-
jury or loss of life.
Do not store or use gasoline or other flammable
vapors and liquids in the vicinity of this or any
other appliance.
What to do if you smell gas
Do not try to light any appliance.
Do not touch any electrical switch; do not use
any phone in your building.
Immediately call your gas supplier from a
neighbors phone. Follow the gas suppliers
instructions.
If you cannot reach your gas supplier, call the
fire department.
Installation and service must be performed by a
qualified installer, service agency or the gas
supplier.
For residential use - Meets all HUD requirements for
manufactured housing installations.
U.S. PATENT 5,613,487
CAUTION:
Do not expose the appliance to the elements (such as
rain, etc.).
REAR DIRECT VENT GAS APPLIANCE
GNRC33/36
Question and Answer IconNeed help?

Do you have a question about the Heatilator GNDC30 and is the answer not in the manual?

Heatilator GNDC30 Specifications

General IconGeneral
Ignition TypeElectronic Ignition
Vent TypeDirect Vent
Log MaterialCeramic Fiber
Fuel TypeNatural Gas
BTU Input30, 000 BTU
Efficiency70%
Fireplace TypeGas Fireplace

Summary

Safety Precautions

B. Locations and Clearances

Appliance Locations and Space Requirements

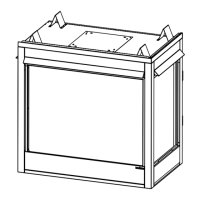
Guidance on where to install the appliance and required space.

Clearances

Required clearance distances to combustible materials around the appliance.

E. Venting - Horizontal Termination

3. Termination Cap Location

F. Venting - Vertical Termination

1. Rear Vent

Instructions for vertical venting through the rear of the appliance.

2. Top Vent

Instructions for vertical venting through the top of the appliance.

G. Venting - Framing & Construction

1. Installing the Interior Wall Shield (WS6)

Procedure for installing interior wall shields during venting.

2. Installing the Rear Vent Heat Shield

Installation steps for rear vent heat shields.

3. Firestop Spacer/Vent Installation

Installing firestop spacers for vent penetrations.

4. Chase/Termination Installation

Installation of chases and termination points for venting.

5. Installing the Vertical Termination Cap

Steps for installing the vertical termination cap.

H. Vent Assembly

1. Attaching the Venting to the Appliance

Connecting vent sections to the appliance collars.

2. Assembling Vent Sections

Steps for connecting standard vent sections.

3. Assembling Minimum Installation (MI) Sections

Procedure for assembling cut-to-length MI vent sections.

4. Assembling the Slip Sections

How to assemble and secure slip vent sections.

I. Utilities

2. Gas Line Connection

Instructions for connecting the gas supply line.

4. Wiring

K. Appliance Preparation

M. Lighting Instructions

1. Intermittent Pilot Ignition

Step-by-step guide for lighting intermittent pilot systems.

2. Standing Pilot Ignition

Step-by-step guide for lighting standing pilot systems.

N. Seasonal Check List

P. Maintenance Instructions

2. Checking Flame Patterns

How to inspect and adjust flame patterns.

3. Venting System Inspection

Ensuring proper airflow and checking for obstructions.

Gas Appliance (Fireplace) Limited Lifetime Warranty

Limited Lifetime Warranty

Coverage for component failure due to manufacturing defects.

1 Year Limited Warranty

Coverage for component failure within one year of installation.

Related product manuals