Step 2
Carefully unplug the ribbon connector which is
plugged in to the front half of the thermostat.
Place the thermostat front half somewhere safe.
Terminate the thermostat as shown in the diagrams at
the back of this booklet.
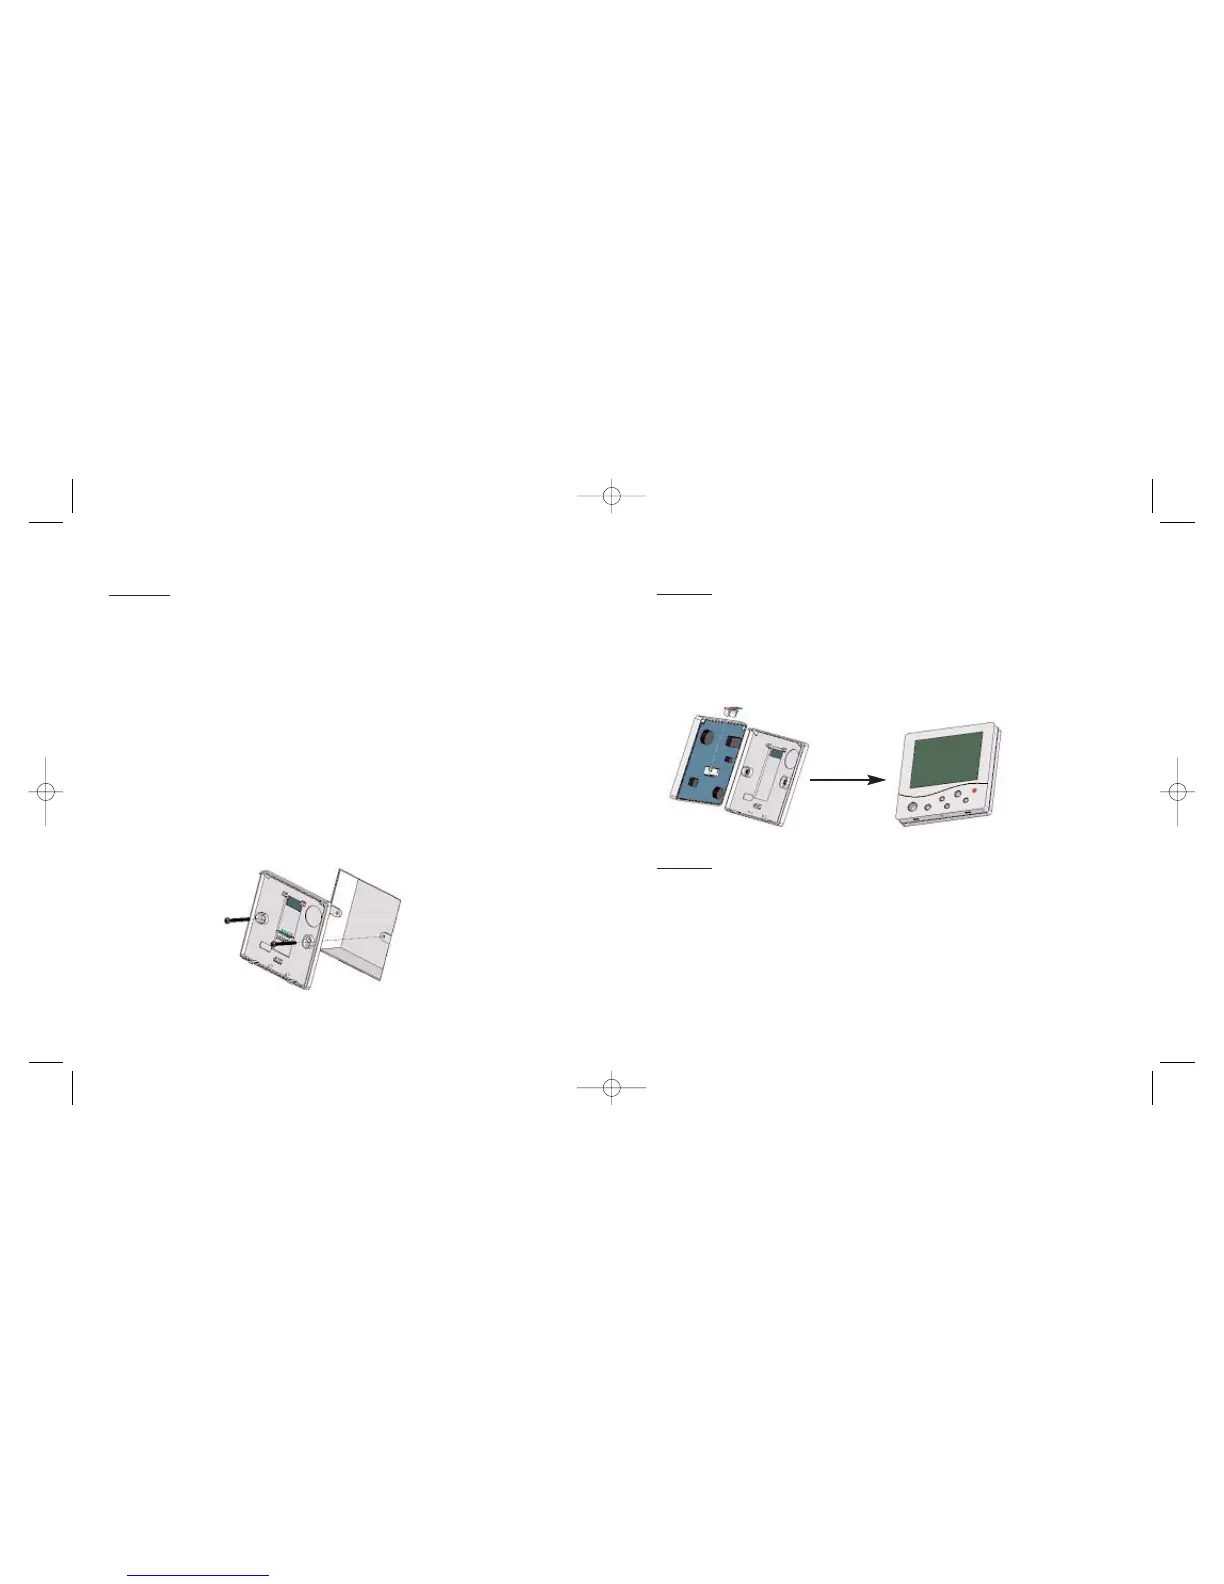
Screw the thermostat back plate on to the back box.
Step 3
Re-connect the thermostat ribbon cable and clip the
two halves together.
S
tep 4
Turn on the power to the thermostat and allow
the thermostat to stabilise for 1 hour before
calibrating.
6
5