Translation of the original instructions / Small animal clipper 17
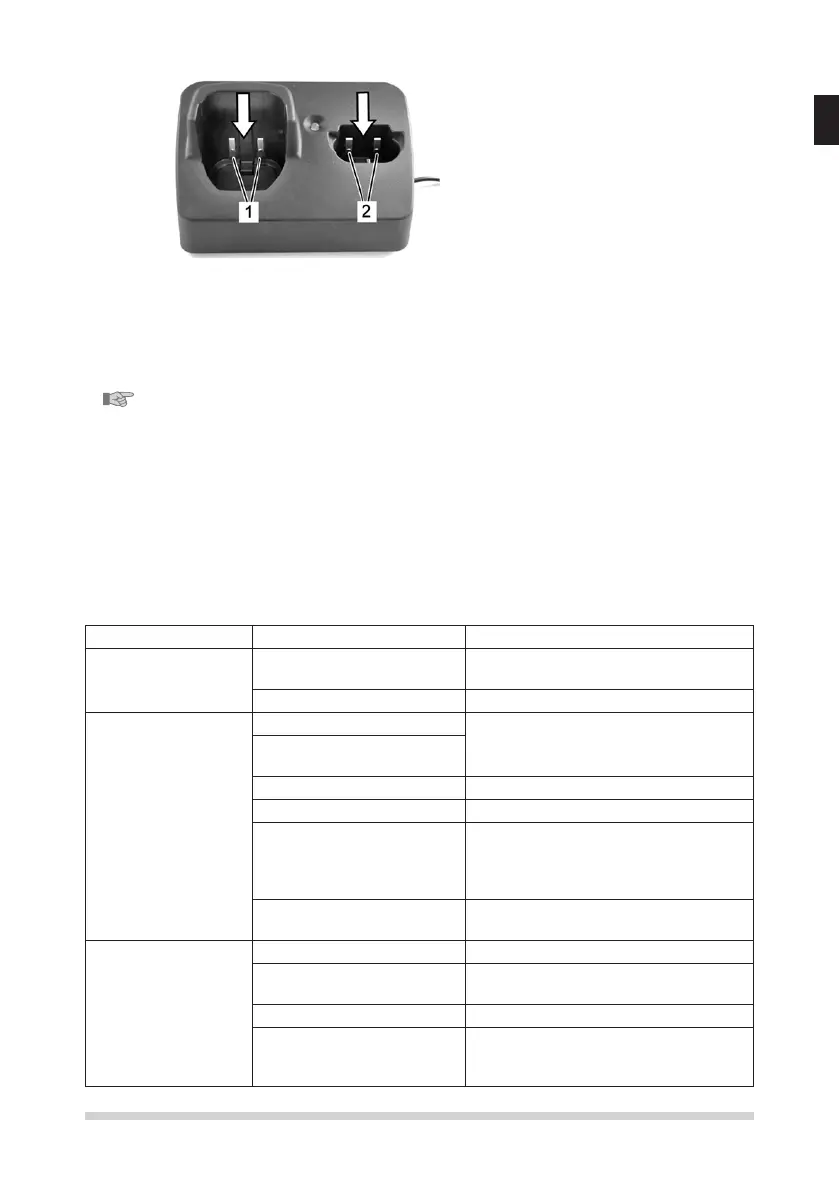
Charging station
1. Disconnect the charging station
from the power supply.
2. If necessary, take away hairs from
both charging cavities.
3. If required, clean the contacts (1)
and (2) with a dry cloth.
Fig. 23
Contacts
Clean the contacts of the battery and the shearer with a dry cloth as nec-
essary.
NOTE!
If not using daily, store shearer and charging station in the packaging sup-
plied with them. When in use daily, we recommend to put clipper and re-
serve battery in the charging station.
7 Troubleshooting
y The here described tasks for troubleshooting can be done mostly by the
operator.
y Some tasks only may be done by especially trained personal or by an
authorised service centre. These tasks are marked with (S).
Malfunction Cause Rectication
Top blade does not
move
Clipperhead is not well
engaged
Engage the clipperhead correctly
when the motor is running
Turning lever is defective Replace turning lever (S)
Clipper cuts badly or
not at all
Clipper blade is blunt Have top and bottom blades resharp-
enend by service centre (S)
Clipper blades have not
been correctly ground
Clipper blades are not oiled Oil clipper blades every 15 minutes
The animal‘s hair is wet Only clip dry hair
Hairs jammed between top
and bottom blades
Take o clipperhead, push the top
blade half away from the clipperhead,
take away hairs between top and
bottom blade
Clipperhead has too little
clipping pressure
Have clipperhead inspected (S)
Motor is not running Battery is dead Charge battery
Contacts dirty Switch clipper o and clean the
contacts
Faulty battery Replace battery
Smell of burning from
the motor housing. Motor
burned out
Have motor and / or electronics
replaced (S)
 Loading...