Menu of the Control Box
The control commands for the Control Box are organized in a menu:
Navigating through the menu
1. Choosing a menu point:
Press the function keys ``UP´´ or ``DOWN´´ for scrolling from one menu entry to another.
2. Entering into a menu entry:
Press the function key ``GO/SET´´. The name of the menu entry, shown in the display, starts to flash. In
case of error, press the function key ``ESCAPE´´.
3. Choosing a value:
Press the function keys ``UP´´ or ``DOWN´´ to alter the value in the display. The keys have a repeating
function:
When pushing them for a longer time the values are not altered one by one but very quickly.
4. Saving a chosen value:
Press the function key ``GO/SET´´ or turning the bridge 180 degrees.
5. Leaving a menu entry without saving the settings:
Press the function key ``ESCAPE´´.
6. How to program your Turntable
Put the bridge onto the turntable pit, plug the grey cable into the control box and switch
on the power supply. The display shows in a moving screen Heljan.
Note: The circular contact ring and wipers must be ultra-clean with digital operation.
Clean both parts in Propyl Alcohol or a similar cleaner any time the bridge is
removed and installed.
Please note that the end to set your positions from, is the end where the sensor in the bridge/Cabin is
placed.
Before you start using your Turntable, please perform a Reset as follows:
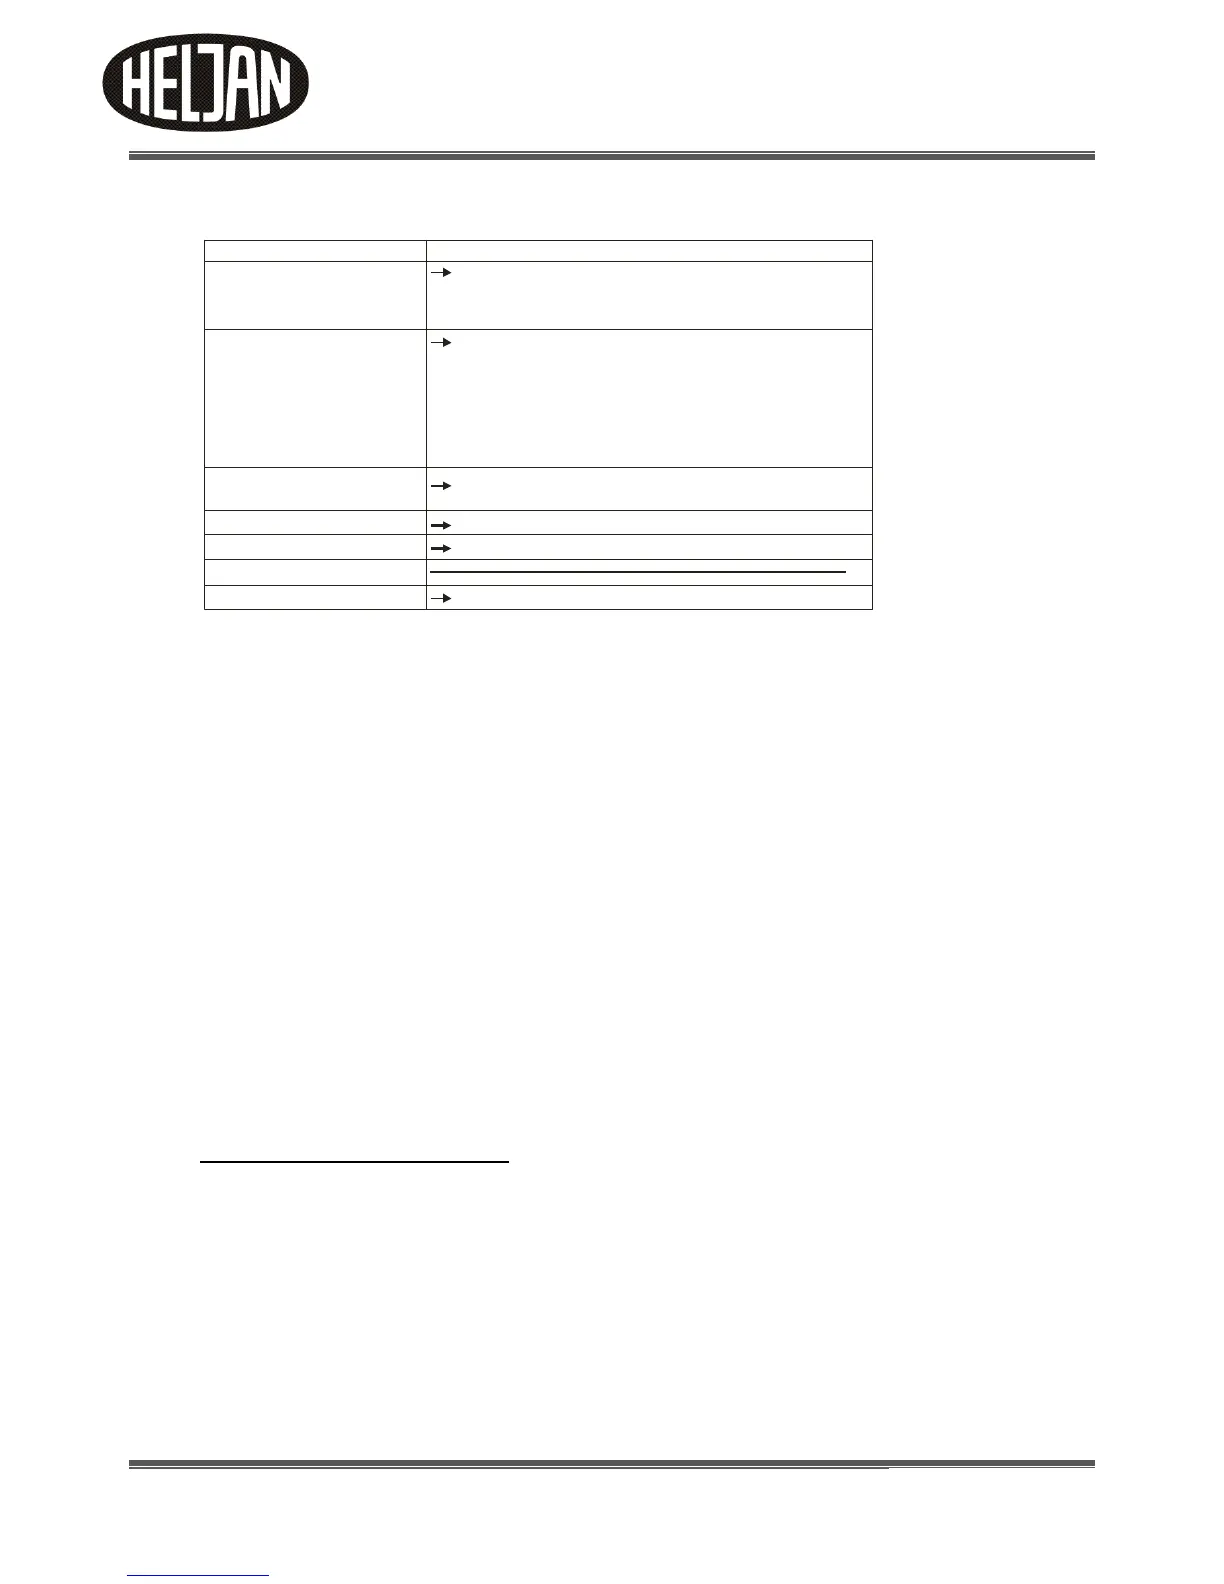
Menu point Remark
Calibrating the ``0´´-position of the bridge
This should be done always
- after putting the bridge into the turntable pit
- after altering the bridge position by hand
- after the power supply has been interrupted while the
bridge was moving or a programme has just been set.
Driving the bridge to set a stop
The displays shows after `` `` the digit number (1 to 48)
of the stop where the bridge currently is
Tr
Setting a stop for the bridge and numerating the
stopping position
Deleting a stop of the bridge
Setting the turntable’s digital address
Performing a reset / restoring the factory settings
Tr
Cal
Prog
Del
Adr
bl
Res
- after programming is done