Docking Station Overview
Front
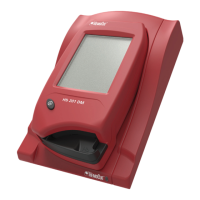
The Docking Station consists of the following items:
Tracks (1) for the Analyzer
Power (2) for the Analyzer
LED (3)
Materials provided
HemoCue 201 DM Docking Station (Primary or Secondary)
HemoCue 201 DM Docking Station Manual (this document)
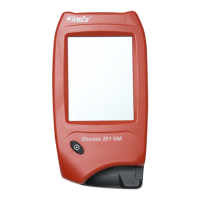
Back/Side panel – Primary Docking Station
The following items are located on the back/side panel:
Power inlet (1) for the AC Adapter
USB port (2) for setting up the Primary Docking Station
(Dierent from the USB port in the Secondary Docking Station.)
Network port (3) for data communication via a LAN.
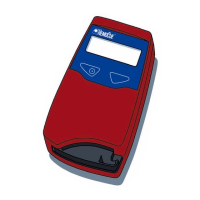
Back/Side panel – Secondary Docking Station
The following items are located on the back/side panel:
Power inlet (1) for the AC Adapter
USB port (2) for data communication directly with the PC
(Dierent from the USB port in the Primary Docking Station.)
1
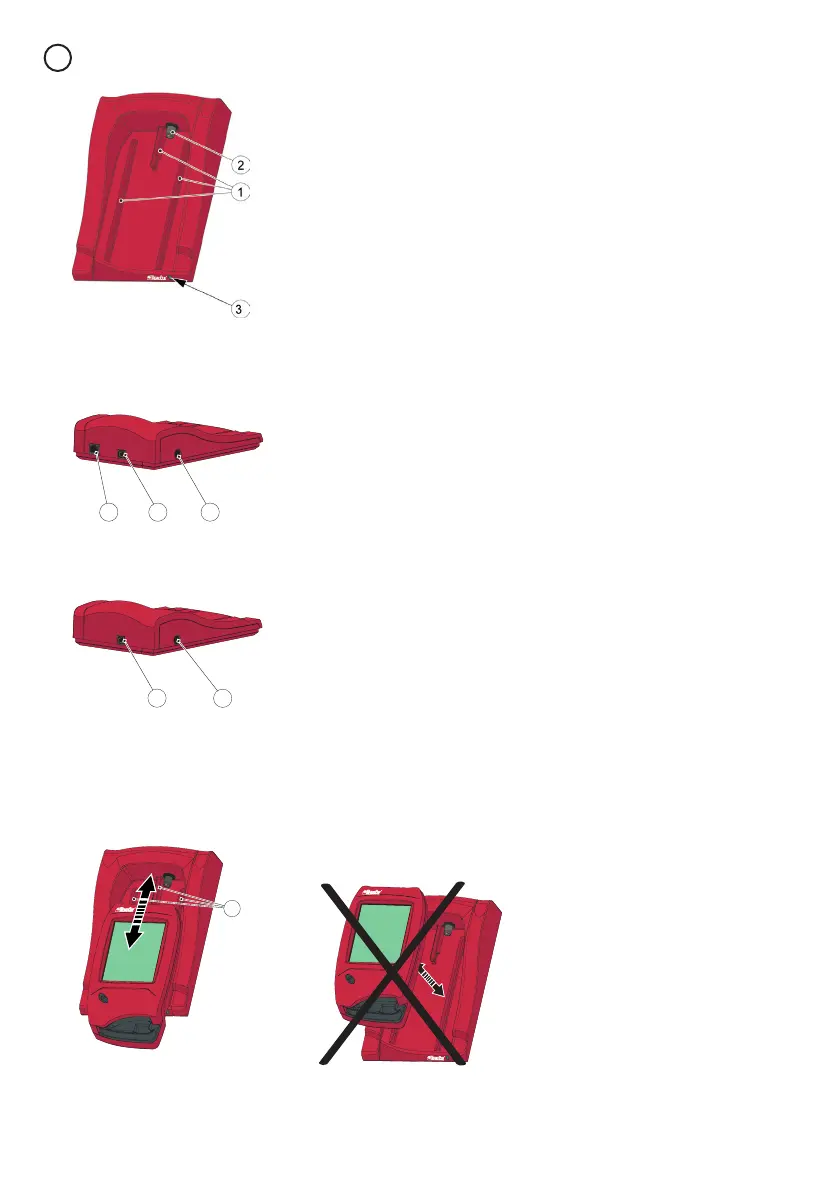
Placing the Analyzer in the Docking Station
Always slide the Analyzer into and out of the Docking Station by means
of the Tracks (1). Make sure the Analyzer is fully inserted.
Never try to lift the Analyzer out of the Docking Station or press the
Analyzer downwards into the Docking Station. This may damage the
casing and power outlets of the Analyzer and/or the Docking Station.
4
EN
 Loading...