EasyManua.ls Logo

Henny Penny Evolution Elite EEE-154 - User Manual

Henny Penny Evolution Elite EEE-154
70 pages
Print Icon
To Next Page IconTo Next Page
Loading...
OPERATOR’S MANUAL
REGISTER WARRANTY ONLINE AT WWW.HENNYPENNY.COM
Henny Penny
Evolution Elite
®
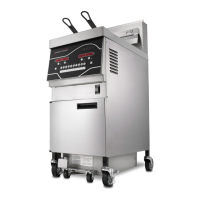
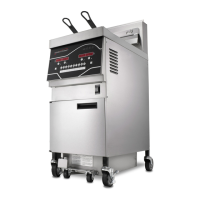
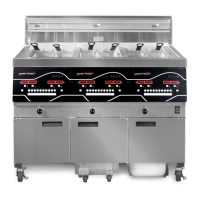
Reduced Oil Capacity Open Fryers
(Full Vat – Electric)
Wendy’s
Model EEE-153
Model EEE-154

Other manuals for Henny Penny Evolution Elite EEE-154

Questions and Answers

  • W
    watkinsnatashaAug 18, 2025
    How to unclog a Henny Penny Evolution Elite EEE-154 Fryer drain valve?
    • S
      smithdonnaAug 19, 2025
      To address a clogged drain valve in your Henny Penny Fryer, open the valve and force a cleaning brush through the drain. If the oil channel is clogged, access the clean-out plug on the sides of the unit.
  • T
    Trevor OchoaAug 20, 2025
    What to do if Henny Penny Evolution Elite EEE-154 Fryer has no power?
    • D
      Dennis WilsonAug 20, 2025
      If your Henny Penny Fryer isn't powering on, even with the power switch in the ON position, start by checking if the unit is properly plugged in. Then, inspect the breaker or fuse at the supply box, and verify the voltage at the wall receptacle. Also, check the main power switch and replace it if it's defective. Finally, make sure to check the cord and plug for any damage and inspect the circuit breakers in the fryer.
  • J
    Jimmy BoydAug 23, 2025
    Why is my Henny Penny Evolution Elite EEE-154 Fryer oil not heating up?
    • M
      Mr. Michael BrownAug 23, 2025
      If the oil in your Henny Penny Fryer is not heating, first check the supply box or control panel for a blown fuse or tripped circuit breaker and reset it or replace the fuse. Inspect the power switch, cord, and plug for any faults. Also, ensure you have power at the receptacle. Check the drain switch. Replace the control panel if the PC board is faulty. If the high limit control switch has tripped, reset it by gently pushing a small screwdriver or Allen wrench into the hole in the heating element hinge; if it doesn't reset, replace the high limit.
  • C
    Chad WoodAug 26, 2025
    Why is the filter motor on my Henny Penny Evolution Elite EEE-154 Fryer pumping oil slowly?
    • T
      Timothy ShieldsAug 26, 2025
      If the filter motor in your Henny Penny Fryer runs but pumps oil slowly, check for loose filter line connections and tighten them. Also, the filter paper or pad might be clogged, so replace it.
  • D
    Douglas FigueroaAug 27, 2025
    What does error code “E-4” mean on my Henny Penny Evolution Elite EEE-154 Fryer?
    • C
      Charles MataAug 28, 2025
      If your Henny Penny Fryer displays an “E-4” error, it indicates the control board is overheating. Turn the switch to the OFF position, then back to ON. If the display still shows “E-4”, check the louvers on each side of the unit for any obstructions.
  • C
    Crystal HunterAug 30, 2025
    What does error code “E-5” indicate on a Henny Penny Evolution Elite EEE-154 Fryer?
    • J
      jordandickersonAug 30, 2025
      If your Henny Penny Fryer displays an “E-5” error, it means the oil is overheating. Turn the switch to the OFF position, then back to ON. If the display shows “E-5” again, the heating circuits and temperature probe should be checked.
  • T
    Tracy HallSep 1, 2025
    What does error code “E-10” mean on my Henny Penny Evolution Elite EEE-154?
    • G
      Geoffrey MoyerSep 1, 2025
      If your Henny Penny Fryer displays an “E-10” error, it indicates a high limit issue. Reset the high limit by gently pushing a small screwdriver or Allen wrench into the hole in the heating element hinge. If the high limit does not reset, it must be replaced.
  • E
    elizabethsheltonSep 3, 2025
    Why is my Henny Penny Evolution Elite EEE-154 Fryer oil foaming or boiling over?
    • H
      Holly WardSep 4, 2025
      Oil foaming or boiling over in your Henny Penny Fryer can occur for several reasons. It may be due to water in the oil, requiring you to drain and clean the vat, then add fresh oil after a cook cycle. Using improper or bad oil can also cause this issue, so ensure you are using the recommended oil. Additionally, improper filtering or a vat full of crumbs can contribute to foaming; in this case, filter the oil. Finally, ensure you thoroughly rinse the vat after cleaning to remove any residual cleaning agents.
  • M
    Molly VaughanSep 6, 2025
    How to fix a Henny Penny Evolution Elite EEE-154 Fryer filter motor that will not run?
    • T
      Todd SmithSep 6, 2025
      If the filter motor on your Henny Penny Fryer won't run, the thermal reset button on the rear of the pump motor may be tripped. Allow the motor to cool down, then press hard against the button with a screwdriver until it clicks.
  • D
    Derek YatesSep 8, 2025
    What does the “CHANGE FILTER PAD” prompt mean on my Henny Penny Fryer?
    • D
      Dominique GuzmanSep 8, 2025
      If the “CHANGE FILTER PAD” prompt appears on your Henny Penny Fryer, it means the filter pad hasn't been changed within 24 hours. Replace the old filter pad with a NEW filter pad while the main power switch is turned on. Also, check the microswitch if the main power switch was turned off during the filter pad change.

Summary

Limited Warranty for Henny Penny Equipment

New Equipment Warranty

Covers new appliances for defects in material or workmanship for two years, excluding baskets, lamps, and fuses.

Filter System Warranty

Excludes warranty coverage for failures caused by non-OEM or unapproved filters.

Replacement Parts Warranty

Covers defects in material or workmanship for 90 days, excluding lamps and fuses.

Extended Frypot Warranty

Covers frypot failures due to manufacturing or workmanship issues for up to seven years.

Section 1. Introduction

1-1. Introduction

Overview of the Henny Penny open fryer as a food processing unit for commercial use.

1-2. Features

Lists key features like easy cleaning, reduced oil usage, computer control, and auto top-off.

1-3. Proper Care

Highlights the need for regular maintenance and cleaning as described in the manual.

1-4. Assistance

Provides contact information for obtaining external assistance or support from Henny Penny.

1-5. Safety

Explains safety alerts, symbols (DANGER, WARNING, CAUTION, NOTICE), and their meanings.

Section 2. Installation

2-1. Introduction

Introduces the steps for installation and unpacking of the Henny Penny Evolution Elite® fryer.

2-2. Unpacking

Provides step-by-step instructions for safely unpacking the fryer and its components.

2-3. Selecting the Fryer Location

Discusses criteria for choosing an optimal location for the fryer to ensure convenience and proper operation.

2-4. Leveling the Fryer

Explains the importance of leveling the fryer and the procedure to adjust casters for stability.

2-5. Ventilation of Fryer

Details the necessity of an adequate exhaust hood or ventilation system for fryer operation.

2-6. Electrical Requirements

Outlines critical electrical specifications, grounding, and connection requirements for the fryer.

2-7. Dimensions

Presents detailed physical dimensions of the fryer, including height, width, and depth.

Section 3. Operation

3-1. Operating Components

Identifies and explains the function of various controls and indicators on the fryer's control panel.

3-2. Set-Up Mode

Guides the user through initial fryer settings and configurations upon start-up.

3-3. Filling or Adding Oil

Details the correct procedure for filling the fryer vat with oil and observing oil level indicators.

3-4. Morning Start-Up Procedures

Describes the steps for preparing the fryer for operation at the beginning of the day, including melt cycle.

3-5. Basic Operation

Explains how to perform standard cooking cycles, including timer use and product placement.

3-6. Idle Mode

Details how to use Idle Mode to save oil and utility costs by maintaining a lower oil temperature.

3-7. Oil Guardian (Auto Top-Off)

Explains the automatic oil level monitoring and replenishment system using BIB.

3-8. Selecting a Product with a Different Setpoint

Guides on adjusting cooking temperatures for products not matching default setpoints.

3-9. Replacing the BIB

Instructions for replacing the Bag-in-Box oil supply when the unit indicates it is low.

3-10. SmartFilter Express

Describes the automated oil filtering system, its operation, and maintenance prompts.

3-11. Daily Filtering

Provides a detailed procedure for performing daily oil filtering for thorough cleaning.

3-12. Discarding Oil Using Optional Oil Discard Shuttle-ODS-400

Instructions for safely disposing of used oil using the optional ODS-400 shuttle.

3-13. Discarding Oil Using Optional Oil Discard Shuttle-ODS-450

Steps for disposing of oil using the optional ODS-450 oil disposal shuttle.

3-14. Discarding Oil from Vat Using Optional Bulk Oil Dispose System

Procedures for discarding oil from the vat using a bulk oil disposal system.

3-15. Changing the Filter Pad

Detailed steps for removing, cleaning, and replacing the filter pad for optimal performance.

3-16. Removing and Cleaning Basket Rest

Instructions for periodically removing and cleaning the basket rest for hygiene.

3-17. Clean-Out Mode

Guides on using the Clean-Out Mode for deep cleaning the fryer vat with cleaning solutions.

3-18. Check;Replace Filter Drain Pan O-Rings

Details on inspecting and replacing O-rings in the filter drain pan to prevent leaks.

3-19. Info Button Stats

Explains how to access and view information such as actual oil temperature and recovery times.

3-20. Filter Button Stats

Describes how to view filter status, including remaining cook cycles before filtering.

3-21. Preventive Maintenance Schedule

Provides a summary table of scheduled maintenance tasks and their recommended frequency.

Section 4. Information Mode

4-1. Information Mode Details

Accesses historical data like error logs, daily stats, and oil usage for operational analysis.

Section 5. Product Program Mode

5-1. Modifying Product Settings

Allows customization of product names, cooking times, temperatures, and other parameters.

Section 6. Level 2 Programming

6-1. Special Program Mode

Accesses advanced settings for fryer configuration, including language, volume, and filter tracking.

6-2. Do Not Disturb

Enables programming of peak operation times when the 'FILTER NOW?' message is suppressed.

6-3. Clock Set

Instructions for setting the fryer's internal clock, date format, and daylight saving time.

6-4. Data Logging, Heat Control, Tech, Stat, and Filter Control Modes

Mentions advanced diagnostic modes primarily for technical use.

Section 7. Troubleshooting

7-1. Trouble Shooting Guide

Lists common problems, their causes, and recommended corrective actions for the fryer.

7-2. Error Codes

Explains various error messages displayed by the fryer's control system and their solutions.

Henny Penny Evolution Elite EEE-154 Specifications

General IconGeneral
BrandHenny Penny
ModelEvolution Elite EEE-154
CategoryFryer
LanguageEnglish

Related product manuals