M
Mark JohnsonSep 15, 2025
What does error 'E-70C' mean on Henny Penny EEG-242?
- LlbryantSep 15, 2025
If the Henny Penny Fryer displays “E-70C”, have the jumper wire checked on the PC board at the drain switch interlock position.
What does error 'E-70C' mean on Henny Penny EEG-242?
If the Henny Penny Fryer displays “E-70C”, have the jumper wire checked on the PC board at the drain switch interlock position.
Why is my Henny Penny EEG-242 Fryer not turning on?
If your Henny Penny Fryer is completely inoperative even when the power switch is ON: * Ensure the fryer is properly plugged in. * Check the breaker or fuse at the supply box.
Why won't oil drain from my Henny Penny EEG-242 Fryer?
If oil will not drain from the vat of your Henny Penny Fryer: * Open the valve and force a cleaning brush through the drain to clear any crumbs. * Remove the right side panel and remove the plug from the end of the trough to clean the trough.
Why won't the filter motor run on my Henny Penny EEG-242 Fryer?
If the filter motor on your Henny Penny Fryer will not run, allow time for the motor to cool down. Then, using a screwdriver, press hard against the thermal reset button on the rear of the pump motor until it clicks.
What does 'E-83-A' mean on a Henny Penny EEG-242 Fryer?
If the Henny Penny Fryer displays “E-83-A”, check the filter system in Vat #1, as this indicates pressure is too high.
What does 'E-83-R' mean on a Henny Penny EEG-242?
If the Henny Penny Fryer displays “E-83-R”, check the Bulk Dispose quick-disconnect behind the fryer, as this indicates the Bulk Dispose switch is ON when the pressure is too high.
What does error 'E-60' mean on Henny Penny EEG-242?
If the Henny Penny Fryer displays “E-60” “FILTER IN USE”, press the power button to turn the vat off, wait 15 seconds, and turn it back on again. If “E-60” persists, have the connector between the PC boards checked. If necessary, replace the AIF PC board or control PC board.
What does 'E-93-1' mean on a Henny Penny Fryer?
If the Henny Penny Fryer displays “E-93-1” “24 VDC SUPPLY TRIPPED” and the AutoLift feature is not operating, have each of the AutoLift motors checked.
Why Henny Penny EEG-242 shows 'E-22' no heat error?
If the Henny Penny Fryer displays “E-22” and indicates “NO HEAT” or “CHECK GAS VALVE”, have the gas valve and heat circuit checked.
What does error E-6A mean on Henny Penny EEG-242 Fryer?
If the Henny Penny Fryer displays “E-6A”, turn the switch to the OFF position and then back to ON. If the display continues to show “E-6A”, the temperature probe should be checked.
Provides troubleshooting information in an easy-to-read table format.
Explains safety symbols (DANGER, WARNING, CAUTION, NOTICE) and their meanings for hazard communication.
Details the process for isolating malfunctions: define problem, locate in table, review causes, and perform corrections.
Lists error codes, their causes (e.g., oil overheating, drain switch failure), and corrective actions.
Explains how to view actual oil temperature, set-point temperature, and recovery information for each vat.
Details how to check cook cycles remaining before filtering, time/date of last filter, and filter pad hours.
Describes accessing various logs and data like E-LOG, LAST LOAD, DAILY STATS, OIL STATS for operational and technical help.
Guides on how to program product names, assign buttons, change times, temperatures, and cook IDs.
Accesses detailed programming options like language, audio settings, melt cycle, idle mode, and filter tracking.
Instructions for setting the date, time, AM/PM, and time format (12/24 hour).
Lists self-diagnostic functions for technicians, including software, fryer type, push button tests, and probe calibration.
Allows technicians to view advanced operational information such as fryer running hours and oil temperatures.
Sets time periods when the "FILTER NOW?" message will not appear, for peak operation times.
Introduces maintenance procedures and provides tips for using a multimeter for checks.
Outlines regular maintenance tasks like filtering oil, changing filter pads, lubricating o-rings, and cleaning.
Instructions for replacing the control panel and menu card, including safety precautions.
Details the procedure for replacing the high temperature limit control, including disconnecting power and removing nuts.
Instructions for replacing the main power switch, including wire disconnection and reconnection.
Explains how to replace temperature and oil level probes, including Ohm checks and procedure.
Guides on checking solenoid valve resistance and replacing them, including removing panels and fittings.
Instructions for replacing the JIB pump, including removing shrouds, blower, flex lines, and pump feet.
Details replacing the blower, including removing back shroud, screws, zip ties, and wire nuts.
Steps to replace the filter beacon light, including removing side panels, pulling apart the light, and reconnecting wires.
Instructions for replacing air pressure switches, including removing shrouds, covers, hoses, and wires.
Guides on replacing the pilot, including removing burner tubes, flame sensor, screws, and pilot tube.
Introduces the section listing replaceable parts for the Evolution Elite® fryer.
Emphasizes using only genuine Henny Penny parts to avoid damage or injury.
Details the information needed when ordering parts, including item number, part number, and product/serial numbers.
Explains how to obtain pricing and delivery information for parts from distributors.
Outlines warranty coverage for replacement parts (90 days) and procedures for shipping damage claims.
| Brand | Henny Penny |
|---|---|
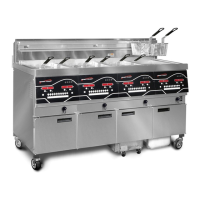
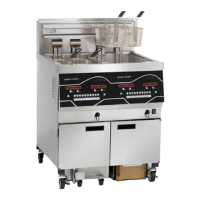
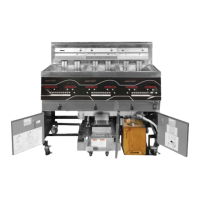
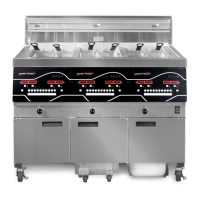
| Model | EEG-242 |
| Category | Fryer |
| Language | English |