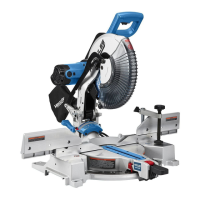
Page 11For technical questions, please call 1-888-866-5797.Item 57673
WARNING! TO PREVENT SERIOUS INJURY: When
installing the saw blade, make sure that the saw
blade teeth point down at the front side of blade.
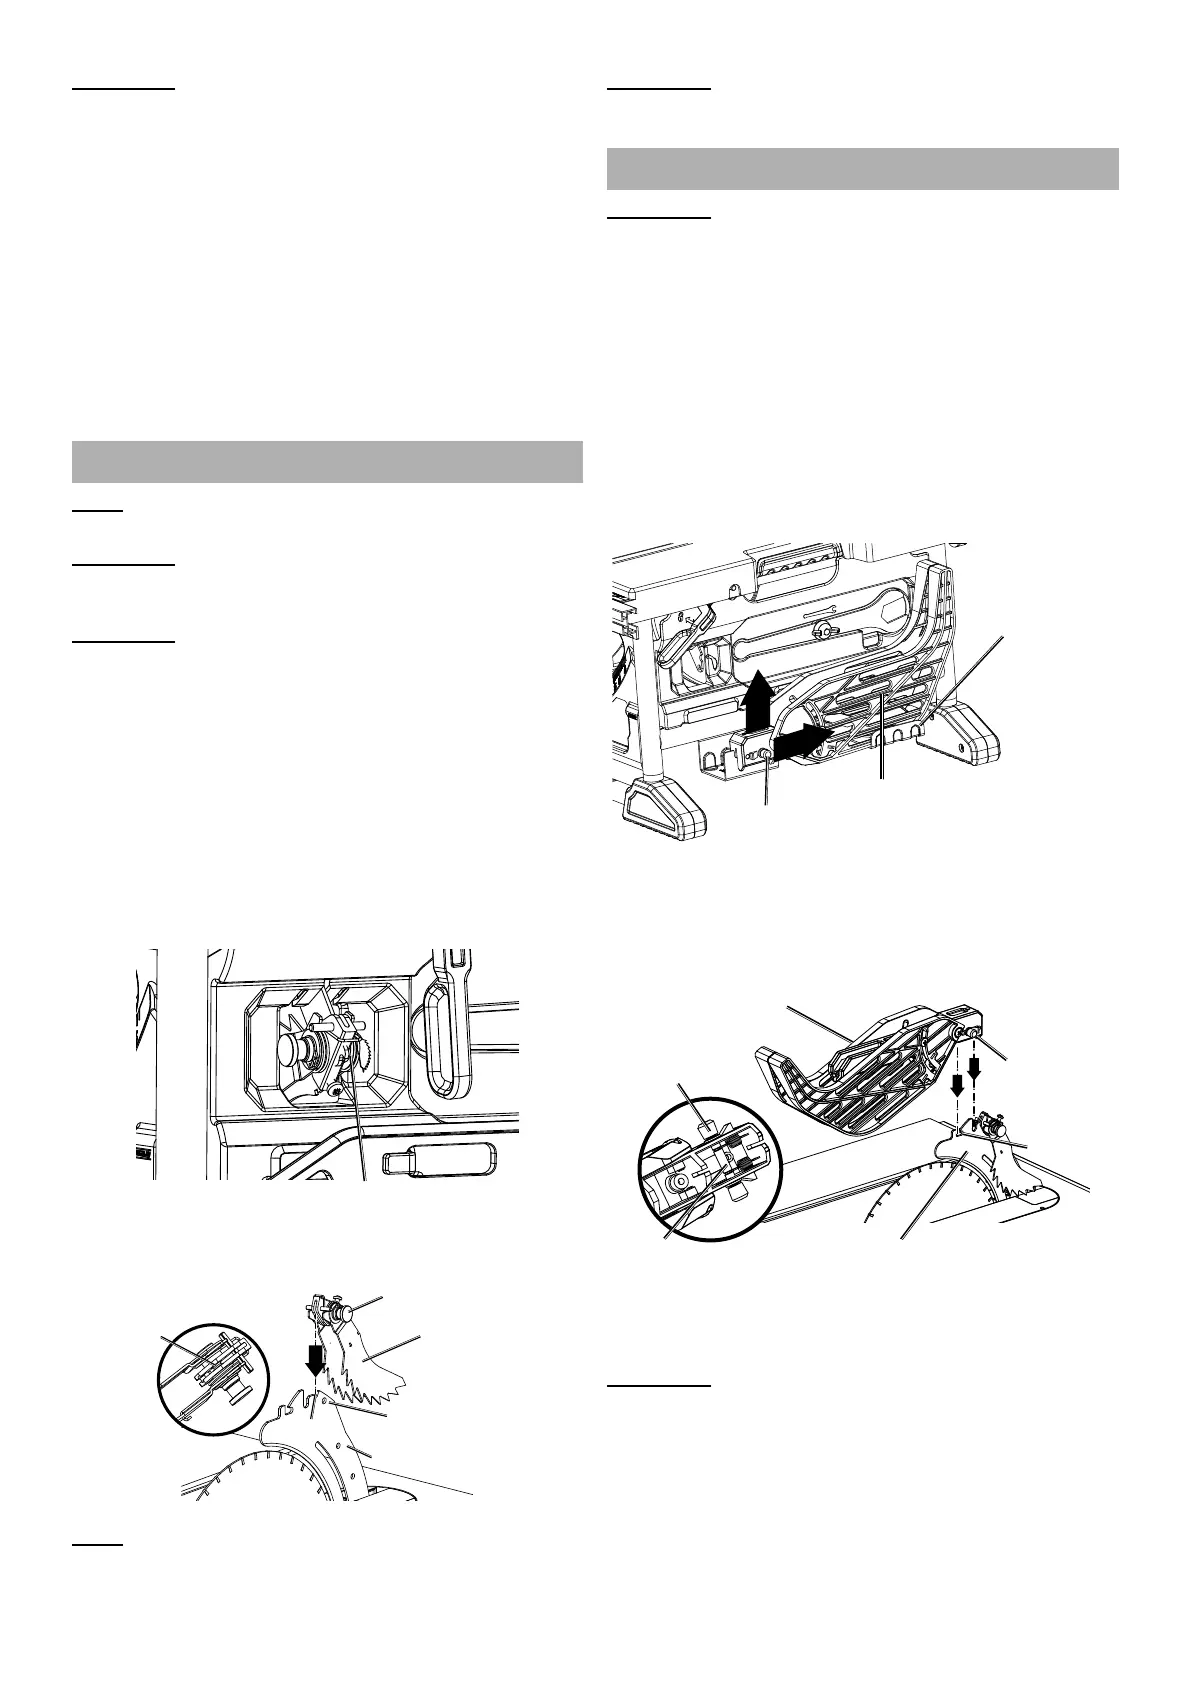
6. Place Outer Flange and Arbor Nut on arbor.
7. Turn Arbor Nut with the blade wrench
and at the same time, pull the Spindle
Lock Lever until it engages.
8. Tighten arbor nut in a clockwise
direction. DO NOT overtighten.
9. Lower the saw blade completely
and replace Table Insert.
10. Once the saw blade is secured, adjust
the Riving Knife and install Anti-
kickback Pawls and Blade Guard.
Installing Anti-Kickback Pawls
Note: Anti-kickback pawls should only
be installed for through cuts.
WARNING! Make sure that the pawls are reinstalled
immediately after finishing any non-through cut
operations which require their removal.
WARNING! Replace dull or damaged anti-kickback
pawls. Dull or damaged anti-kickback pawls may not stop
a kickback, increasing the risk of serious personal injury.
1. Unplug the saw.
2. Set the blade angle to 0°. Raise the saw
blade to maximum height by turning Height
Adjustment Knob clockwise. Lock the blade
by turning Bevel Lock Handle clockwise.
3. Place Riving Knife in its highest position.
4. Remove pawls from the storage
compartment by pulling out and holding
knob, then pushing pawls down.
Anti-kickback Pawls
5. Secure pawls by placing over Riving Knife until
they snap securely into the Mounting Hole.
Pin
Knob
Anti-kickback
Pawls
Mounting Hole
Riving Knife
Slot
Note: Pull up on Pawls assembly to make
sure it is secured to Riving Knife.
WARNING! TO PREVENT SERIOUS INJURY: Use
extra caution when cutting wood with slippery surface
as the anti-kickback pawls may not always be effective.
Installing the Blade Guard
WARNING! KEEP GUARD IN PLACE and in good
working order for all through cut operations.
Reinstall blade guard immediately after finishing
any non-through cut operations which require
removal of the blade guard. Failure to heed this
instruction could result in serious personal injury.
1. Unplug the saw.
2. Hold the knobs (one on either side of the
blade guard) and push knobs forward
to the front of the Blade guard.
3. Push up until the pin comes out from the slot in the
mounting bracket (blade guard storage) at bottom
right side of the saw, then remove Blade Guard.
Blade Guard
Storage
Blade Guard
Knob
4. Hold and push knobs forward to the front of
the Blade Guard. Place the blade guard pin
into the slot indicated on Riving Knife. Pull
blade guard fully back onto knife. Push pin
and release it to lock guard into position.
Blade Guard
Knob
Knob
Slot
Riving Knife
Pin
5. If blade guard is not parallel to working table when
Riving Knife is in uppermost position (through
cuts), adjust the set screw as necessary.
WARNING! TO PREVENT SERIOUS INJURY: After
the installation, check the blade guard to ensure that it is
properly placed and working before operation of the saw.